The need for a “Router” module and how to use it


The problem
When automating tasks in Make.com, we often encounter scenarios where different conditions require different actions.
For example, our “Quote Generation” automation came out good, but I have a small problem with it.
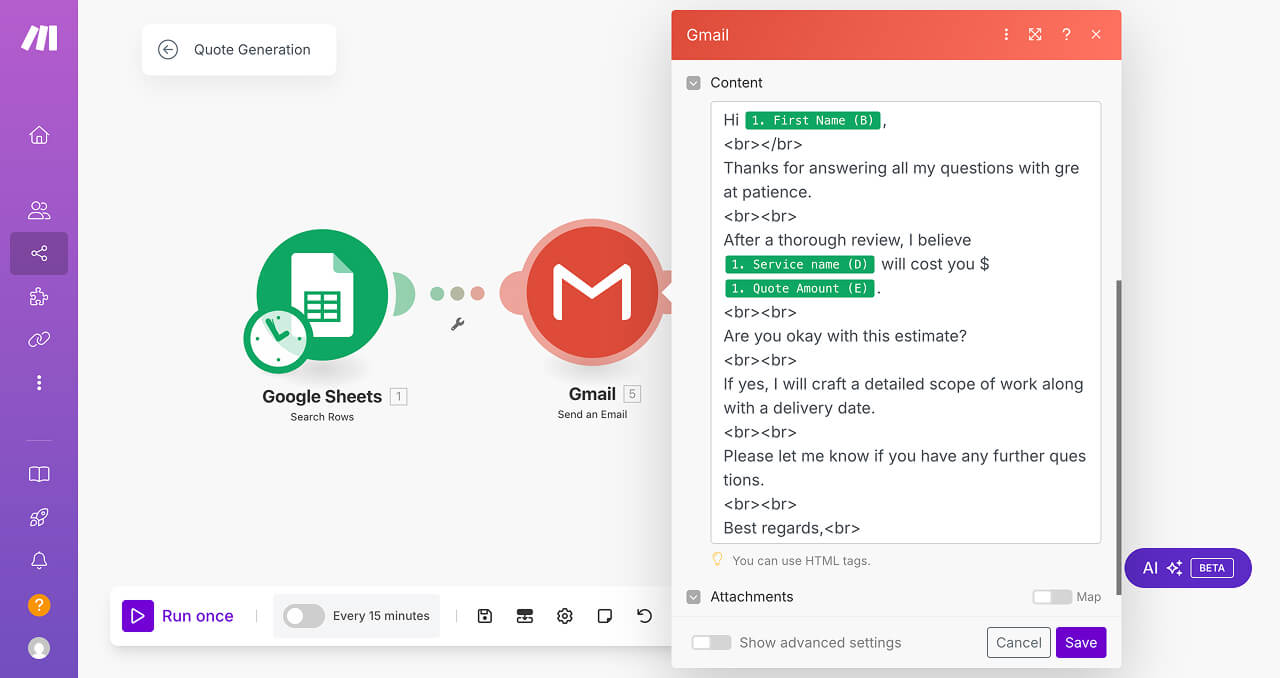
Hi Andy,

Thanks for answering all my questions with great patience.

After a thorough review, I believe troubleshooting emails will cost you $300.

Are you okay with this estimate?

If yes, I will craft a detailed scope of work along with a delivery date.

Please let me know if you have any further questions.

Best regards,
Naresh Devineni
Founder, UsableWP
It is built to use the same quote template for all kinds of services.
But, to improve conversions, I want to use a different quote template based on the service type.
For example, I want to use the existing template (above template) for the design-related services such as:
- Building a landing page
- Converting Figma design to WordPress
And I want to use a different quote template (provided below) for the troubleshooting-related services such as:
- Troubleshooting email
- Troubleshooting checkout
Hi Andy,

From what I can see, I would recommend having it as a troubleshooting task.

That means I can spend limited time (e.g. 3 hours) analysing the issue and debugging.

The problem can be fixed in that limited time.

If not, I will have a much better understanding of what problem is in there and what time it will require, and I will be ready to give you an offer for fixing that.

I'm looking forward to your answer.

Please let us know what you think :)

Best regards,
Naresh Devineni
Founder, UsableWP
Simply put, let's say I offer two types of services and I want to make use a unique template for each service type.
How do we achieve this?
One way to solve this problem is creating a separate automation for each template.
But this would create maintenance issues in the long run because the only difference between each automation is the quote template.
Apart from the quote template, if you want to perform any other change to the automation workflow, you have to apply the same change in both the automations.
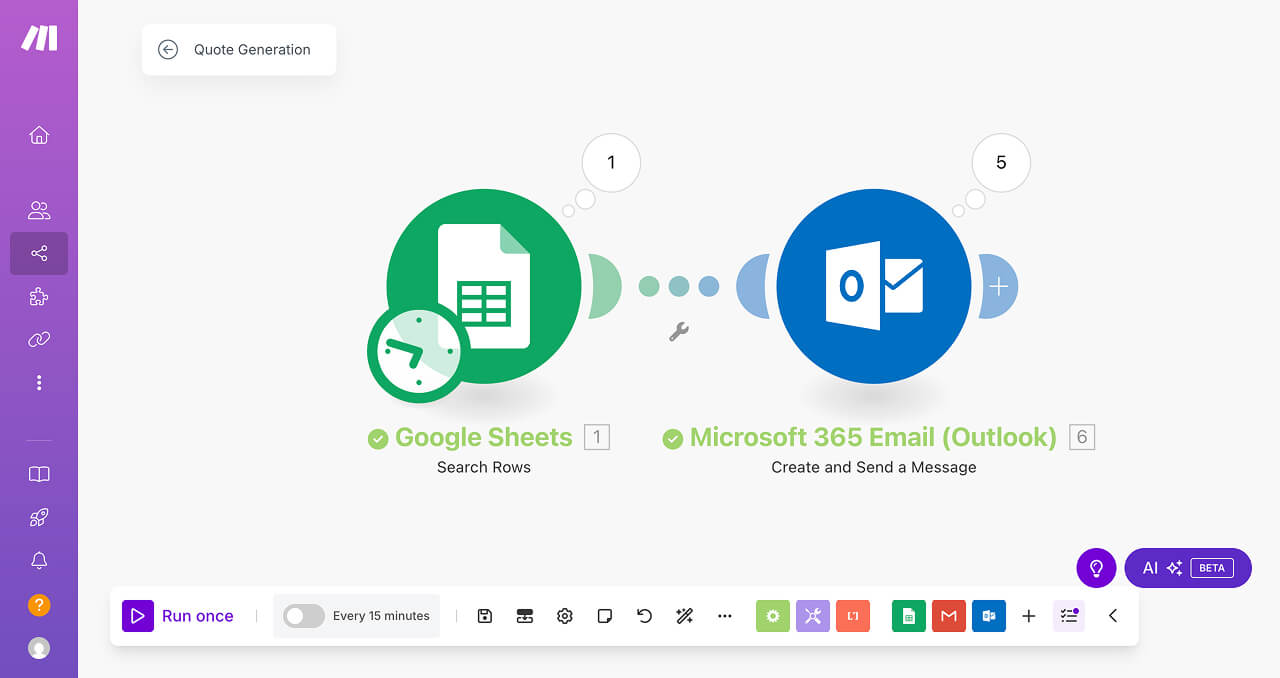
For example, imagine you want to switch from using Gmail to Outlook or Zoho email service. If that is the case, changing the email service should happen on each of the automations:
Now imagine you're offering 6 different service types, and you want to use 6 different templates.
You can see that the “Separate automation for each template” solution quickly becomes a problem of its own by being difficult to maintain and non-scalable.
So, is there an easy-to-manage and easy-to-scale solution for this problem?
Yes.
We have to use the “Router” module and conditional filters to solve this problem.
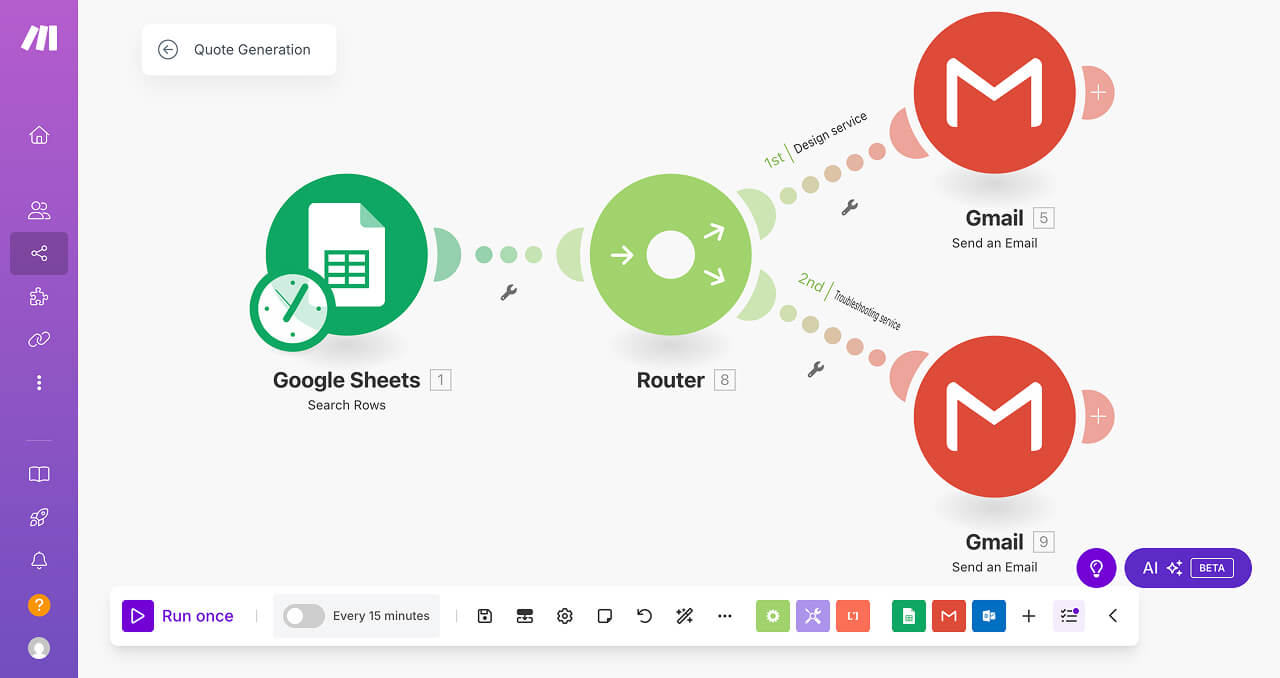
As you can see in the above screenshot, the “Router” module allows us to split the automation into multiple paths and helps us handle each condition according to our needs.
In our case, it will help us use different template based on the service type.
Also, a router module doesn’t process bundles or modify data. It doesn't have that capability.
Instead, it just acts as a traffic controller, splitting the automation into multiple paths and directing each bundle accordingly.
This is better understood via implementation.
Come on, go back to the make.com and open up our Quote Generation scenario.
To do so, go to:
Make.com dashboard → Scenarios → Quote GenerationYou'll now be presented with the diagram of the automation.
Click anywhere on the diagram to open up the editing screen of the scenario.
How to add a “Router” module to our scenario
Before we add a “Router” module to our scenario, we should understand where we should add it.
Think about it.
Our goal is to send different email templates based on the type of service, right?
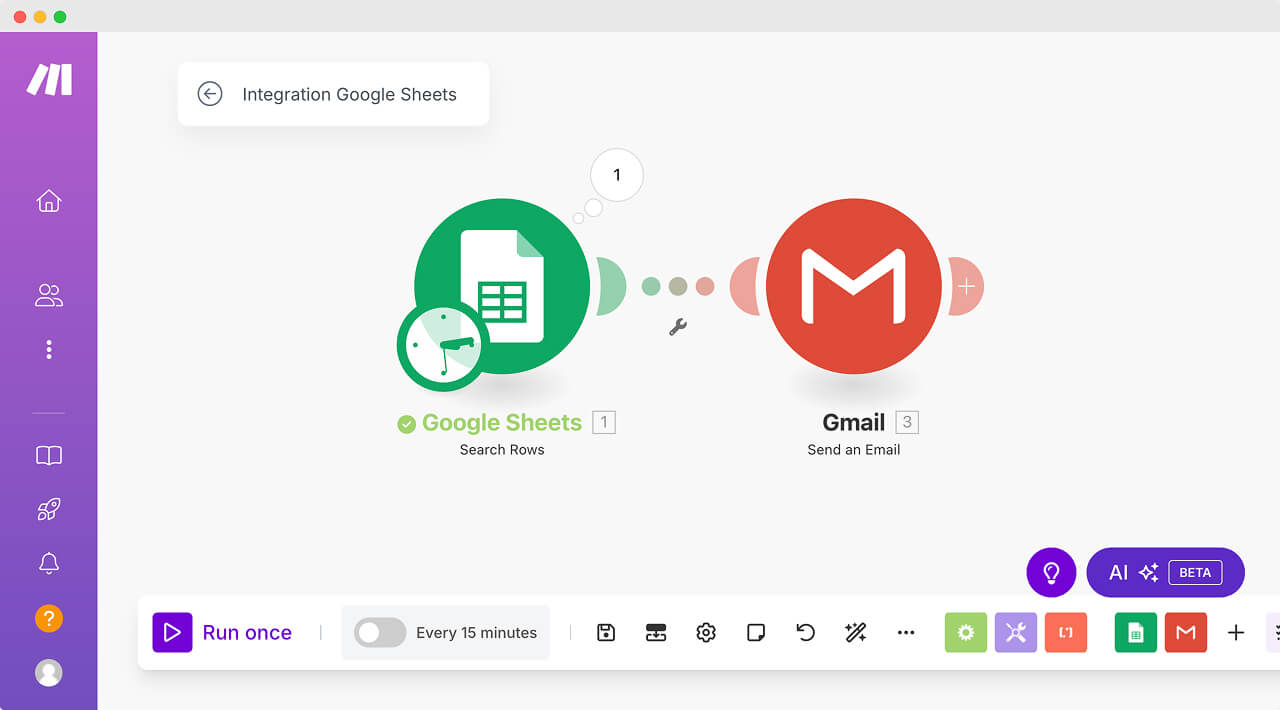
Currently, we have a single template tied to the “Send an Email” module.
This means, if we need multiple templates, we need multiple “Send an Email” modules, each handling a different template.
And to make that work, we should introduce the “Router” module before the email-sending step.
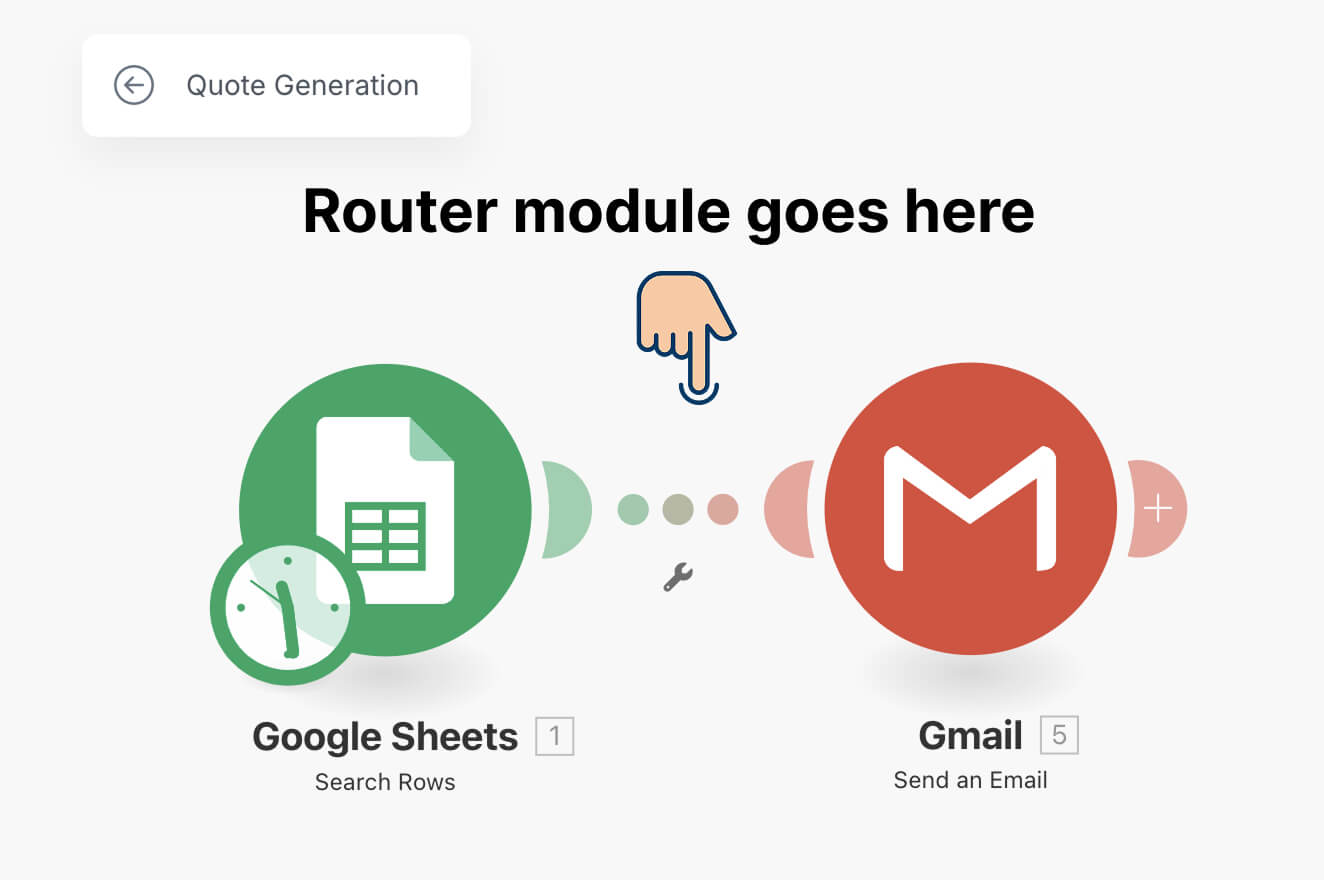
This means, we have to add the “Router” module right in between the “Search Rows” and “Send an Email” modules.
This allows us to dynamically route the automation, ensuring the right template is used for each service type.
How to add a module in between the two modules
If you notice, there is a connecting-line between the two modules.
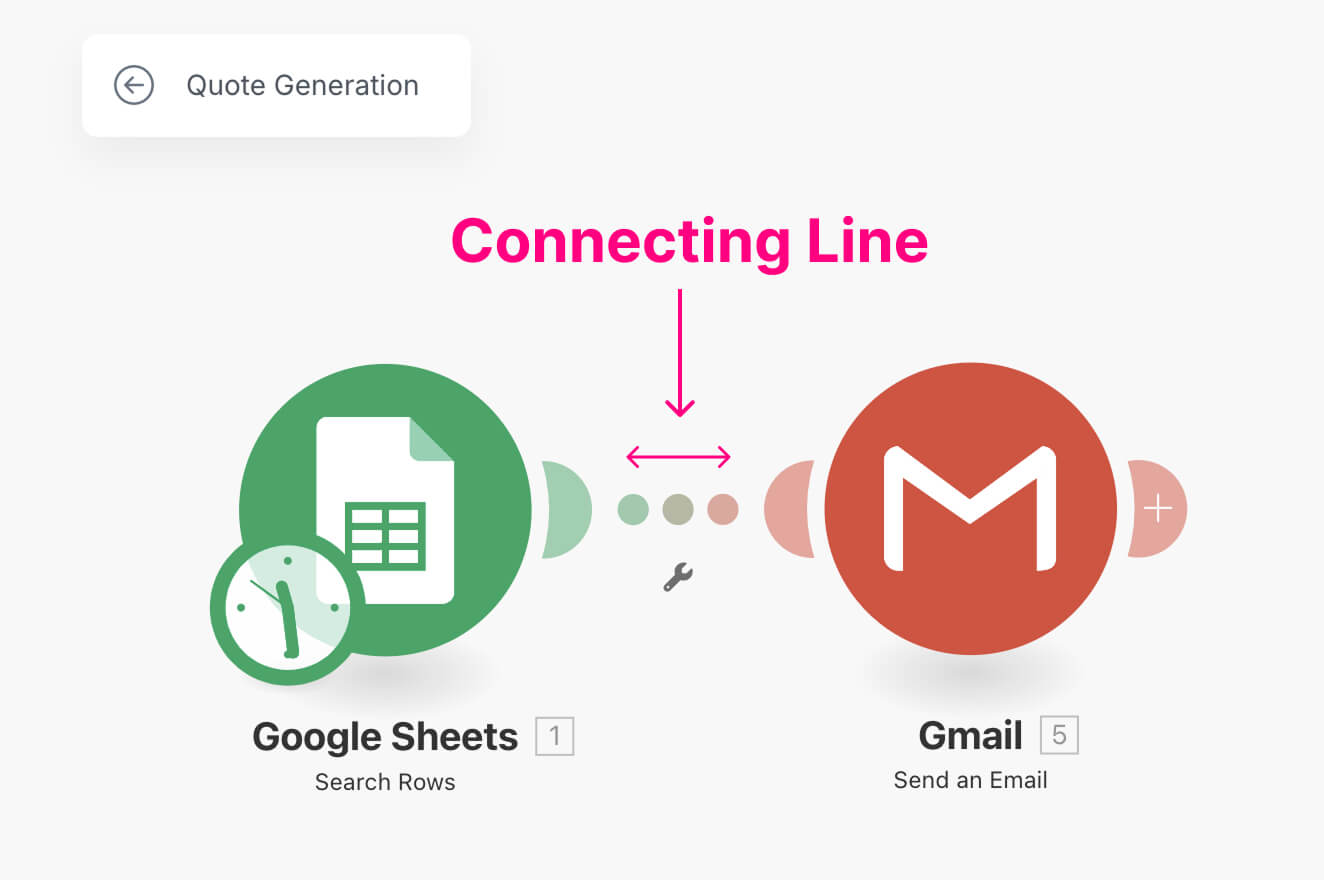
The connecting-line has a dual functionality depending on whether you are right-clicking or left-clicking on it:
- If you left-click on the connecting-line, it opens up a panel for adding a conditional filter. More on this in the next lesson.
- But if you right-click on the connecting-line, it opens up a menu. This menu contains a link to add a router between the existing modules.
So, right-click on the connecting-line to open up the menu and then click on the “Add a router” link:
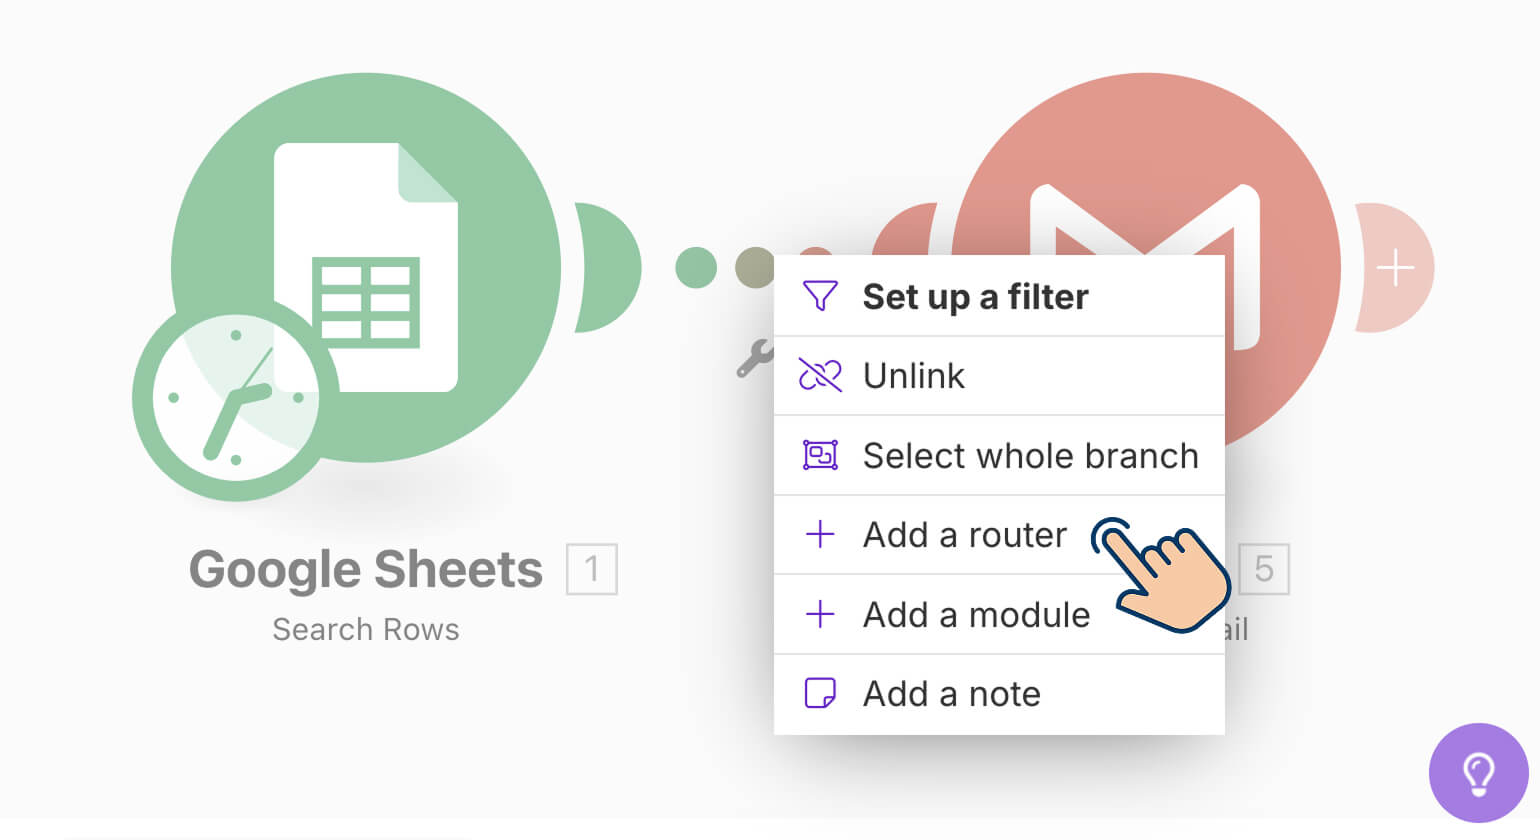
This will automatically add a “Router” module in between the “Search Rows” and “Send an Email” modules:
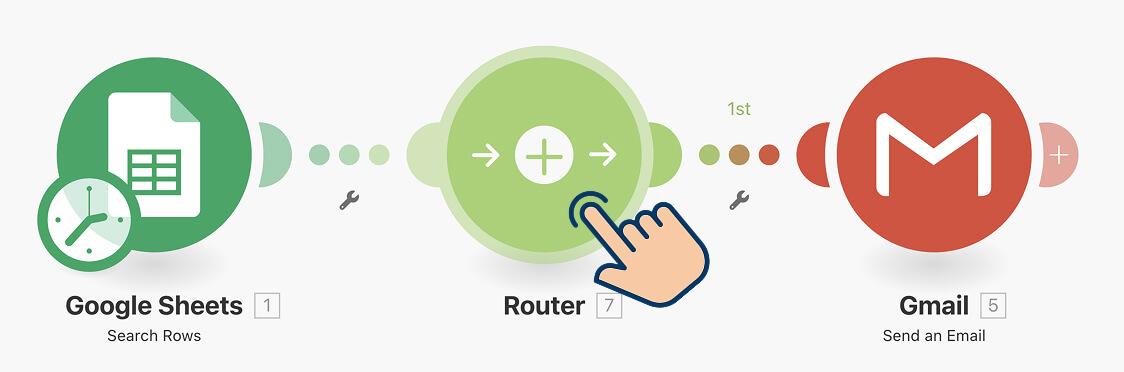
Next, to add a new path to our automation, click anywhere on the “Router” module.
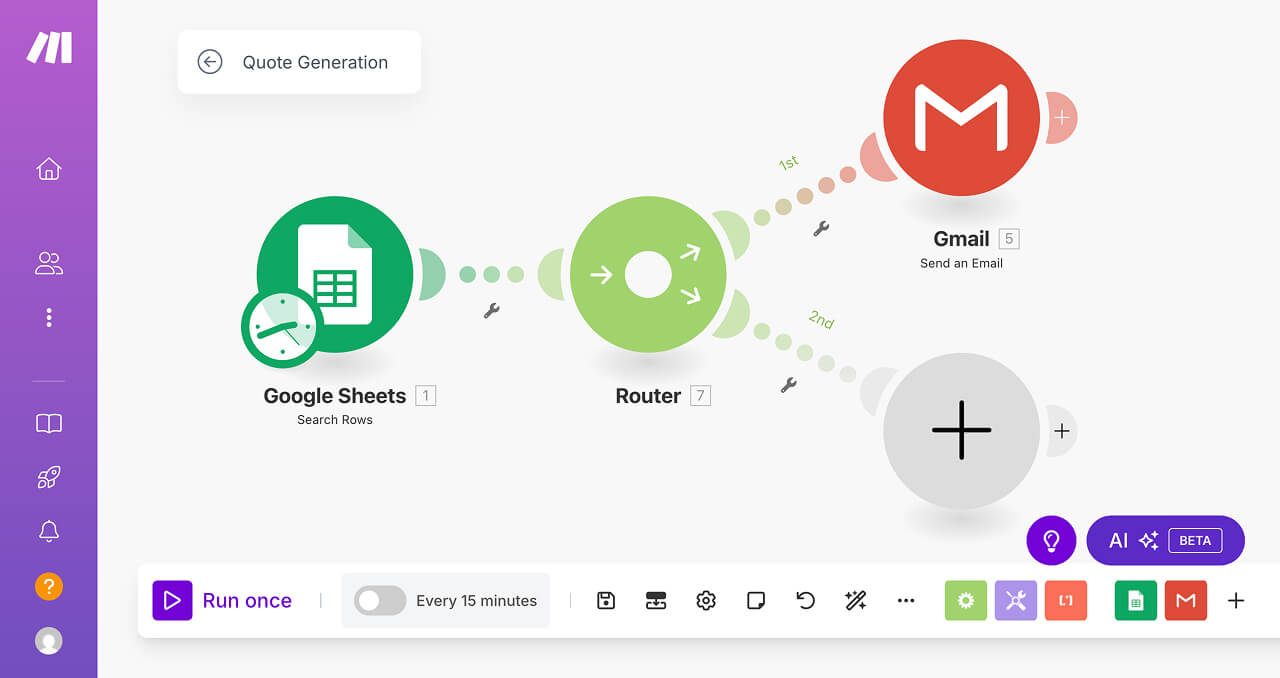
As soon as you click on the “Router” module:
- It adds a second path to our automation
- And then adds a big “Add Module” button on the second path.
We are not done yet.
Here are the next steps:
- We should copy the “Send an Email” module and place it on the second path.
- Inside the copied email module, we should use the new content template for the troubleshooting services.
- Using multiple filters, we should use the first path for sending emails related to the design services
- Using the conditional filters, we should use the second path for sending emails related to the troubleshooting services.
Ufff… a lot of work to do.
In the next lesson, we will implement the first three steps from the above list.