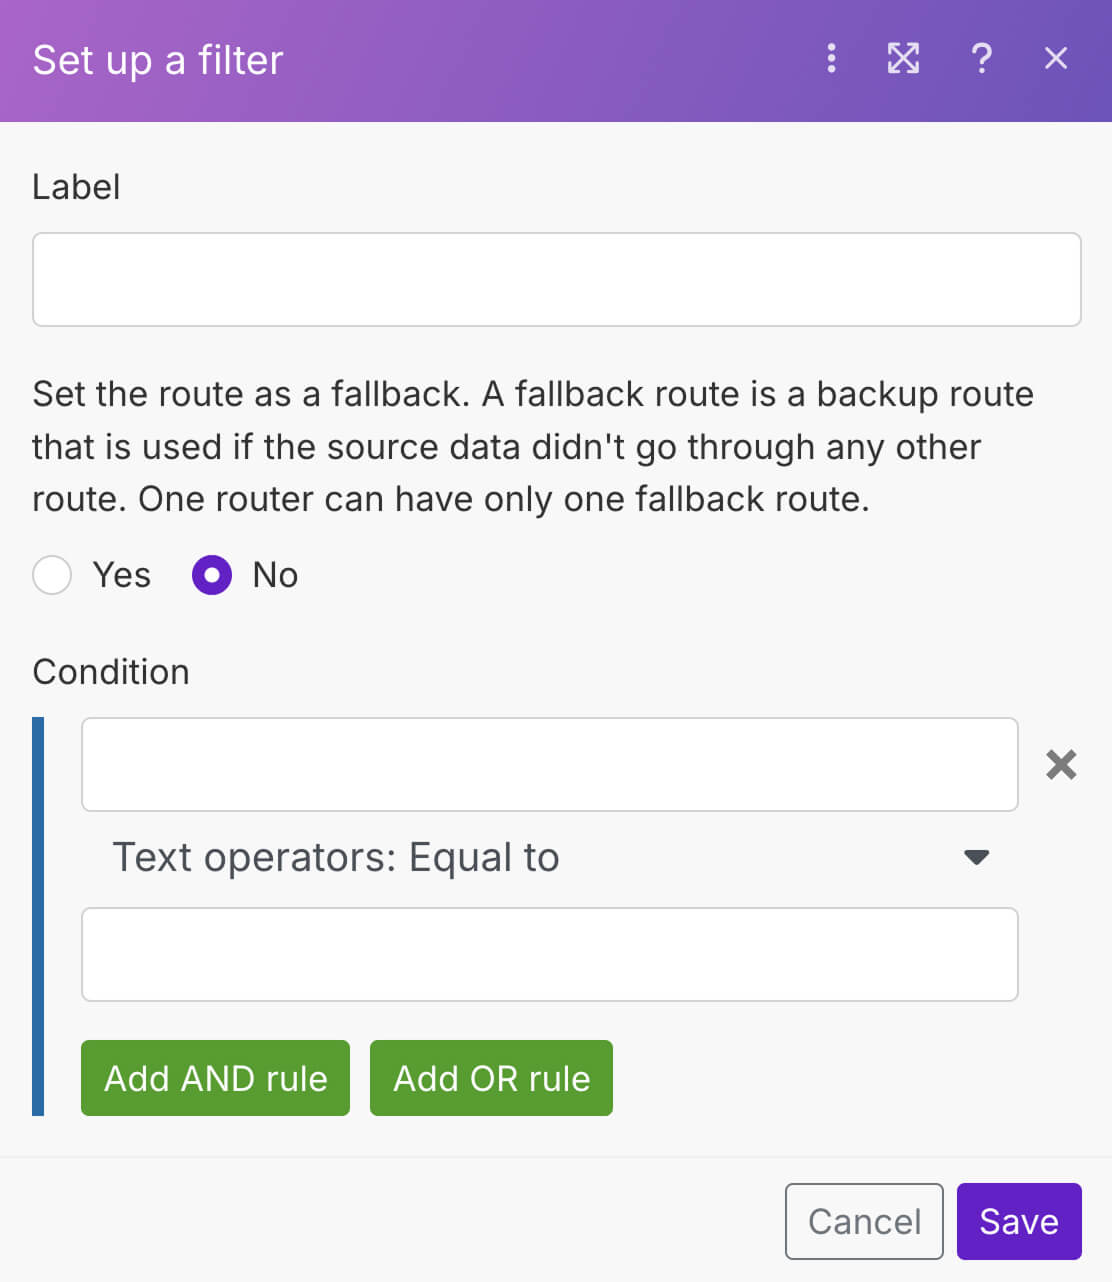
The elements of the make.com filter panel


The filter panel in Make.com is a powerful tool that makes it easy to set up conditions in our automations.
From a technical standpoint, here is how a filter works inside an automation
Imagine there are two modules inside an automation:
- Module 1 — first module of the automation that produces bundles
- Module 2 — processes the bundles produced by module 1 (one-by-one) to achieve the goal of the automation
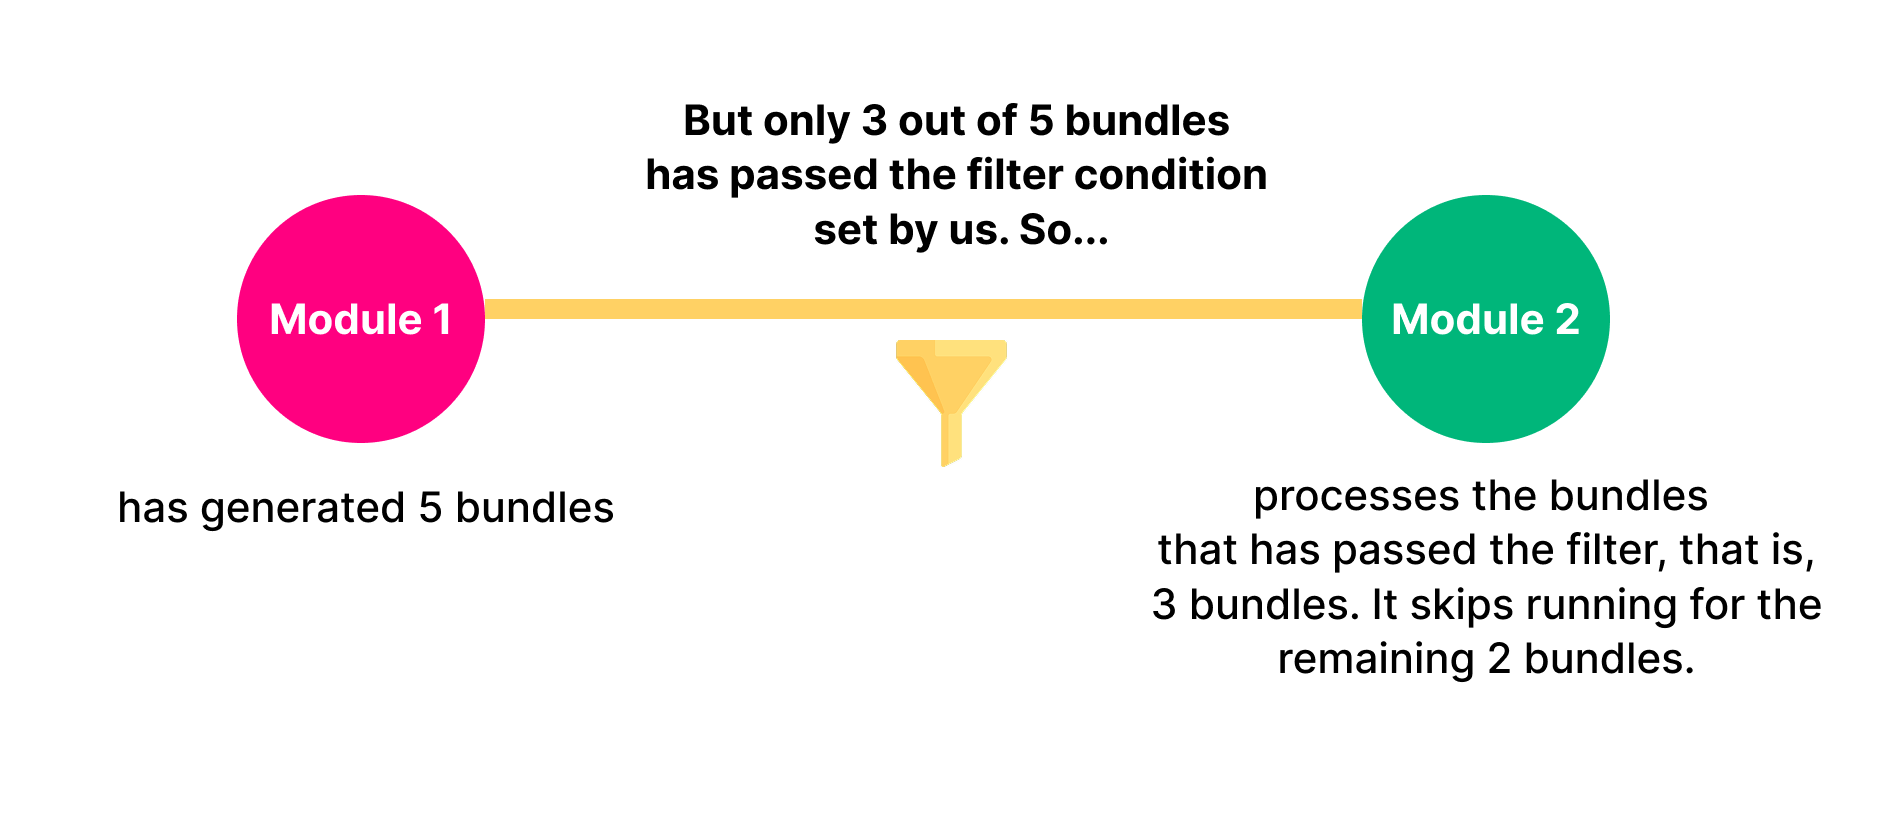
As you already know, if “Module 1” has produced five bundles, the “Module 2” will get executed once for each of those 5 bundles.
But what if you don't want the “Module 2” to process some bundles produced by “Module 1”?
In other words, what if you only want to process bundles that meet a certain condition?
For example, imagine you have a database of 100 people from various age groups, and you want to run a campaign for people who are at least 18 years old.
You don't want to send messages to the underage people.
This is where a filter comes in.
If you set up a filter with a condition between “Module 1” and “Module 2”, the “Module 2” will get executed for the bundles that only match the condition set inside the filter.
For example, if the condition set inside the filter is only matching 3 out of 5 bundles produced by “Module 1”, the “Module 2” will get executed only for those 3 bundles that passed the condition.
I will repeat this explanation when we set up our first filter in an upcoming lesson. So, don't worry if you don't understand this yet.
For now, let's understand the features of the filter panel in make.com.
In fact, let's focus on the main feature of the filter panel, that is, the “Condition” section.
The condition section allows us to define single or multiple conditions to filter the data we want to process.
The anatomy of the “Condition” section
The “Condition” section helps us compare values using a set of rules.
It consists of three key elements:
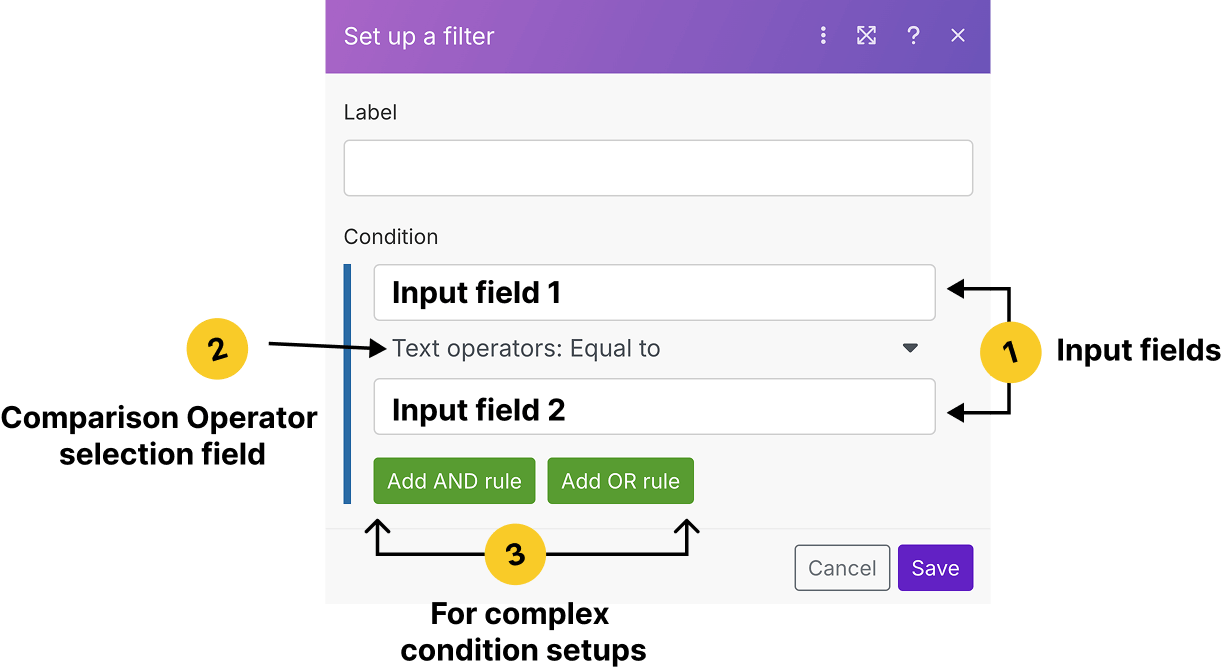
- Two input fields – Used for entering the values that need to be compared.
- Comparison operator – A dropdown option placed between the input fields to define how the values should be compared.
- “AND” and “OR” options – For creating more complex conditions by combining multiple rules.
A quick introduction to the comparison operators
Comparison operators define how data is compared within filter conditions.
If you observe, whenever we compare something, we think in terms of comparison words such as:
- Contains
- Greater than
- Less than
- Greater than or equal to
- The list goes on and on
For example:
- Checking if Car A contains a specific feature.
- Checking if Car B’s price is greater than or equal to Car A’s price.
- Checking if your colleague’s salary is less than yours
And inside make.com, these comparison words are represented as comparison operators.
Also, comparison operators change based on the data we are comparing.
Text operators
If you're comparing two pieces of text data, we should use a text operator and here are some of the text operators we'll end up using a lot:
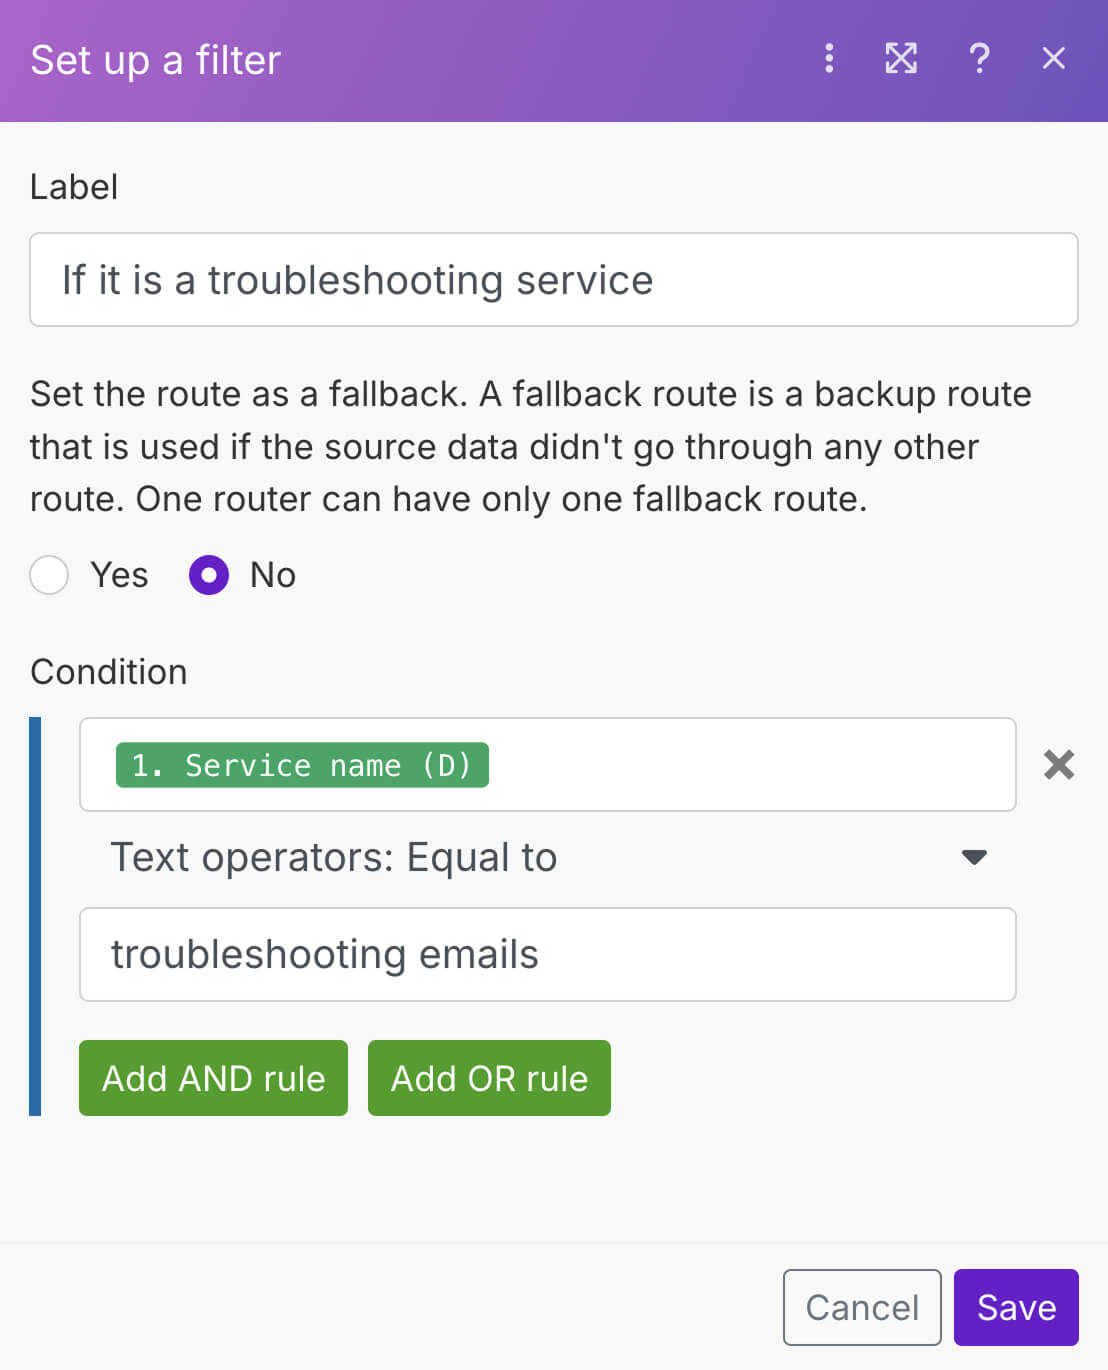
- Equals to — If “service name” equals to “troubleshooting emails”
- Not equals to — if “payment” not equals to “paid”
- Contains — If “job title” contains “copywriting”
- Does not contain — If “support ticket” does not contain “high priority”
- Starts with — Think of an example on your own :D
- Ends with - If an “email address” ends with “@gmail.com”
- Matches pattern (for regex) — If password contains special characters such as *.
- And a lot more
Number Operators
If you're comparing two pieces of numeric data, we should use a numeric operator and here are some numeric operators that make.com provides:
1) Greater than (>): The condition passes if the first value is greater than the second value.
Is the amount greater than 100?
2) Less than (<): The condition passes if the top value is smaller than the bottom value.
Is the discount less than $50?
3) Greater than or equal to (>=): The condition passes if the top value is greater than or equal to the bottom value.
Is age greater than or equal to 18?
4) Less than or equal to (<=): The condition passes if the top value is less than or equal to the bottom value.
Is flight ticket less than or equal to $200
Datetime Operators
These operators apply when comparing date and time values.
Here are some of the text operators we'll end up using a lot:
- Equals to — If creation date of a post equals to yesterday's date
- Not equals to
- Later than
- Earlier than
- Later than or equal to
- Earlier than or equal to
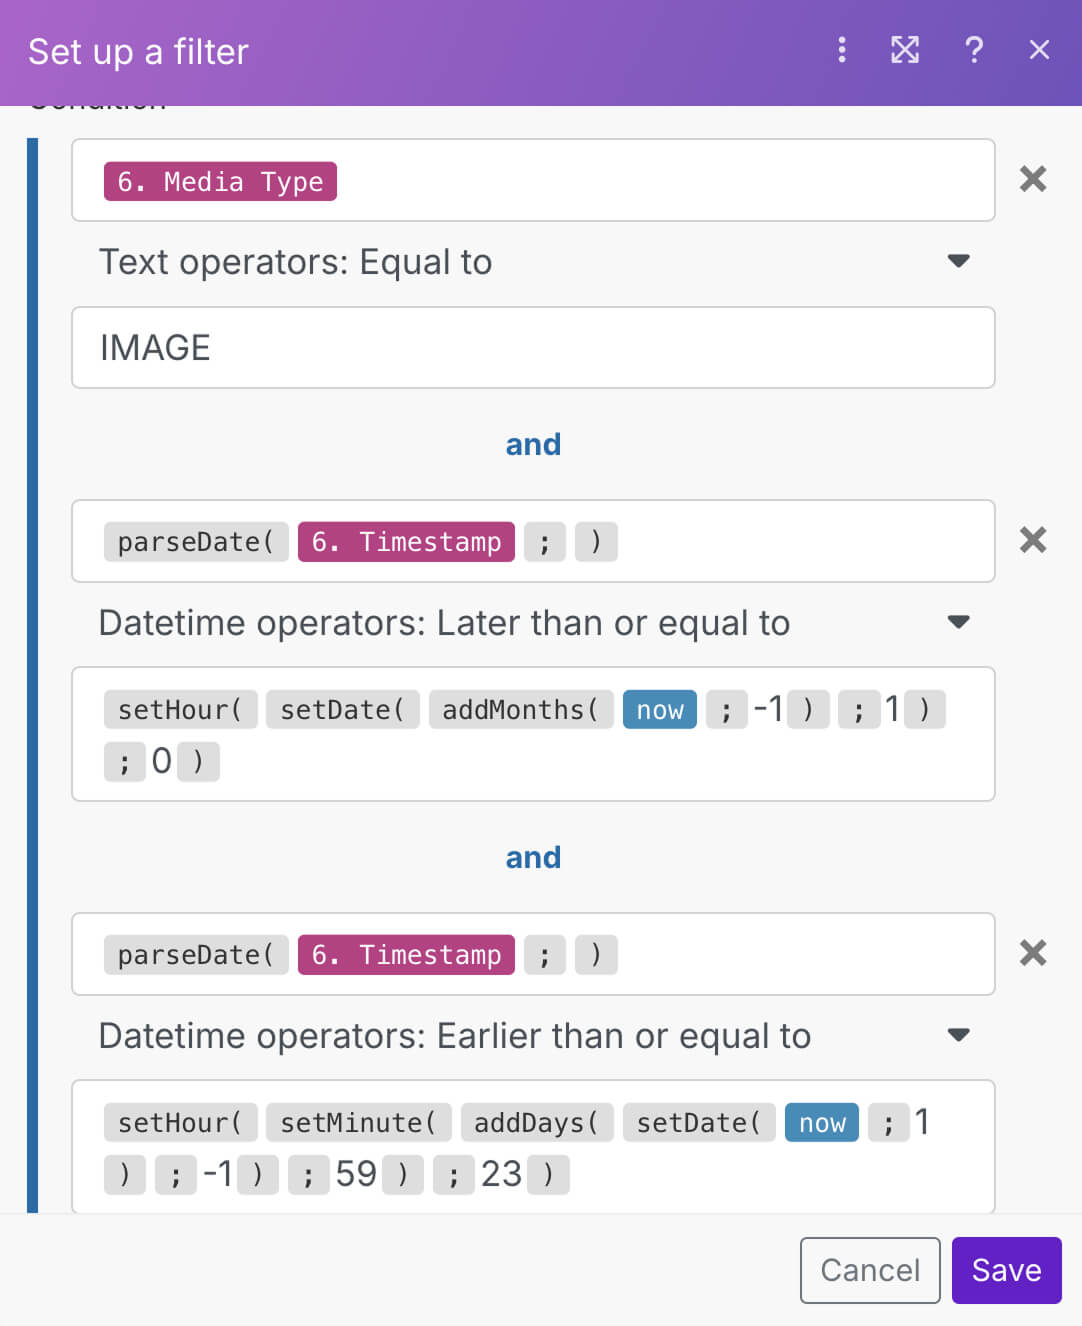
For example, when trying to get the last month's post count of a client's Instagram channel, I had to use date operators such as:
- “Later than or equal to” operator for getting the 1st day of the previous month
- “Earlier than or equal to” operator for getting the last day of the previous month
And trust me, we can easily create complex automations with any kind of complex conditions and filters with just the above-mentioned comparison operators.
Anyway, setting up the filter panel by using the conditional elements takes practice and time.
For now, to learn to understand how filters and conditions truly work inside an automation, let's implement a simple payment reminder automation in the next lesson.