Step 2 of Implementing the automation: Converting Bundle data into Email messages and Sending Them

Just to recap:
1) Using the “Search Rows” module, we have connected to the Google Sheet API and requested the data from the “Quote Generation” spreadsheet
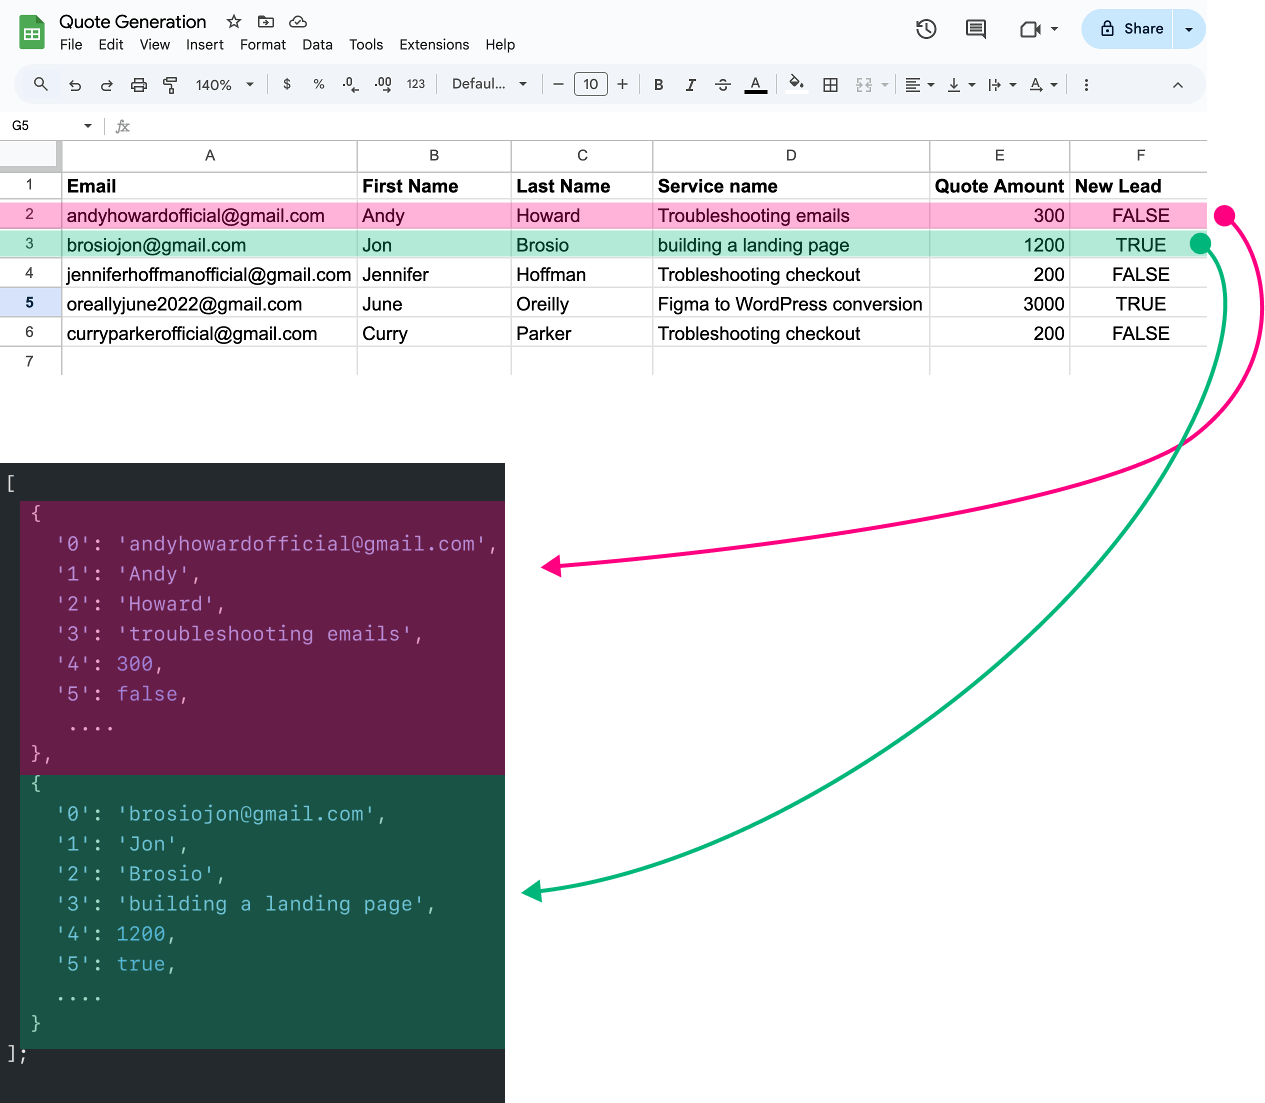
2) Google Sheets API responded and sent us the data back in the JSON format
3) Finally, Make.com converted the JSON data into bundles so that we can use the data in the subsequent modules
4) We now need to transform the bundles into separate emails and send them to respective leads.
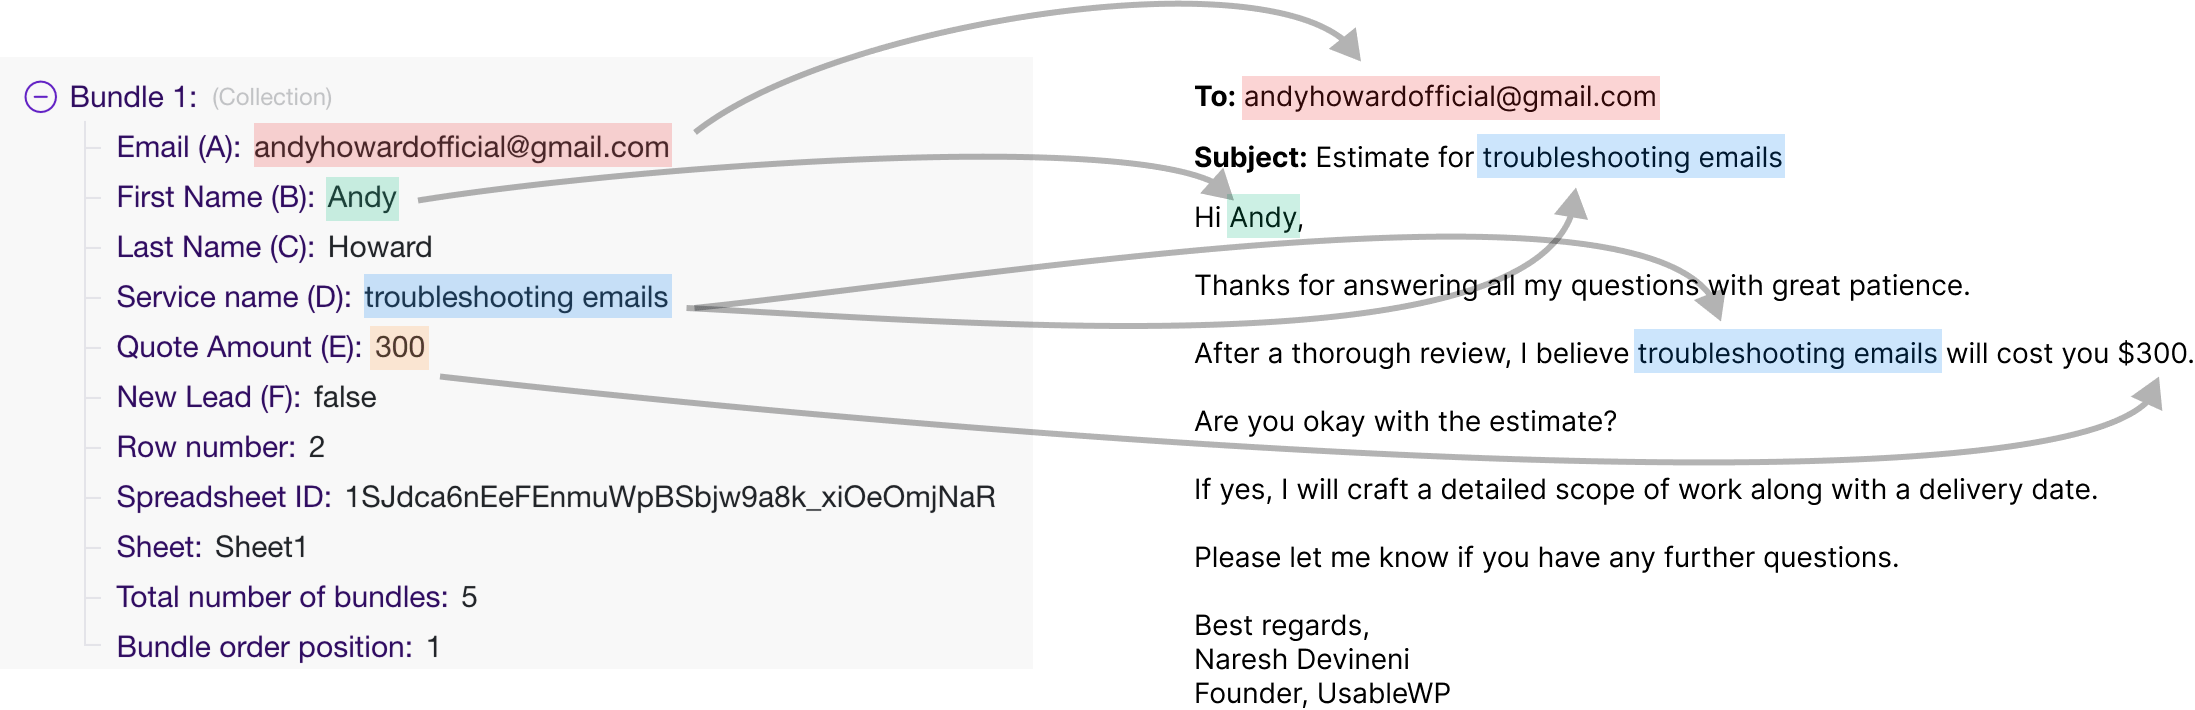
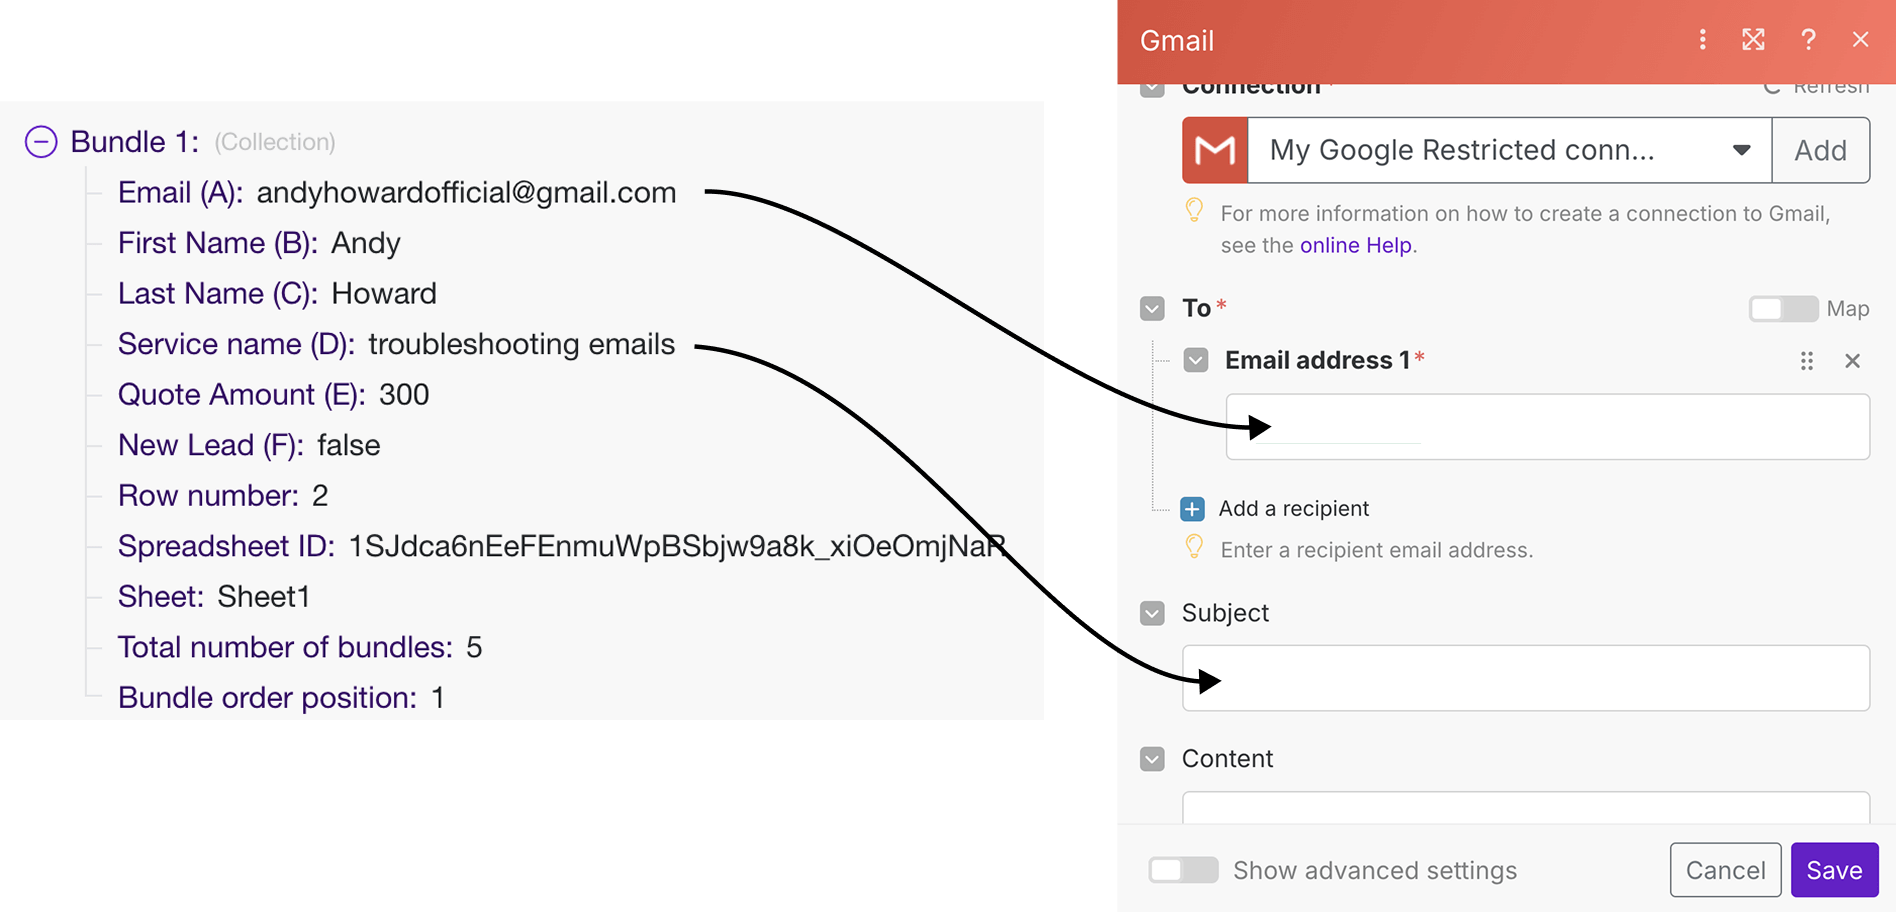
For example, we need to convert data from Bundle 1 into email message 1:

It can be achieved using the “Send an email” module of the “Gmail” app.
So, let's add it to our automation.
Please remember that the “Send an email” module will run once for each bundle generated in the first module.
In our case, the first module (Google Sheets) generated five bundles, so, the “Send an email” module will run five times and each time with the data of a different bundle.
Also, since the “Send an email” module relies on the data retrieved by the “Search Rows” module of Google Sheet, we need to add the “Send an email” module right after the “Search Rows” module in our automation pipeline.
Here’s how to do it…
Adding the “Send an Email” module to our automation pipeline
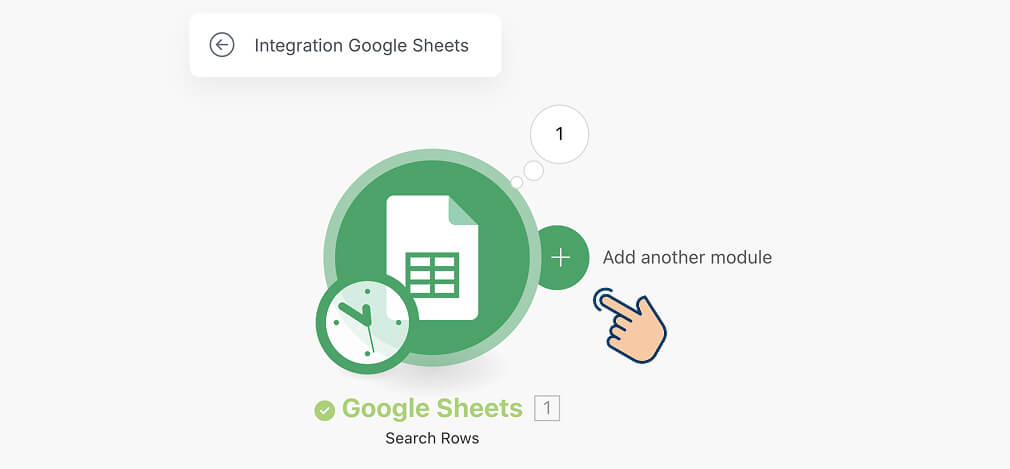
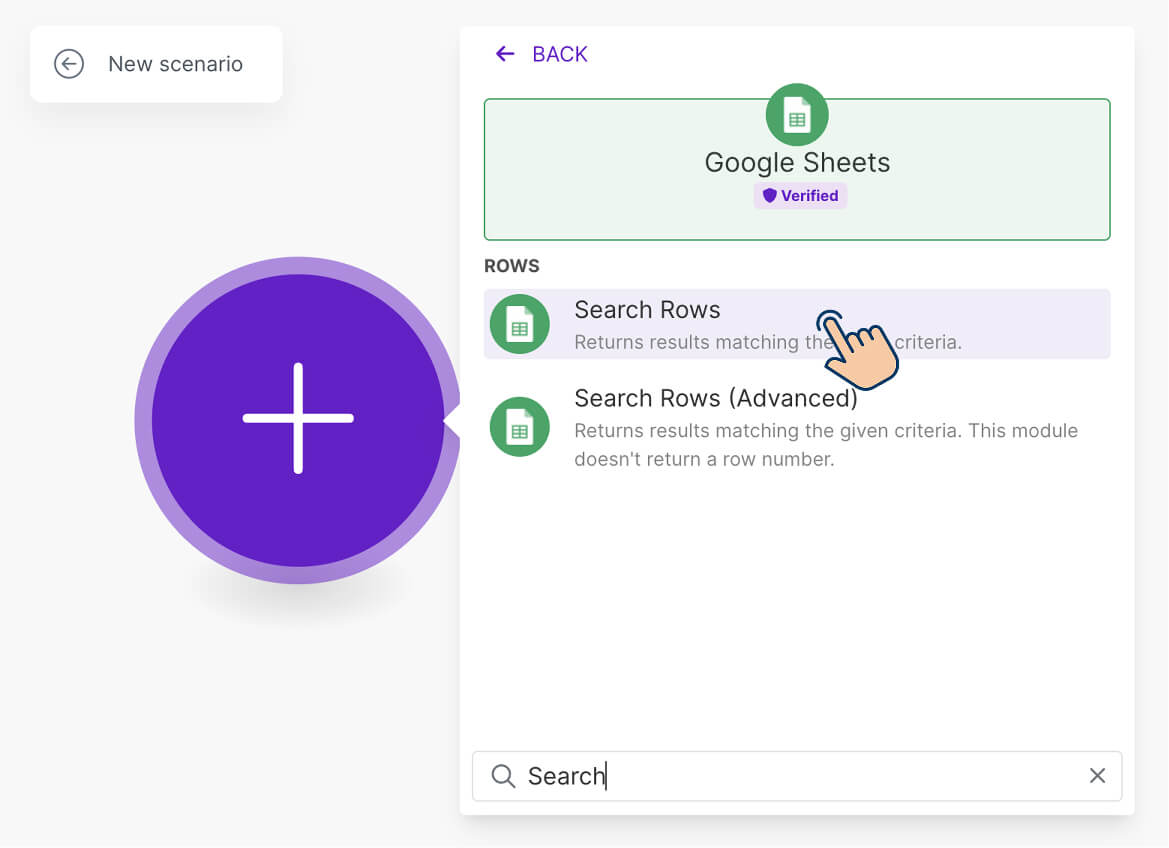
1) If you notice, there is a “+” button next to the “Search Rows” module. It is called as an “Add a module” button.
2) If you put your cursor on the “+” button, you’ll see a tooltip that says “Add another module”—and that’s exactly what it does. So, click on it to open up the app browser.
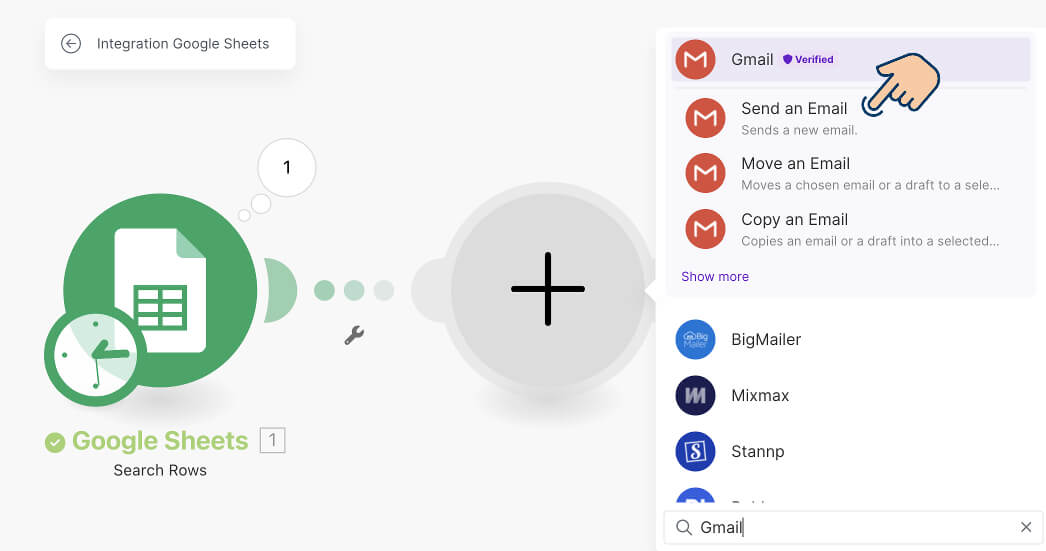
3) Next, in the app browser, search for “Gmail”, click on it and then click on the “Send an email” module to add it to the automation.
As soon as you add the module, Gmail’s API configuration settings will appear.
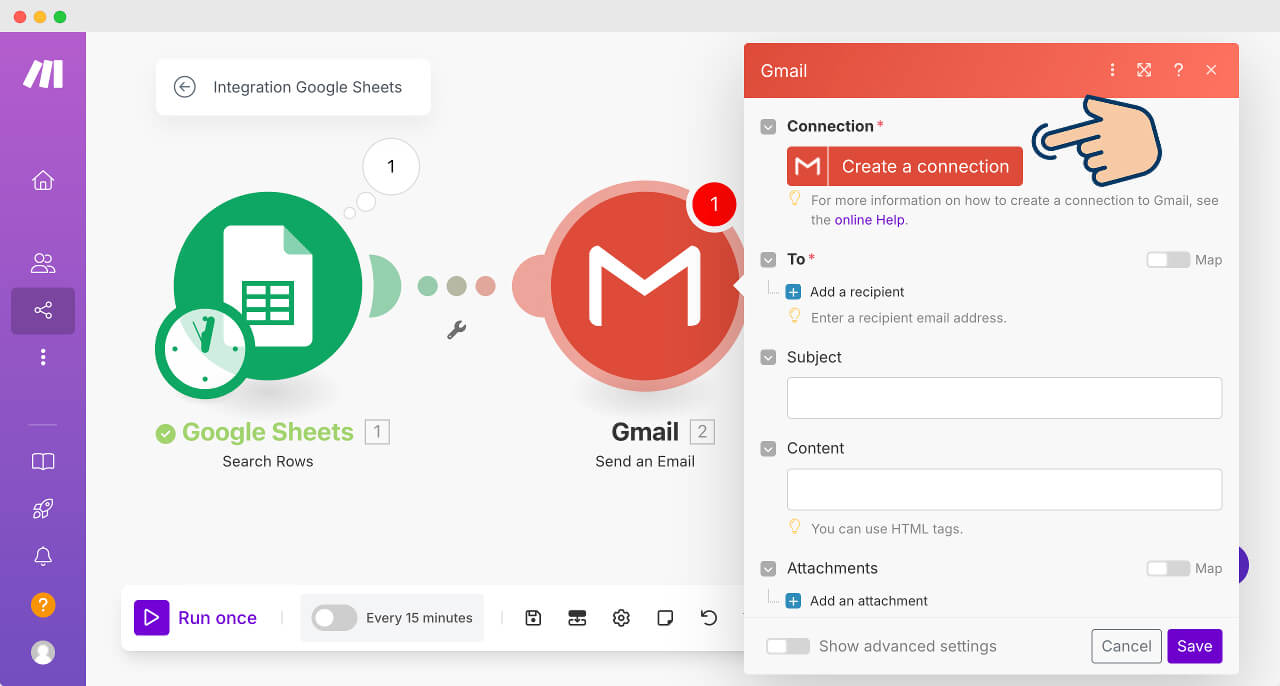
These settings will let you:
- Authenticate yourself with Gmail API using the OAuth authentication method.
- Authorize make.com to send emails on your behalf
- Once the above steps are done, it will let us add a recipient(s), subject, and message for your email
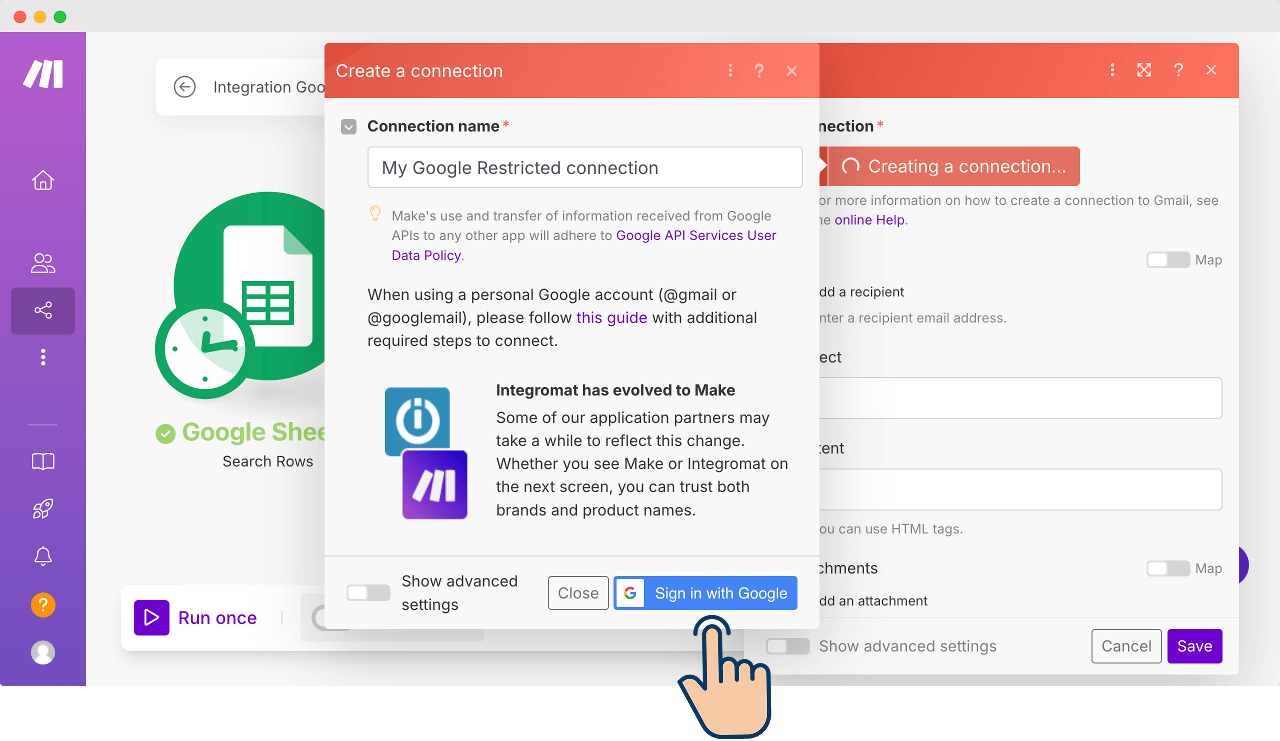
To begin the process, click on the “Create a connection” button.
This will bring up another popup that sets up the stage for authorising Make.com to send emails on your behalf.
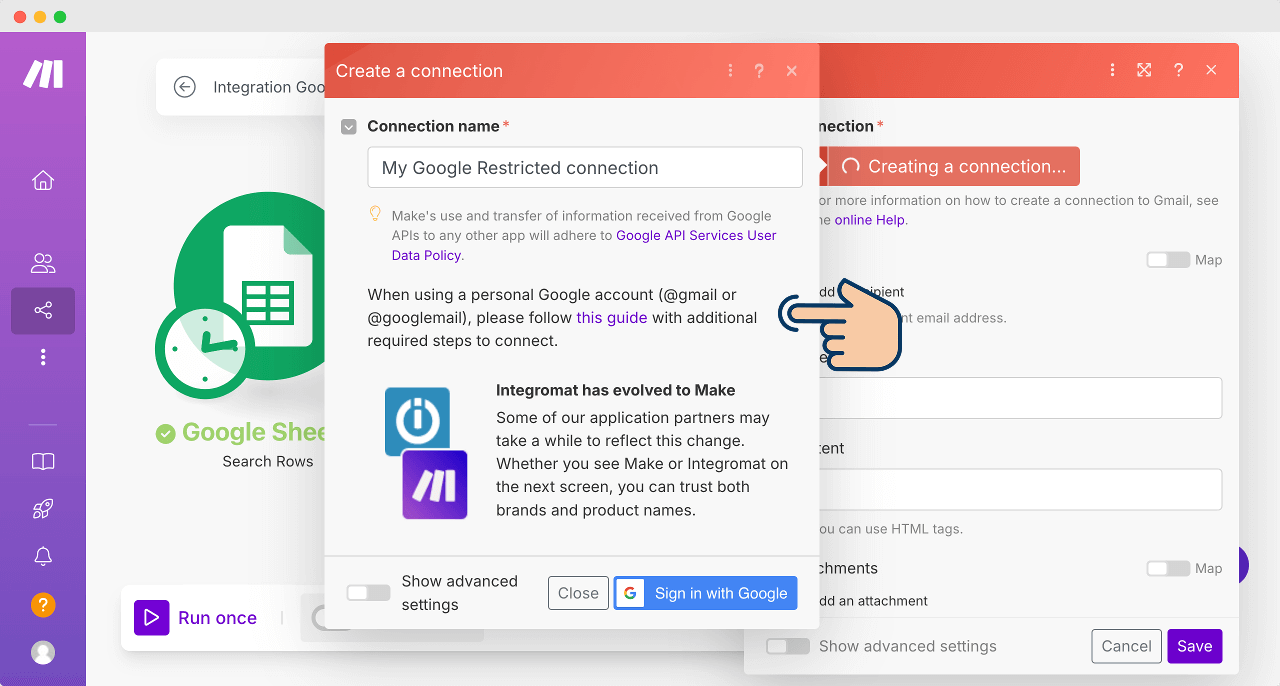
Problem: The Gmail app works well with business accounts. But it imposes some restrictions when it comes to using a personal account that ends with @gmail.com.
So, If you're going to sign in with Google using a personal account (@gmail.com), it says that you need to perform additional steps to connect with Gmail API.
Solution: So, if you are going to use an account that ends with @gmail.com (personal account), read this guide:
https://www.make.com/en/help/connections/connecting-to-google-services-using-a-custom-oauth-client
As an alternative solution, delete the “Send an email” module of the “Gmail” app and use another email app like “Microsoft Outlook”.
The “Microsoft Outlook” app doesn't impose any restrictions on personal accounts that end with @outlook.com or @hotmail.com.
If the “Gmail” app doesn't work out for you for some reason, create a free email account with Microsoft Outlook and continue to follow along with me.
The configuration options among email apps don't change much.
For all email apps, you need to add a:
- “From” email
- Subject Line
- Email message
This applies to the authorisation process via OAuth or an API key too.
Anyway, I own a business email account with Gmail.
So, I will click on the “Sign in with Google” to select it:
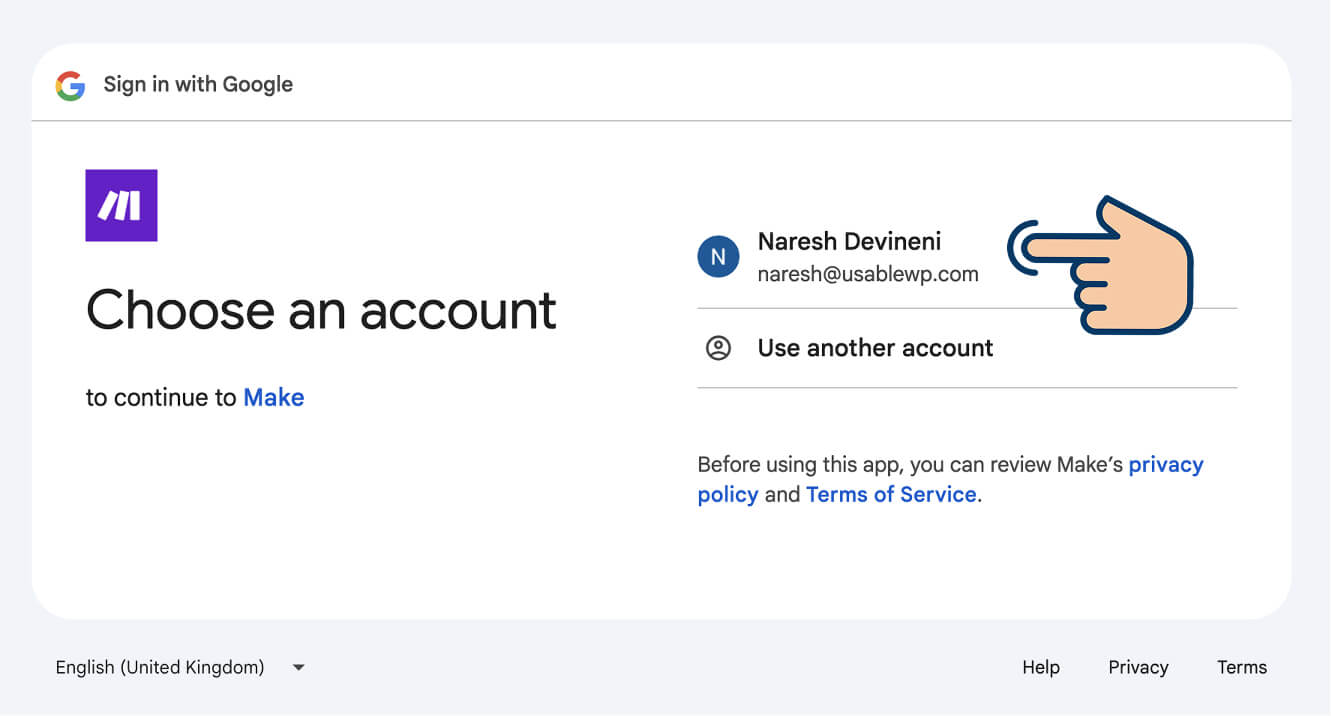
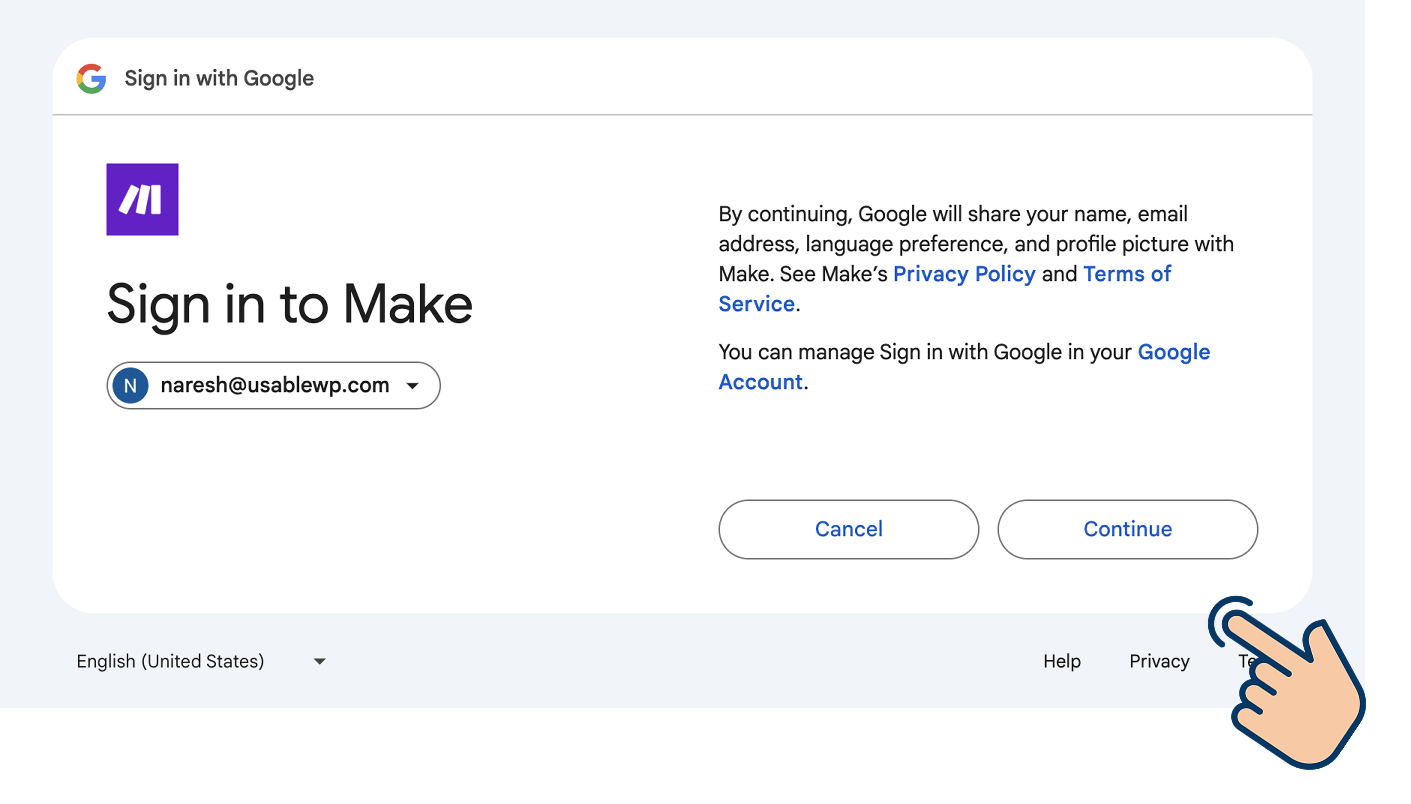
Next, I will click on the “Continue” button to share my name, email address, etc. with Make.com:
The next screen from Google says that “Make wants to access your Google account” so that it can read, compose, send, and, delete all your email from Google.
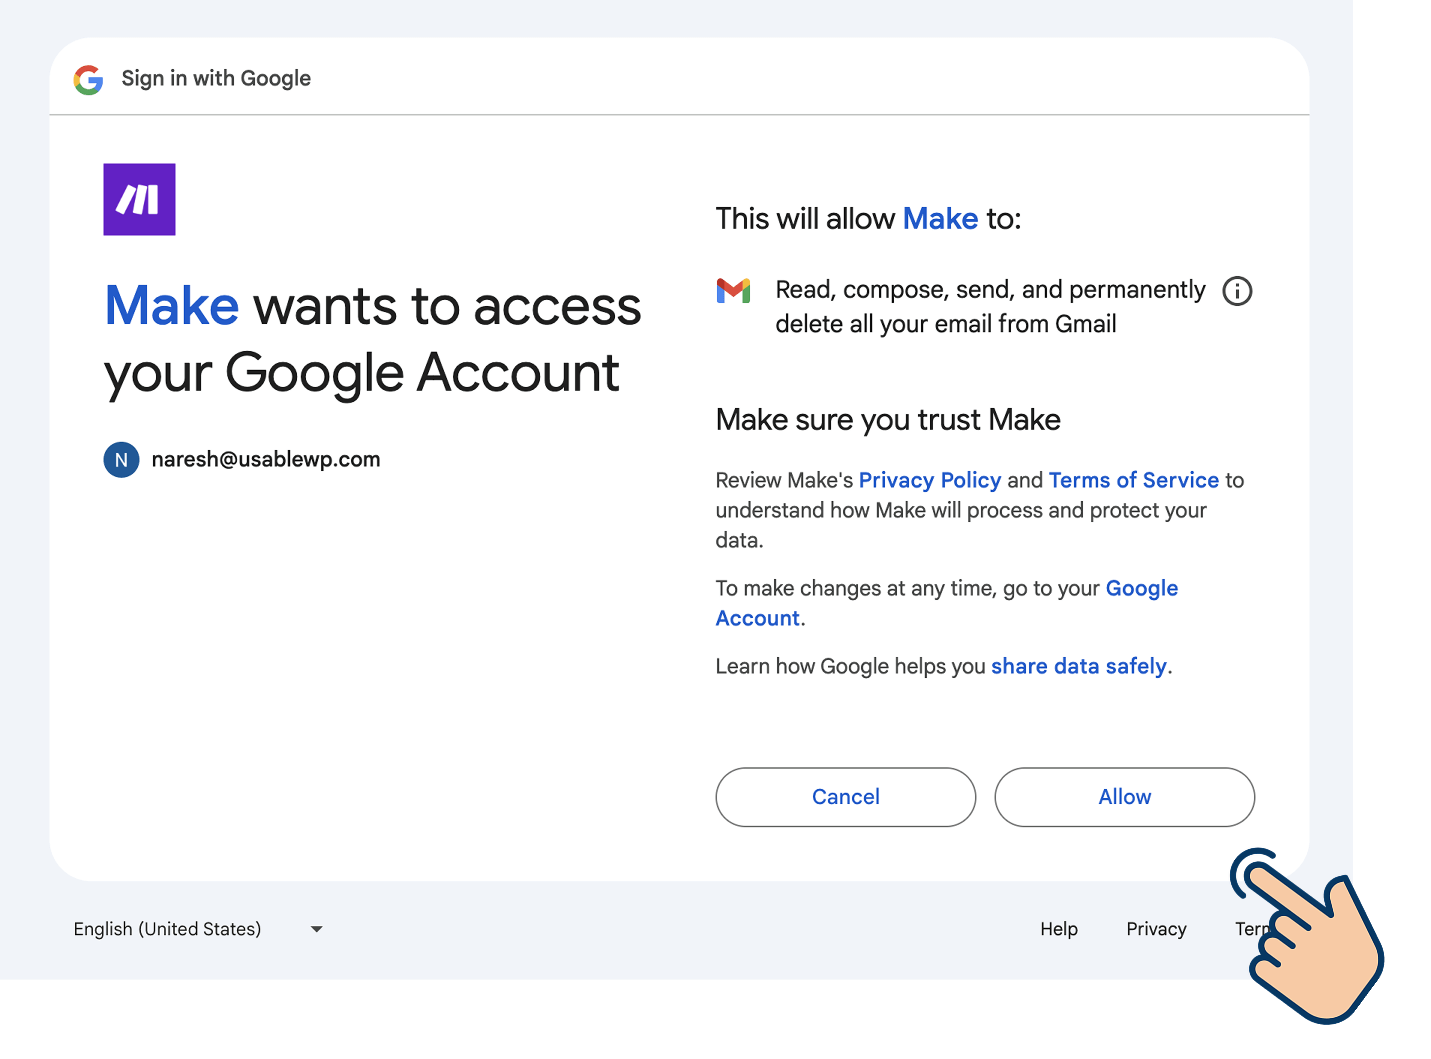
Click on the “Allow” button so that we give enough control to Make.com to compose and send quote emails.
Once authorized, you’ll see the options of the “Send an Email” module to configure:
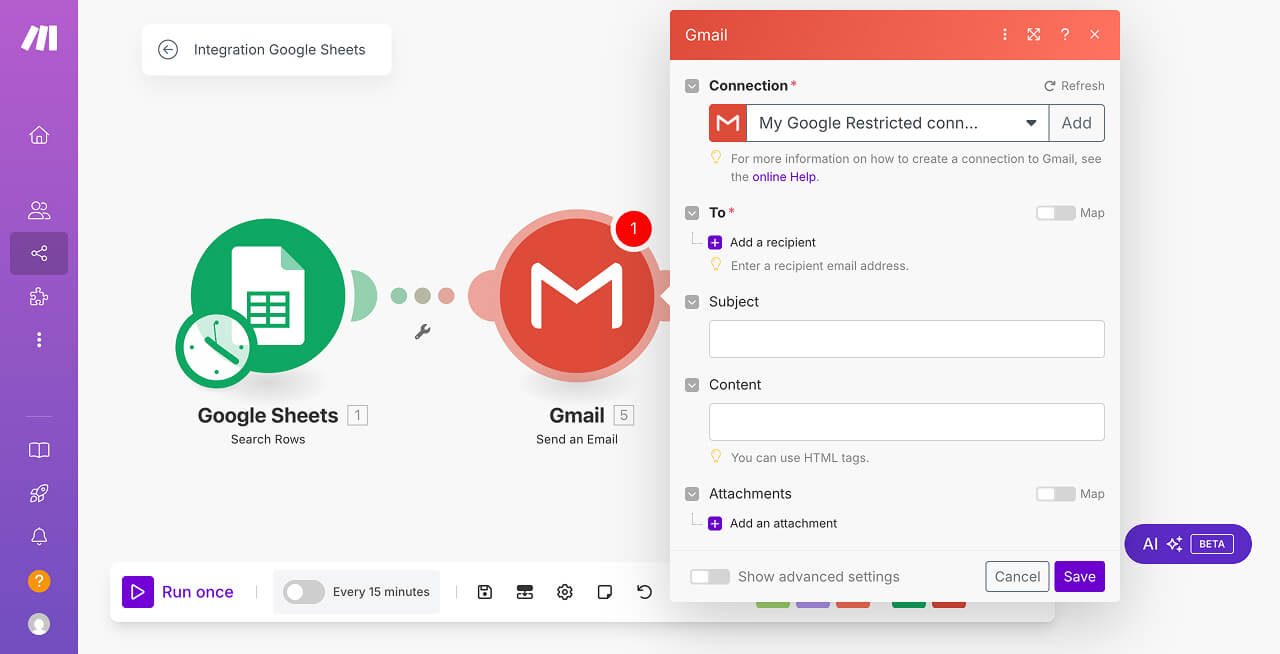
This means, we have connected with the Gmail API successfully.
If you notice the Gmail window, you'll find the following options to configure:
- “To” — Recipient's email address
- “Subject” line — for example, “Estimate for [service name]”
- “Content” — The message that we want to send to our leads
- “Attachments” — there aren't any in our case
And if you remember, we already have all the above details in the form of bundles generated from running the Google Sheets App:
So now, all we have to do is configure the Email module options with the data of each bundle (one-by-one).
Come on, let start the process by adding the recipient's email address.
1) Adding recipient email address
To achieve this, click on the “Add a recipient” button located under the “To” section.

This will reveal options for adding multiple recipients.
You’ll see a field labelled “Email address 1”.
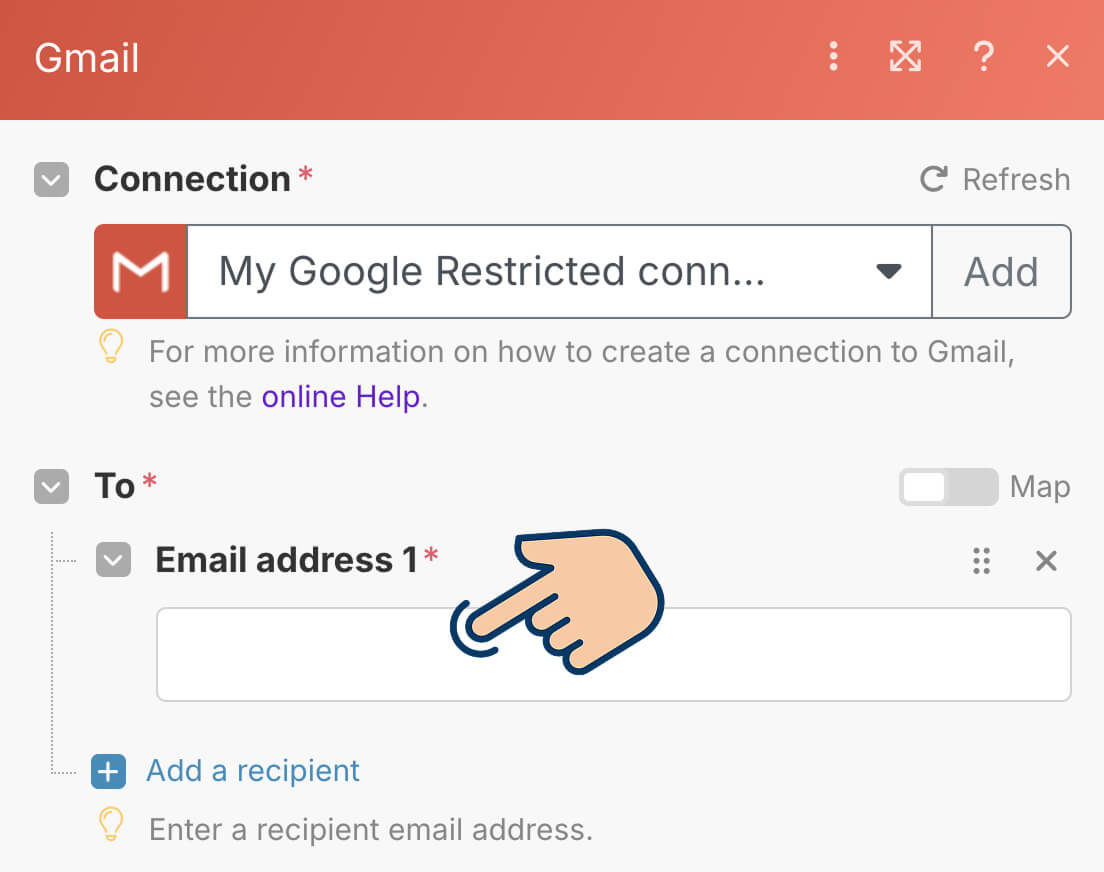
Now, we shouldn’t enter the email address manually:
Why? Because if we enter the email manually, the email will always be sent to the same recipient for every automation run.
That defeats the purpose of automation.
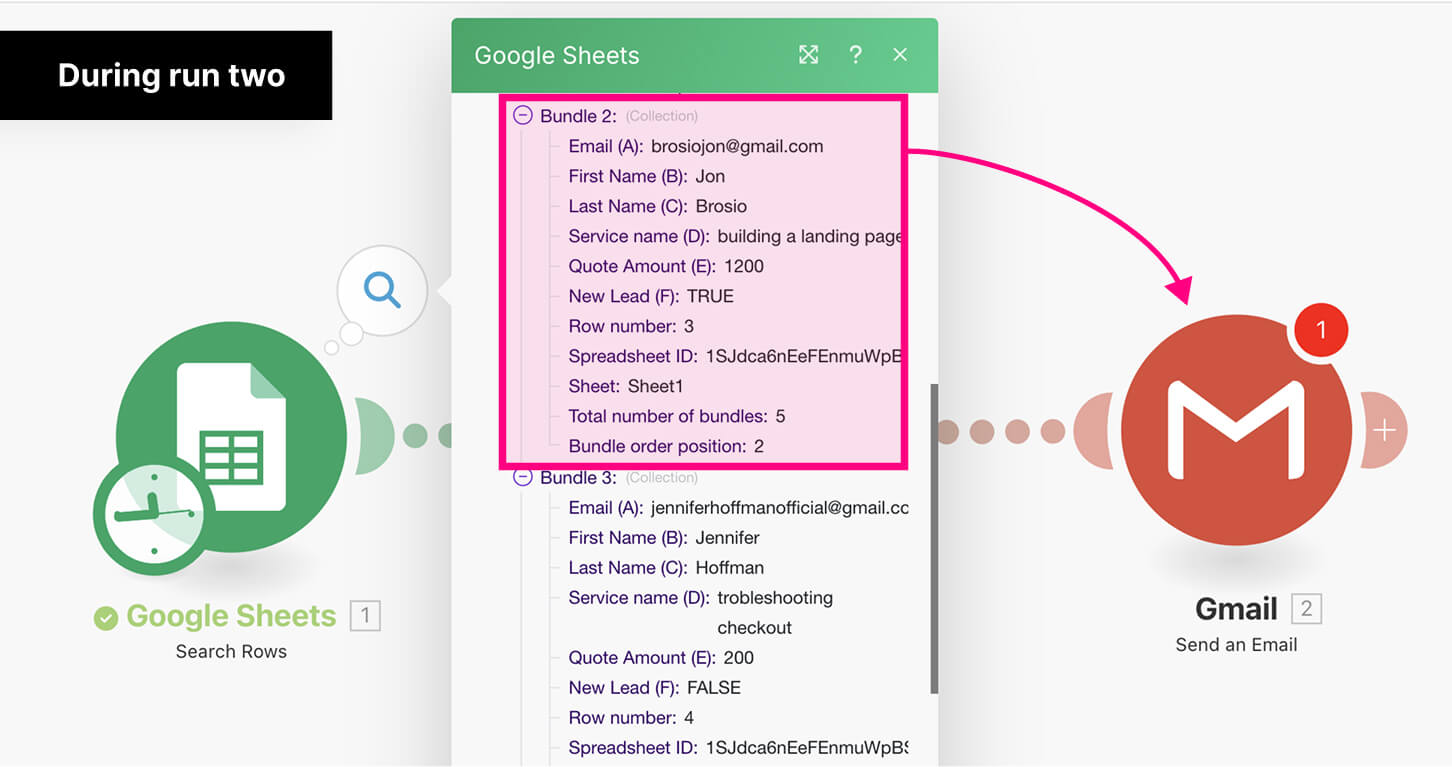
When we run the Google Sheets module, it generates five bundles, each containing a different email address. Right?
So, we need to dynamically map these email addresses to the “Email Address 1” field.
The same logic applies when configuring other options, like the “Subject” line.
But how do we do that?
If we want to map the email from Bundle 1 to the “Email Address” field, what should we enter?
And if you remember from the last lesson, the “Send an Email” module executes once for each bundle, pulling in the data from each one.
So, the real question is: If we want to map the emails from Bundles 1, 2, 3, 4, and 5 to the “Email Address” field of the “Send an Email” module, what value should we enter?
The answer lies the data structure of the bundle.
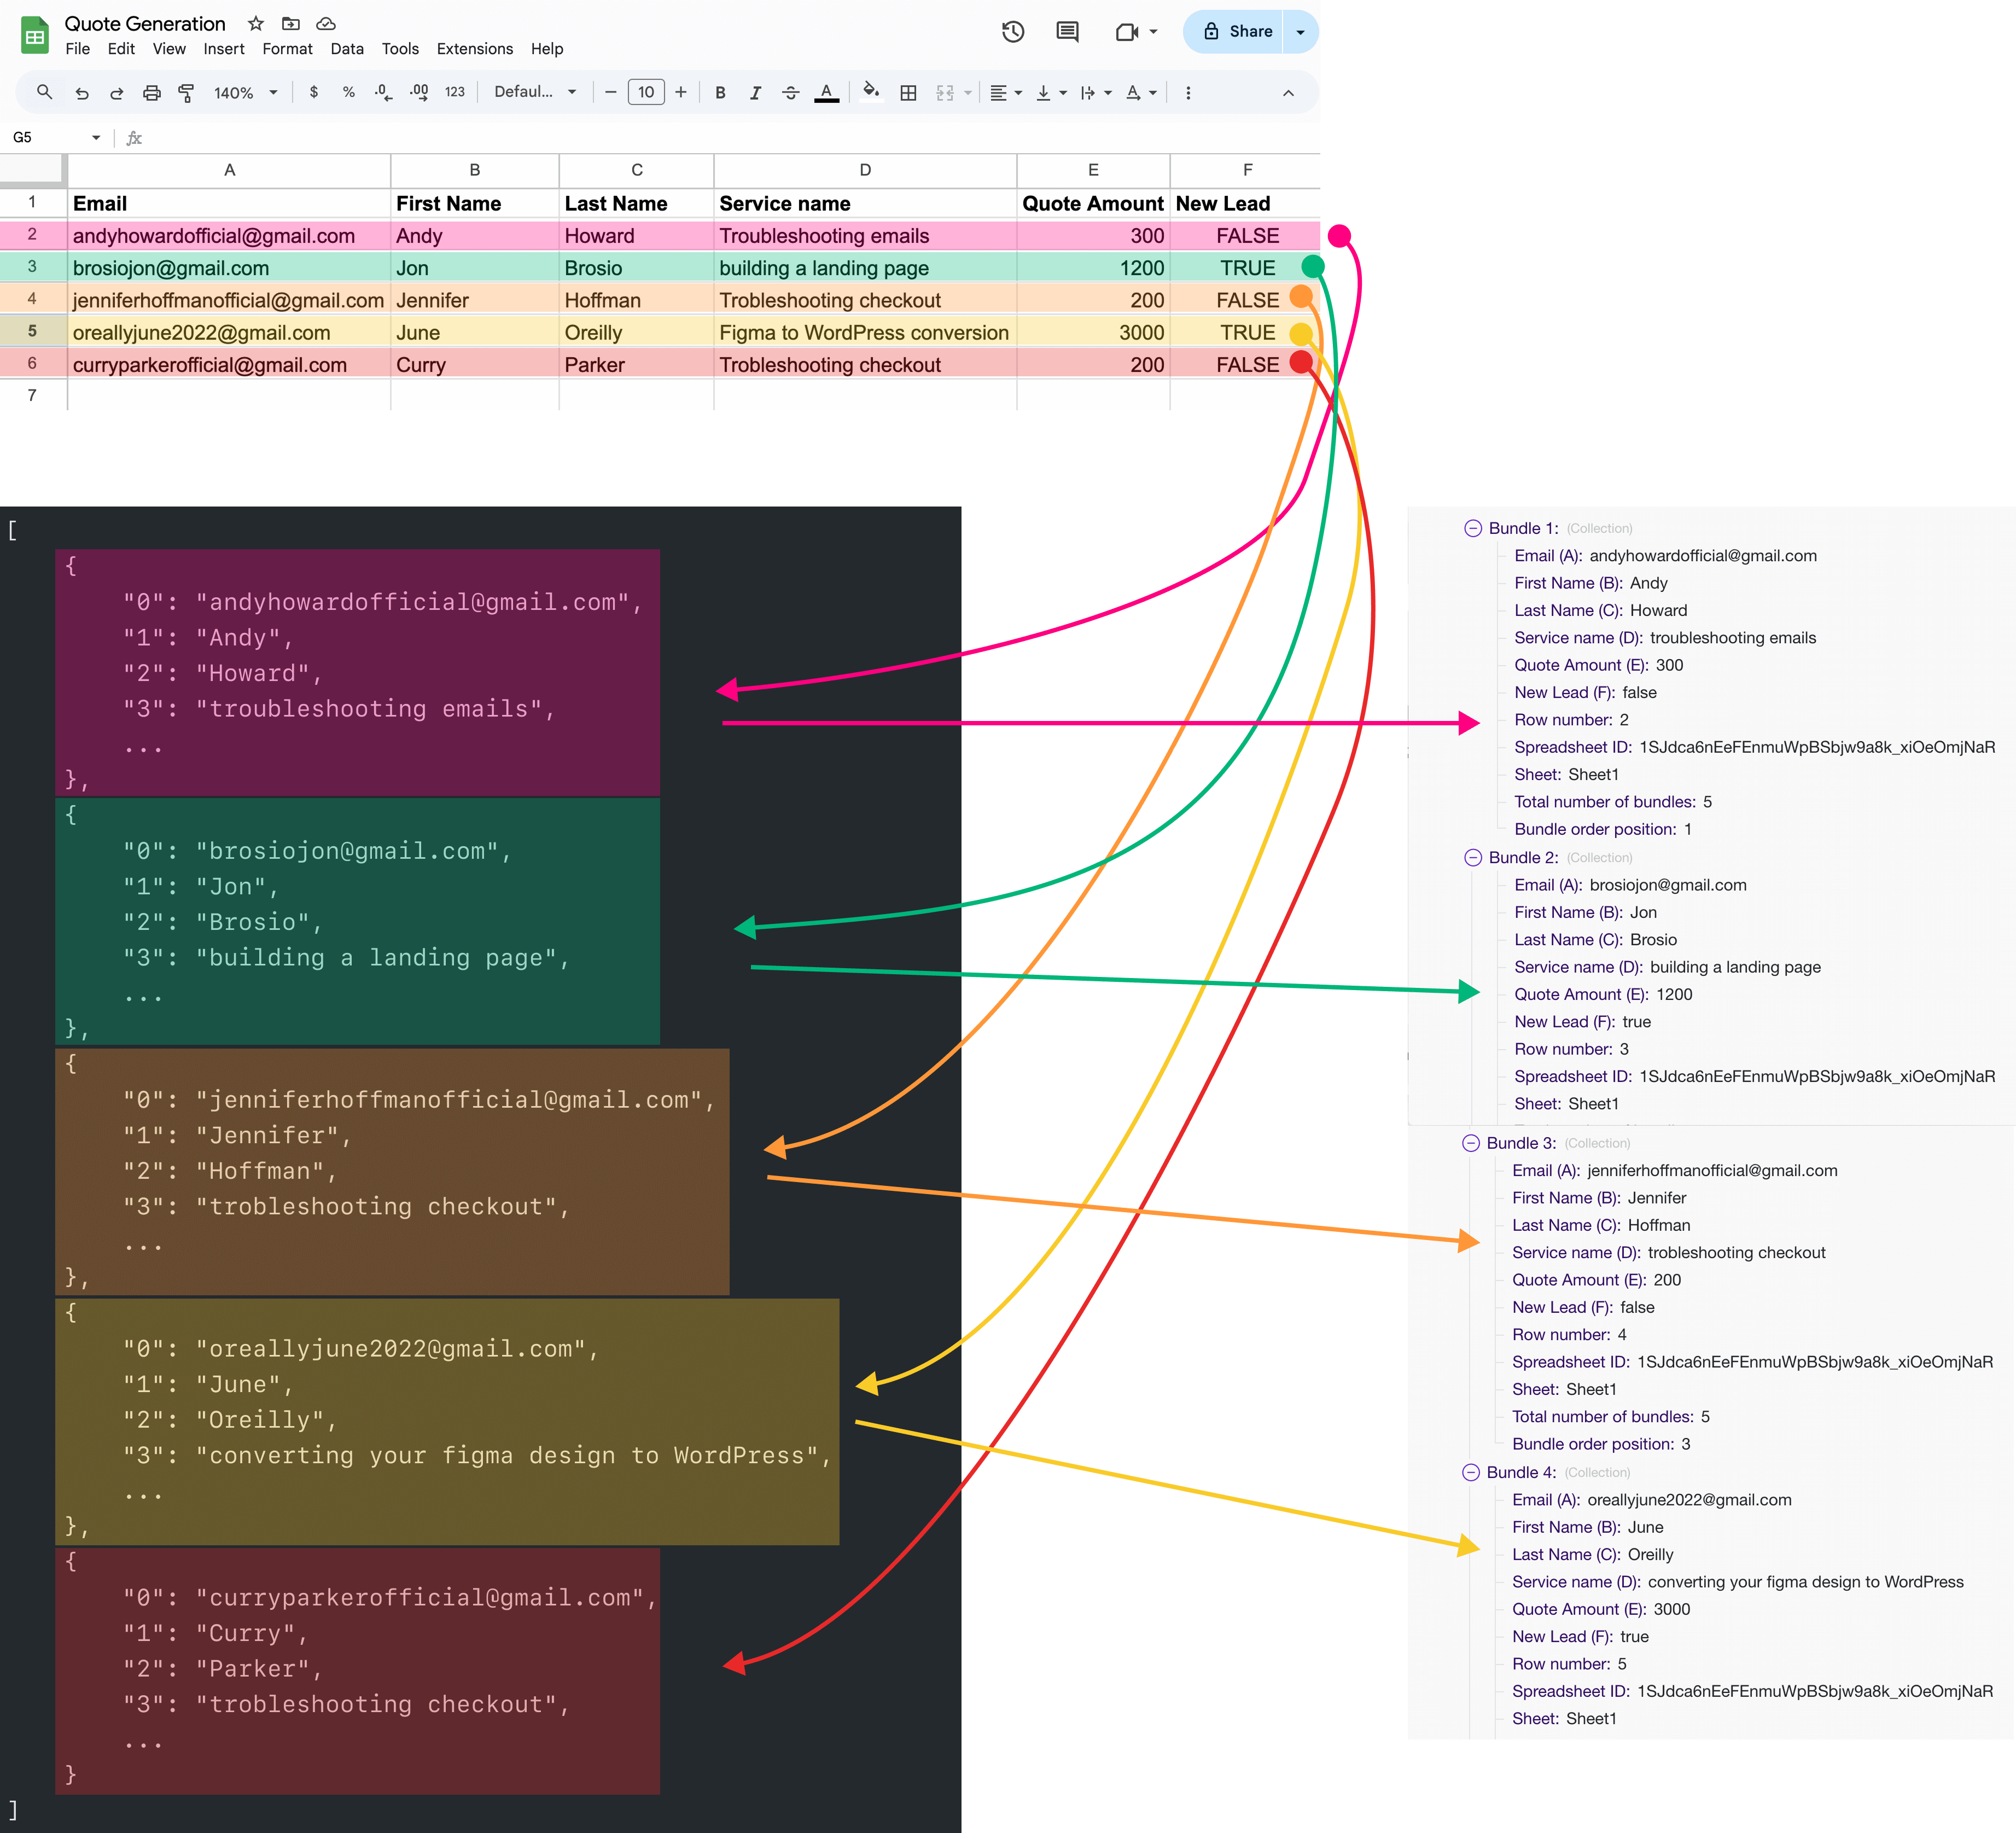
When the Google Sheets module generates bundles, the data is structured as key-value pairs:
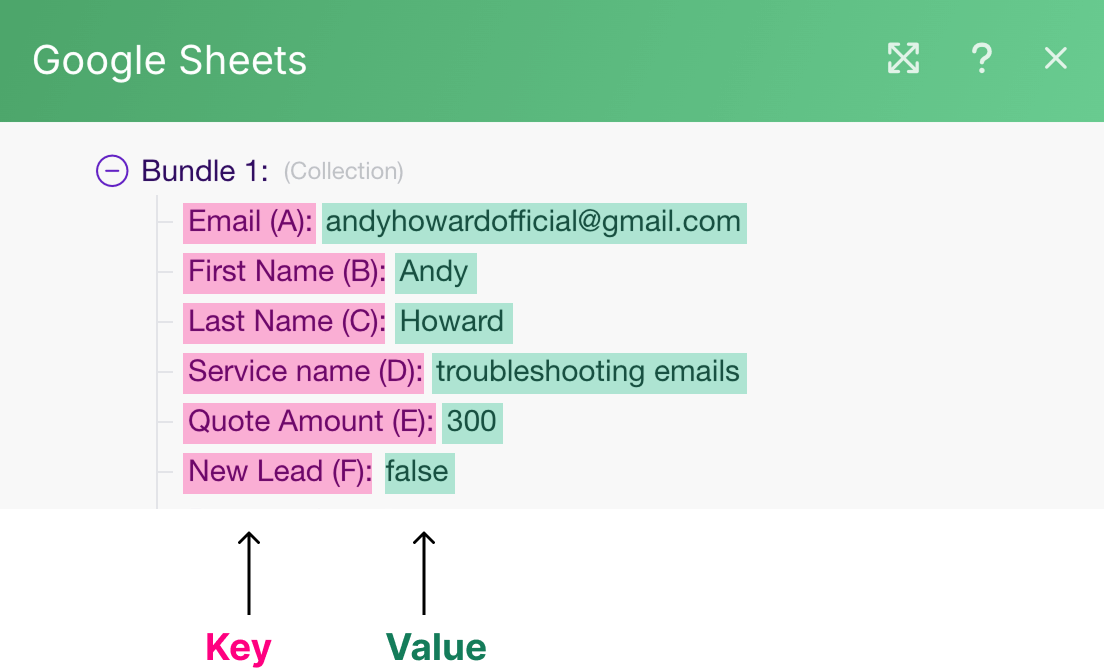
- The “keys” represent the column names from the spreadsheet.
- The values represent the corresponding row data for each column
If you compare two bundles, you'll notice that the keys (column names) remain the same, while only the associated values (row data) change.

So, to ensure the automation dynamically picks the correct recipient email, we need to enter the key Email (A) inside the Email Address field like this:
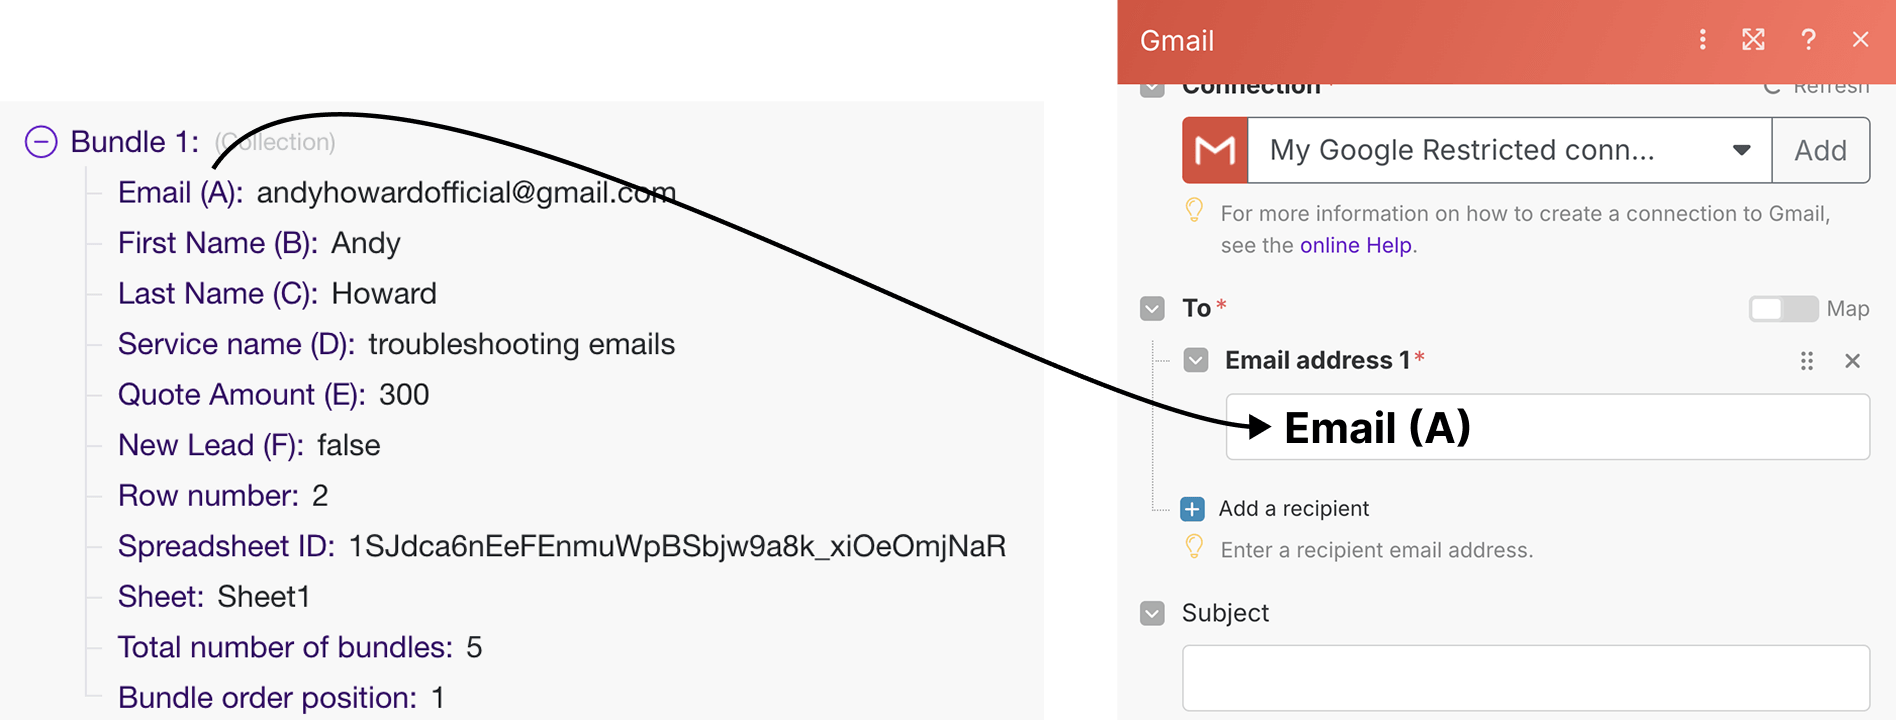
This way, when the automation runs, Make.com will automatically replace “Email (A)” with the actual email address from each bundle.
Also, we shouldn't enter the key names manually.
It doesn't work like that.
Instead, we should use the Data Mapping Panel to select the correct key.
This is better shown than explained.
Come on, click inside the “Email address 1” field to bring up the Data Mapping Panel:
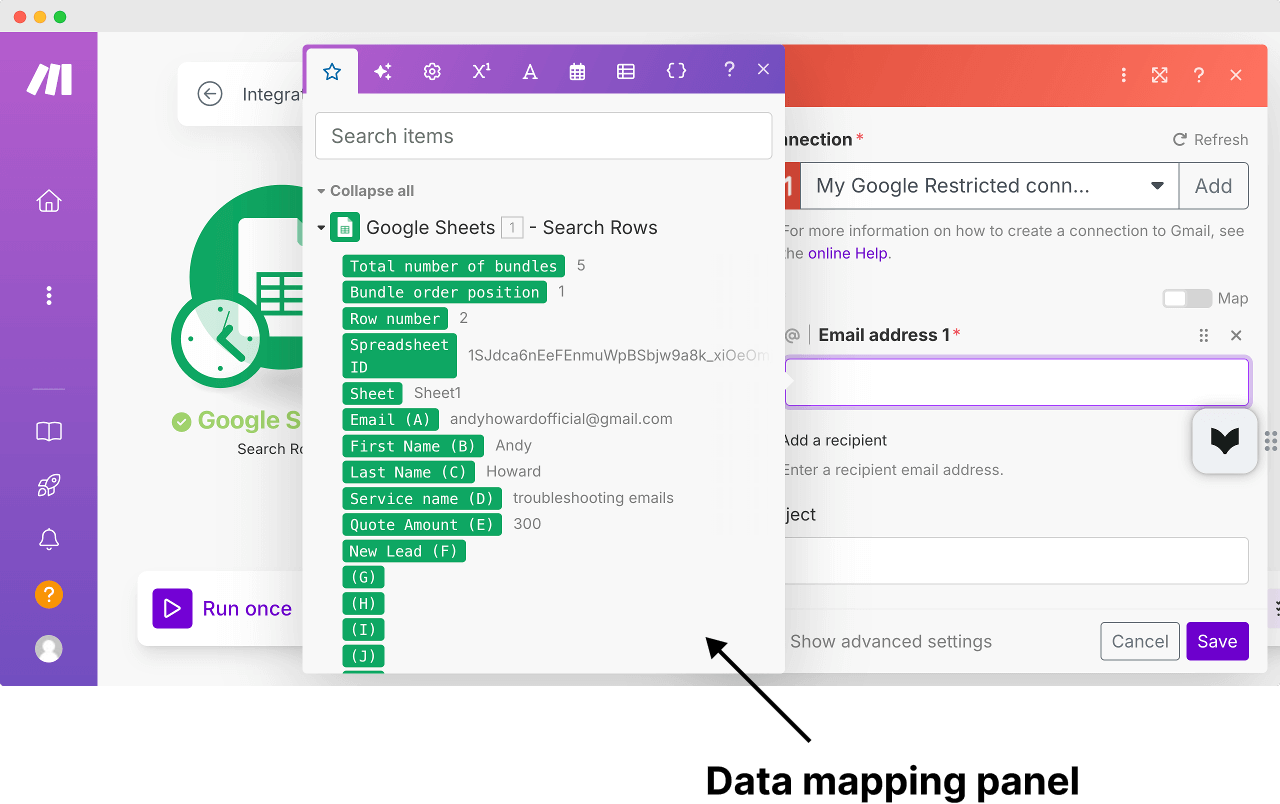
If you notice, the panel contains key names from our bundles, displayed as clickable/draggable green boxes.
For the “Email Address 1” field, we need to map the key that contains recipient email address as the value right, right?
“Yep!”
What key is it?
“Easy bro. Email (A).”
Correct.
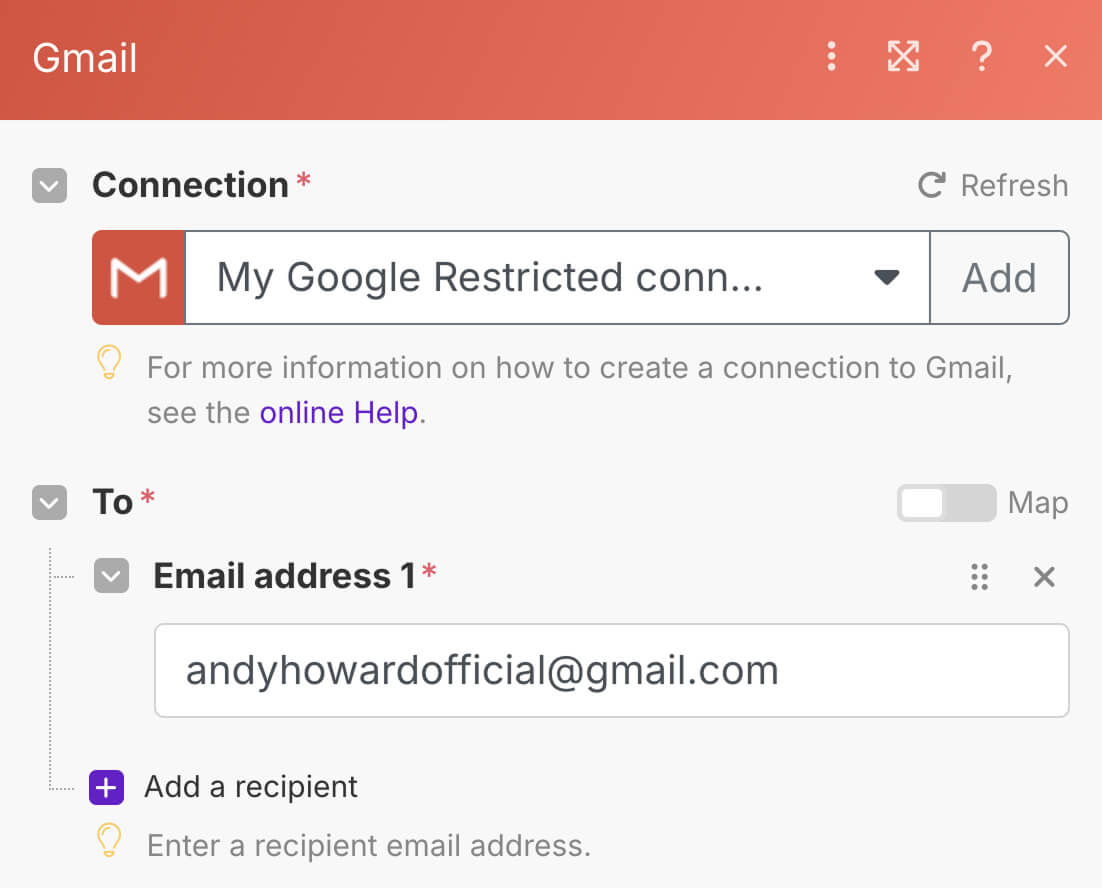
So, click on “Email (A)” from the Data Mapping Panel to add it to the “Email Address 1” field.
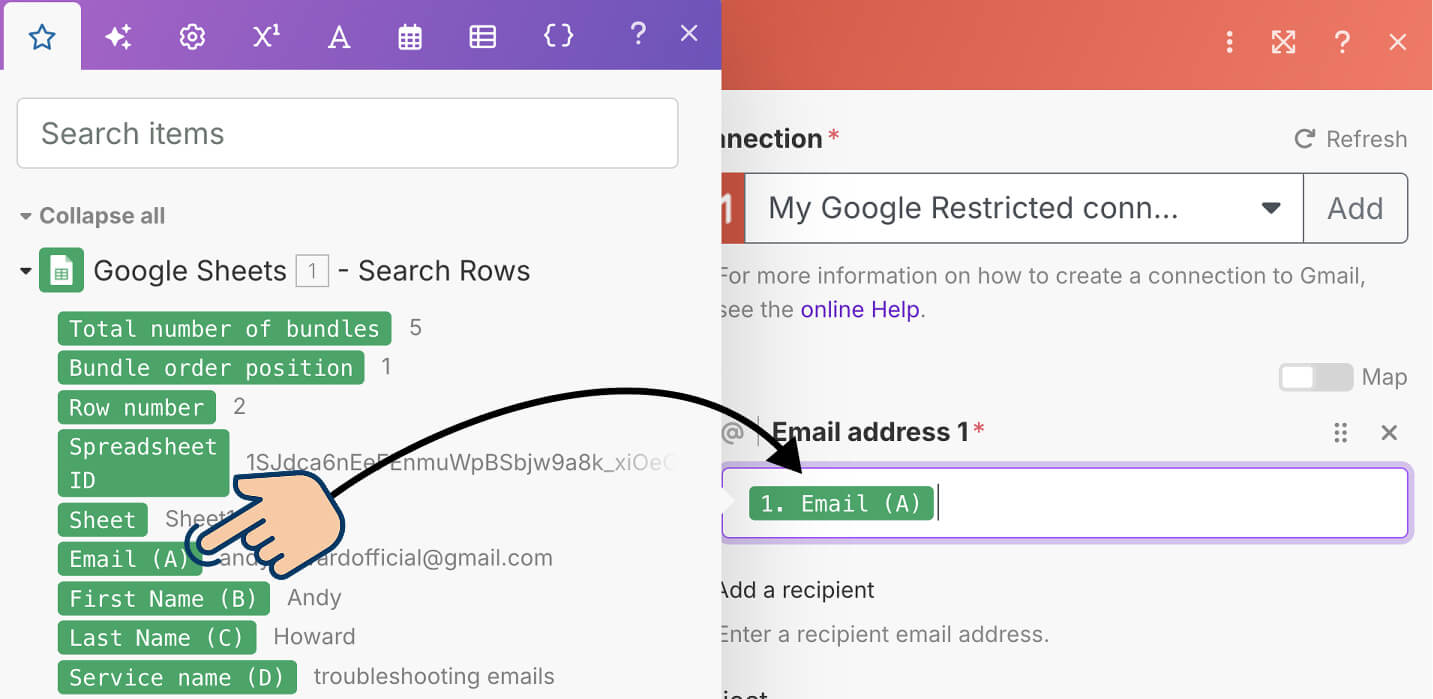
This ensures that each email is sent to the correct recipient dynamically, based on the Google Sheets data.
Simply put, when the automation runs for each bundle, the green “1. Email (A)” box gets replaced with the actual email address from that bundle.
If this explanation feels complex, don’t worry! Once you see it in action, it will make more sense.
Things will become clear in the next lesson, where I explain the flow of the automation.
Anyway, If you want to send the same email to multiple recipients, click the “Add a recipient” button and add as many as emails as you want:
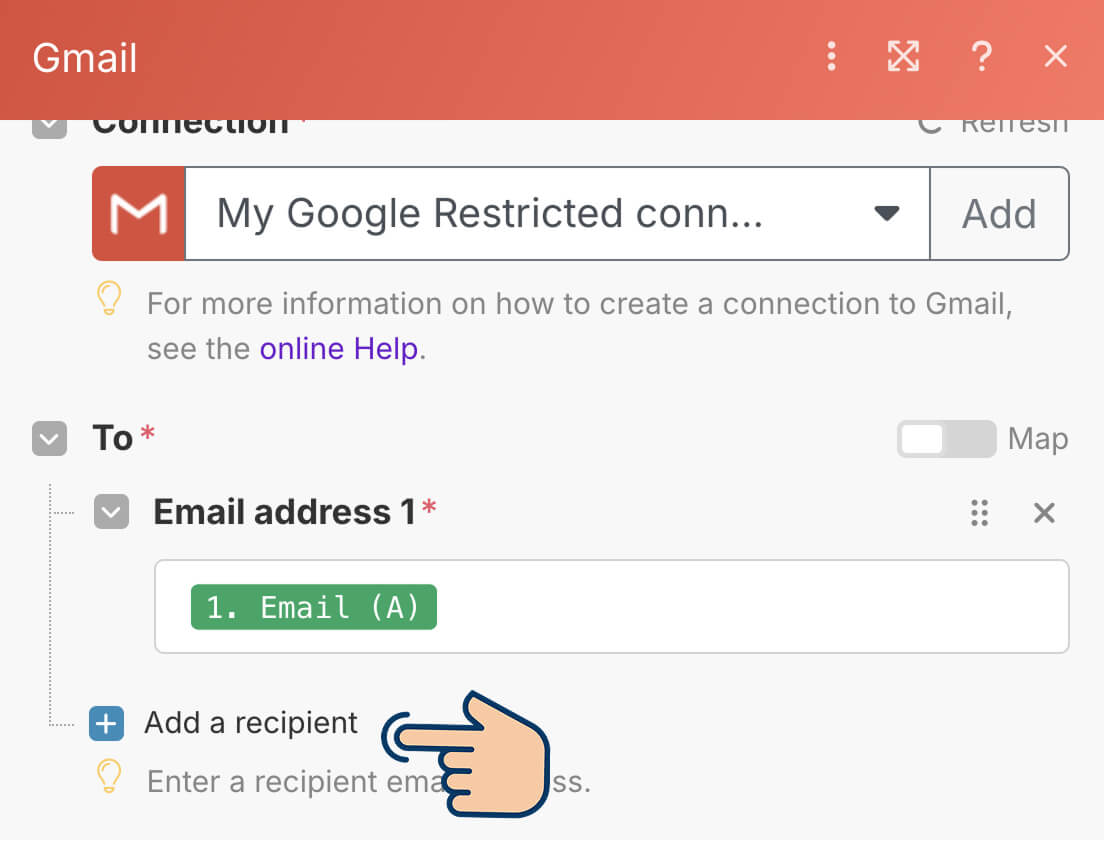
If your spreadsheet doesn't contain multiple email recipients data, you can enter an email address manually.
You can enter plain text values instead of using data mapping panel.
Anyway, next, we need to add a subject line for our email, right?
We have to do the same thing.
2) Adding subject line
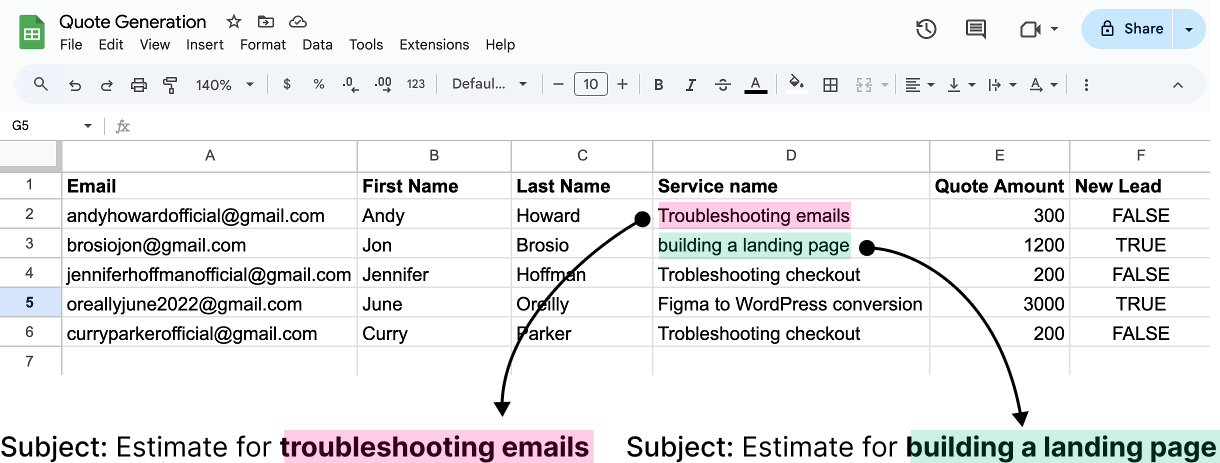
The email's subject line is going to be a mixture of:
- Static text — “Estimate for”
- Dynamic value from the spreadsheet — “troubleshooting emails”
That means, for the email we send, the subject line will always start with “Estimate for” and ends with the “Service name” whose value we will pull dynamically from our spreadsheet:

To achieve this, click on the “Subject” field.
The data mapping panel will open up as usual.

But before mapping the “Service name” column to the “Subject” field, type “Estimate for” and then map the “Service name (D)” column from the spreadsheet.
Here is how the final subject line looks like:
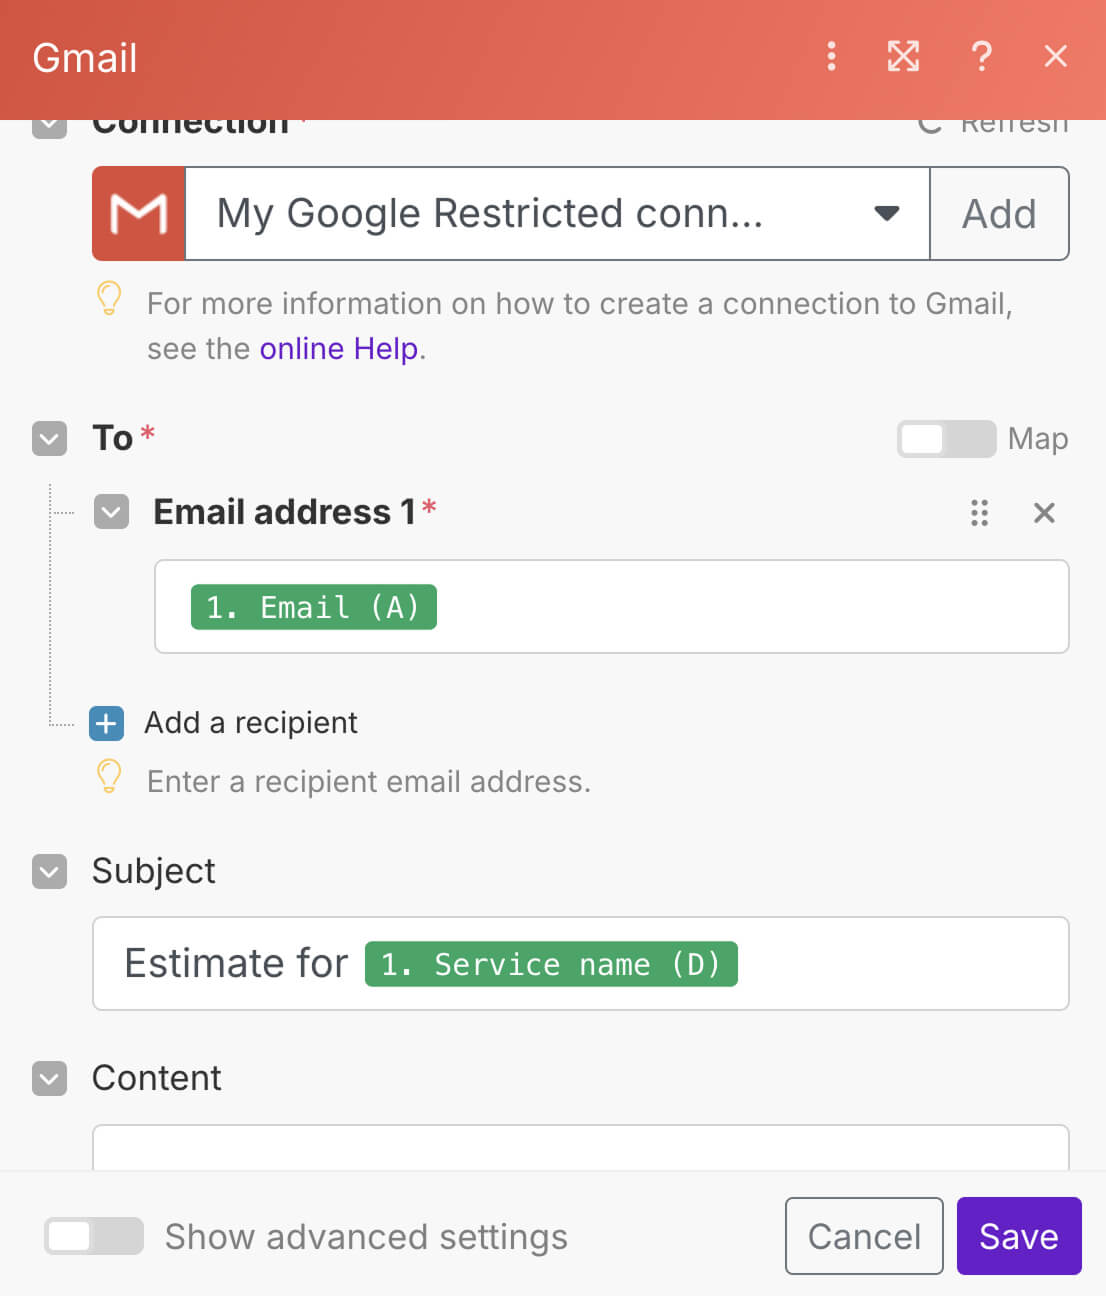
This means, when the automation runs for each row of the spreadsheet, the green “1. Service name (D)” box will get replaced with the actual “Service name” from each row.
And using the same technique, let's prepare the email message using the “Content” field.
3) Preparing the email message
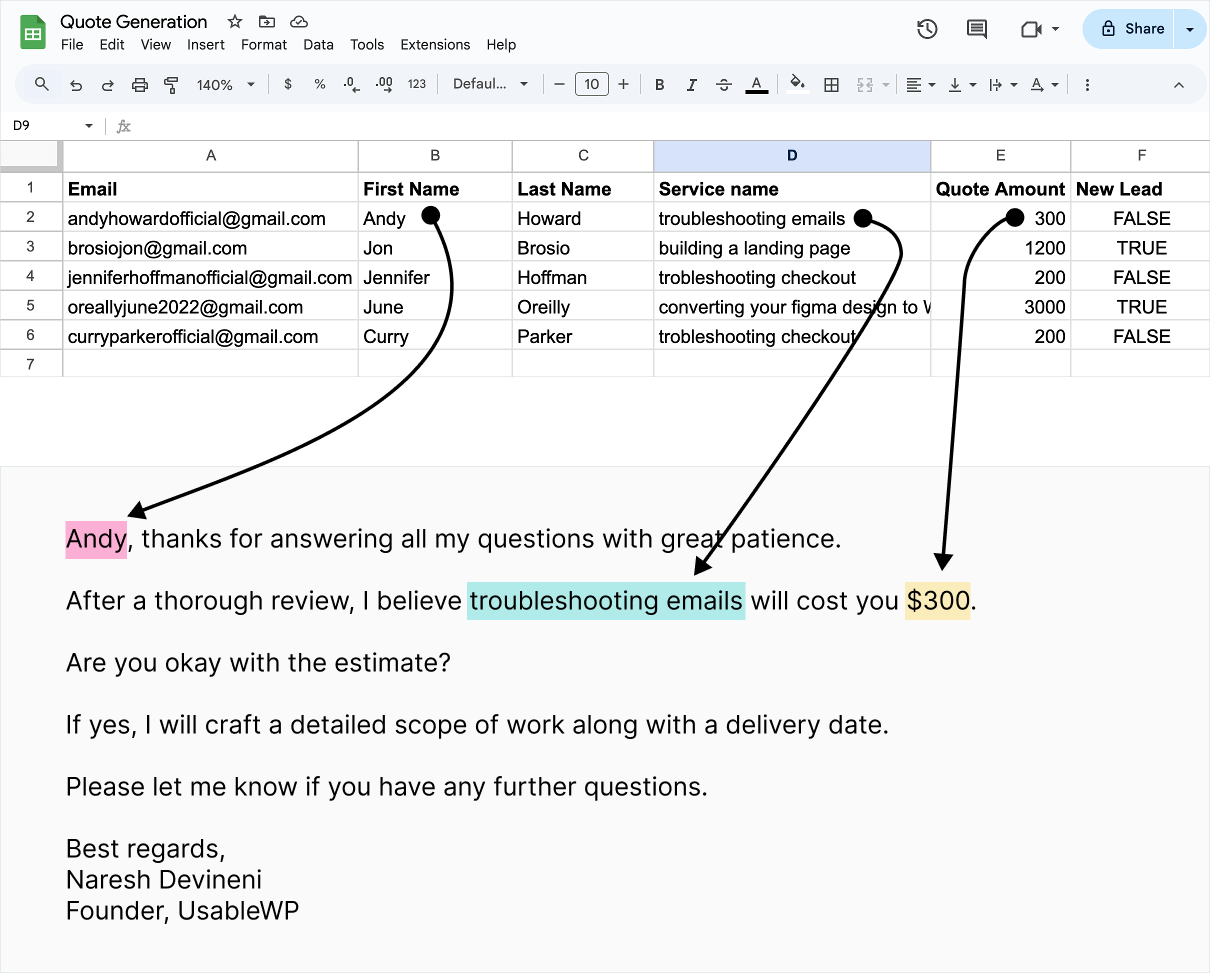
Again, the email message is going to be a mixture of:
- Static text that doesn't change for every email
- Dynamic values from the spreadsheet that change for every email such as First name, Service name and Quote amount
To achieve this, click on the “Content” field and paste this text inside it:
Hi [First Name],

Thanks for answering all my questions with great patience.

After a thorough review, I believe [Service Name] will cost you $[Quote Amount].

Are you okay with this estimate?

If yes, I will craft a detailed scope of work along with a delivery date.

Please let me know if you have any further questions.

Best regards,
Naresh Devineni
Founder, UsableWP
The message will look like a big paragraph.
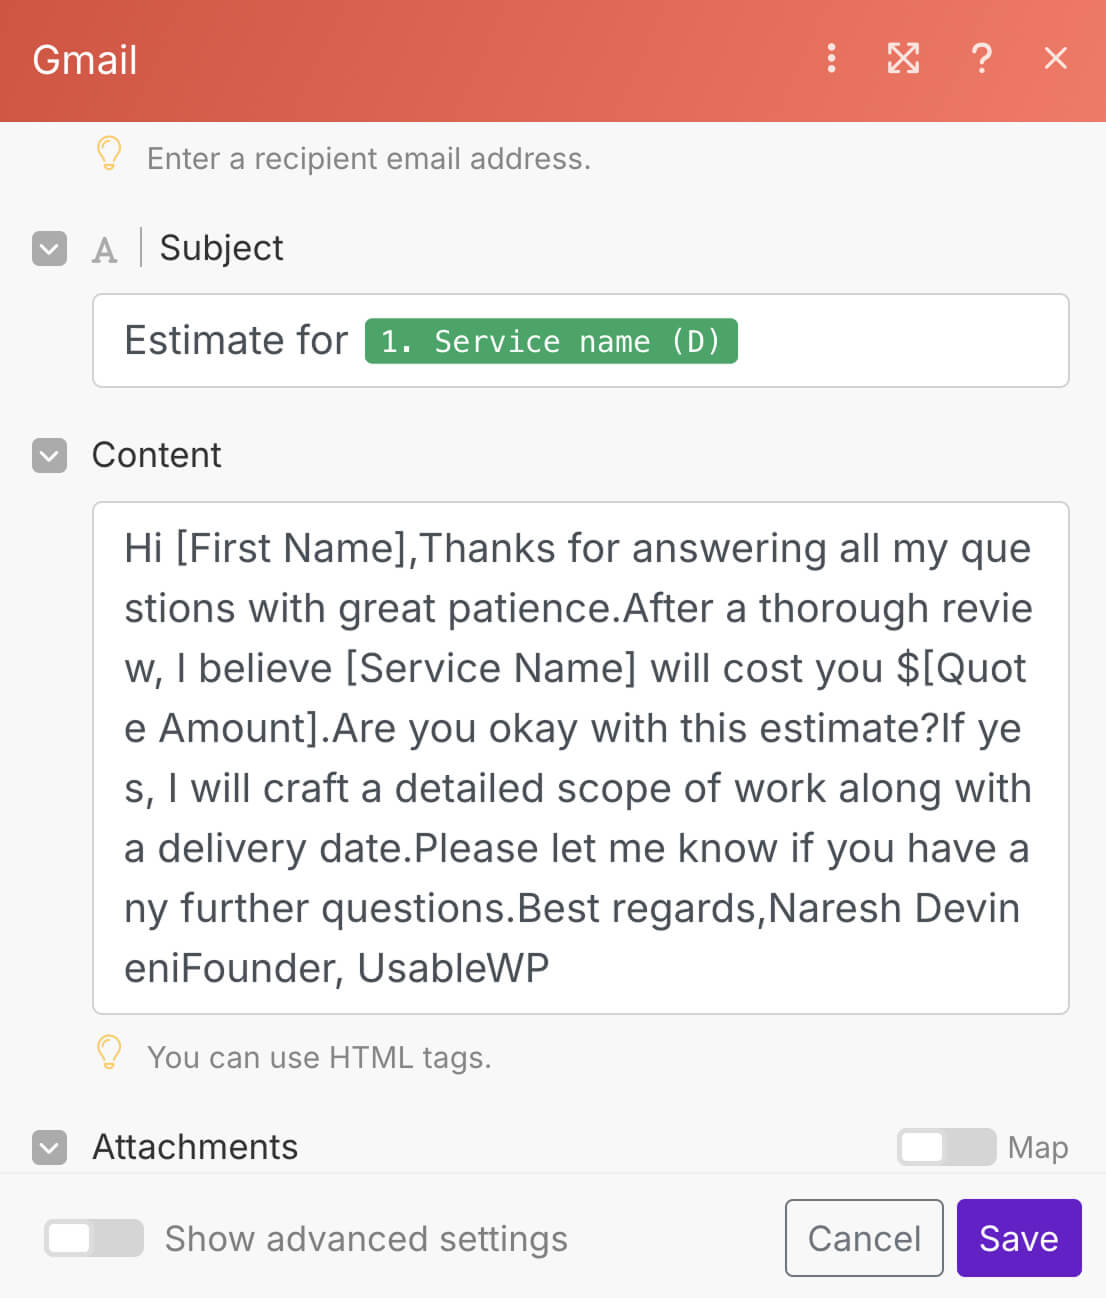
It didn't preserve the line gaps between the paragraphs.
And we can fix it by manually adding gaps between the paragraphs.
To do so, use the keyboard shortcut “Shift + Enter” to divide the text into multiple paragraphs.
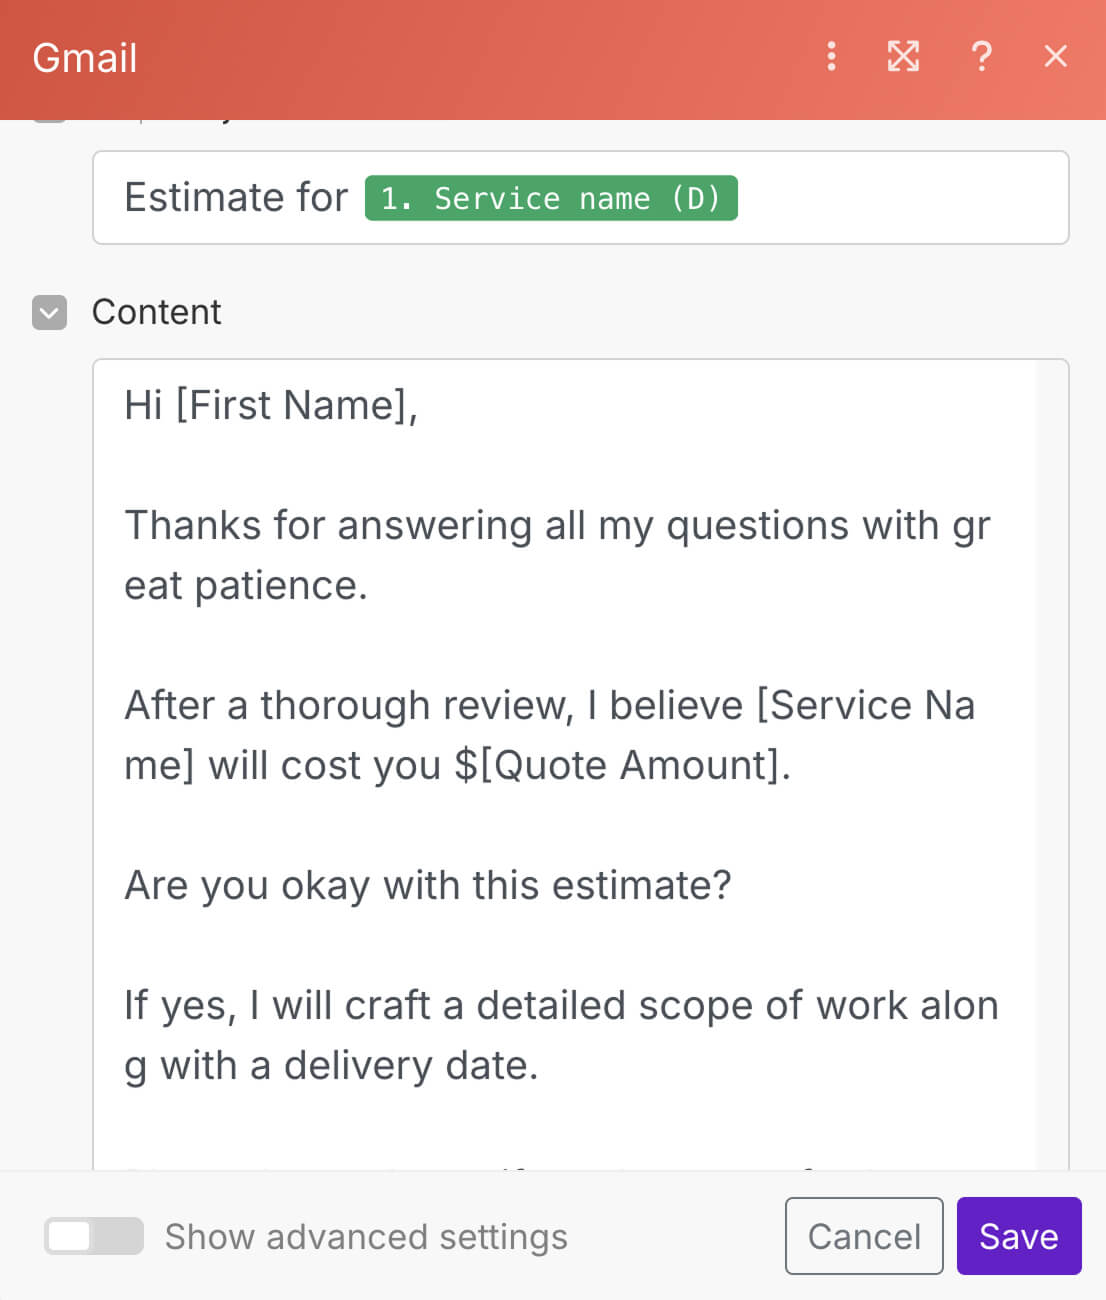
Okay, now the formatting looks as expected.
Now, if you notice, there are three placeholders in the above text:
- [First name]
- [Service name]
- [Quote amount]
To make our email message dynamic with the values from the spreadsheet, we need to replace the placeholders with the respective key names using the Data Mapping Panel.
If you have lost access to the Data Mapping Panel, just click inside the content field to bring it up and then make the message dynamic.
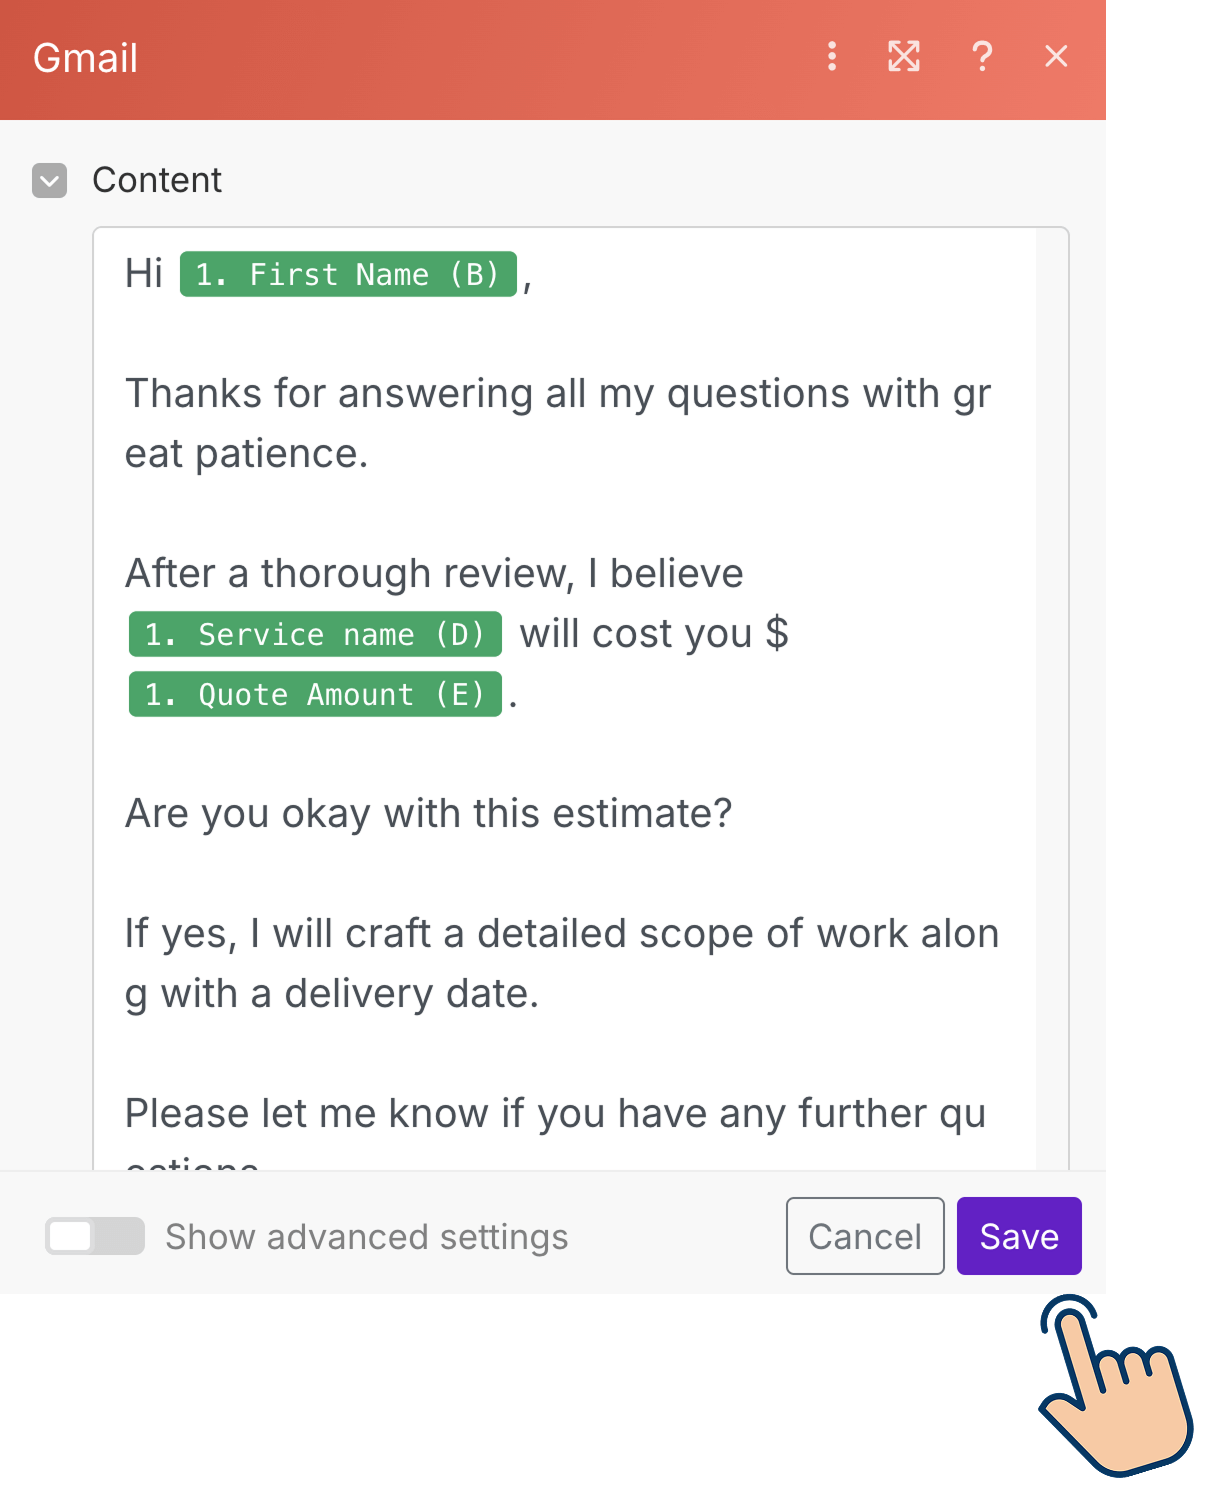
And finally, click on the “Save” button to save the configuration.
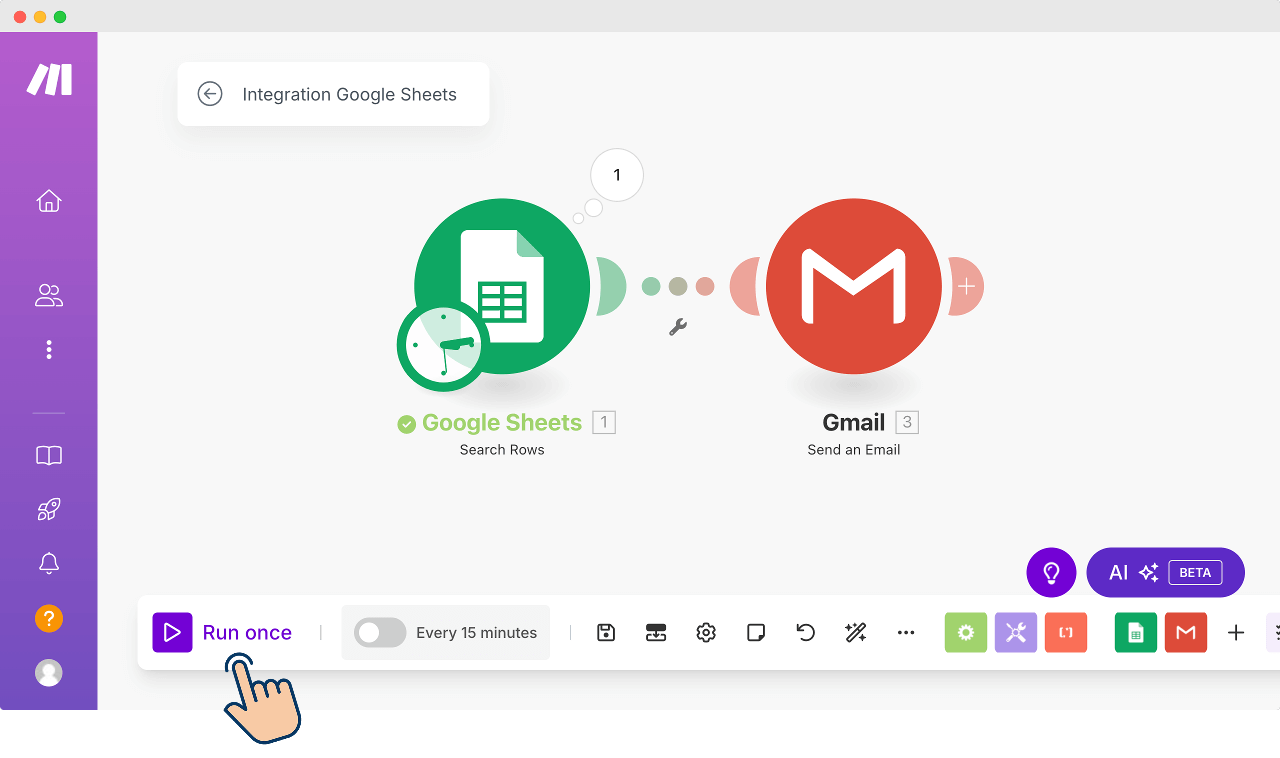
Here is how the finished automation looks like:
Uff…we came a long way.
Now all we have to do is click on the “Run once” button to run the automation.
If all goes well, it will send quote emails to the respective leads.
But Ah! Ah! Ah!
Not so fast. Don't run the automation yet.
I know you're excited, but before you run it, I want you to understand how the data mapping works inside the automation.
And we will do that in the next lesson.