Setting up the APIs of Tally.so, OpenAI, Airtable, and Convertio platforms


For the automation to kick in, an applicant must fill in the job submission form.
That's the input data for our automation.
From there, the automation will take control.
So...
First, we should build a form on the Tally.so website.
The need for a form builder service
For the applicant to fill the form, we must have a form that can be filled.
And this is where form builders like Tally and Google Forms come in.
The form builders make it really easy to create and share a form for gathering the submissions.
We don't have to worry about hosting them.
We don't have to worry about the error handling, either. These form builders are battle tested for handling any kind of errors.
Last but not least, we can easily access the forms submitted.
Tally.so vs Google Forms
For the purposes of this automation, we will go with Tally.
It has a free tier, and Google Forms has some restrictions for our use case.
“What are they?”
Google Forms doesn't have an in-built field type for collecting an email or phone number.
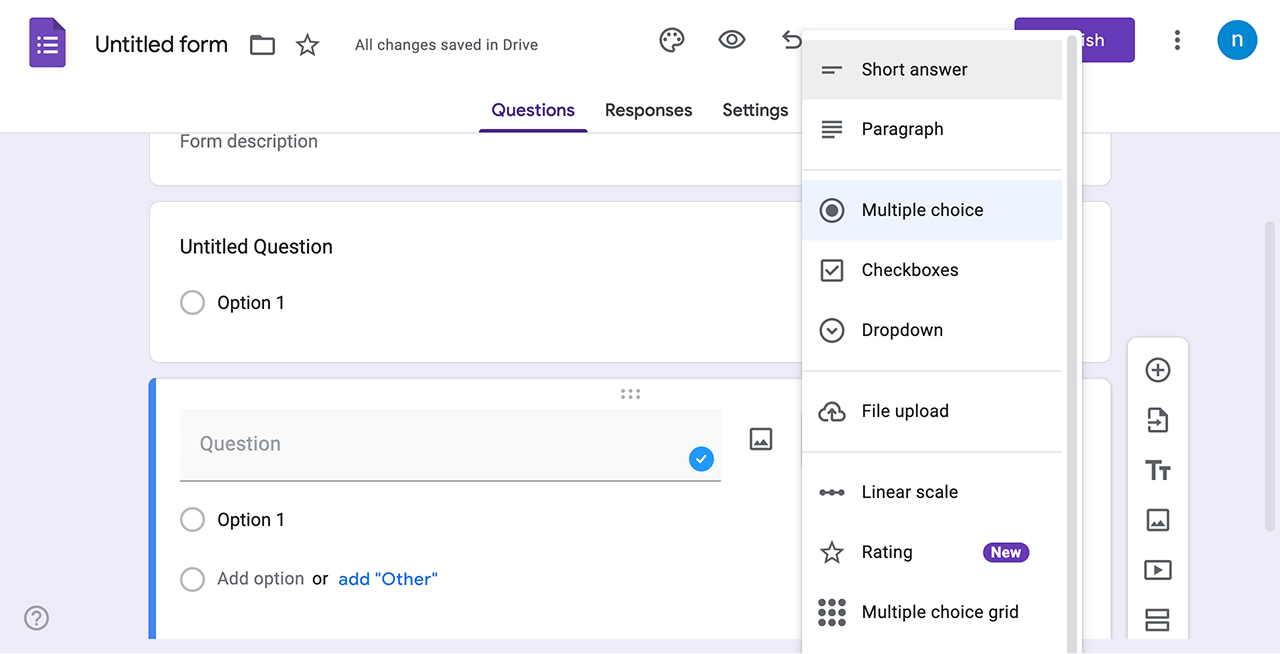
We have to use the “Short answer” field for collecting them. The problem with this is, without a dedicated field type for a phone number or email, we can validate that data entered by the users.
And both phone number and email are critical for the HR team.
“Got it. Makes sense, bro!”
Yeah. That's why we cannot go with Google Forms.
On the other hand, Tally lets us collect phone number and email easily with dedicated fields and validation support.
So, for our current needs, create a free account at Tally.so:
Next, learn how to create forms on Tally using the following official tutorial:
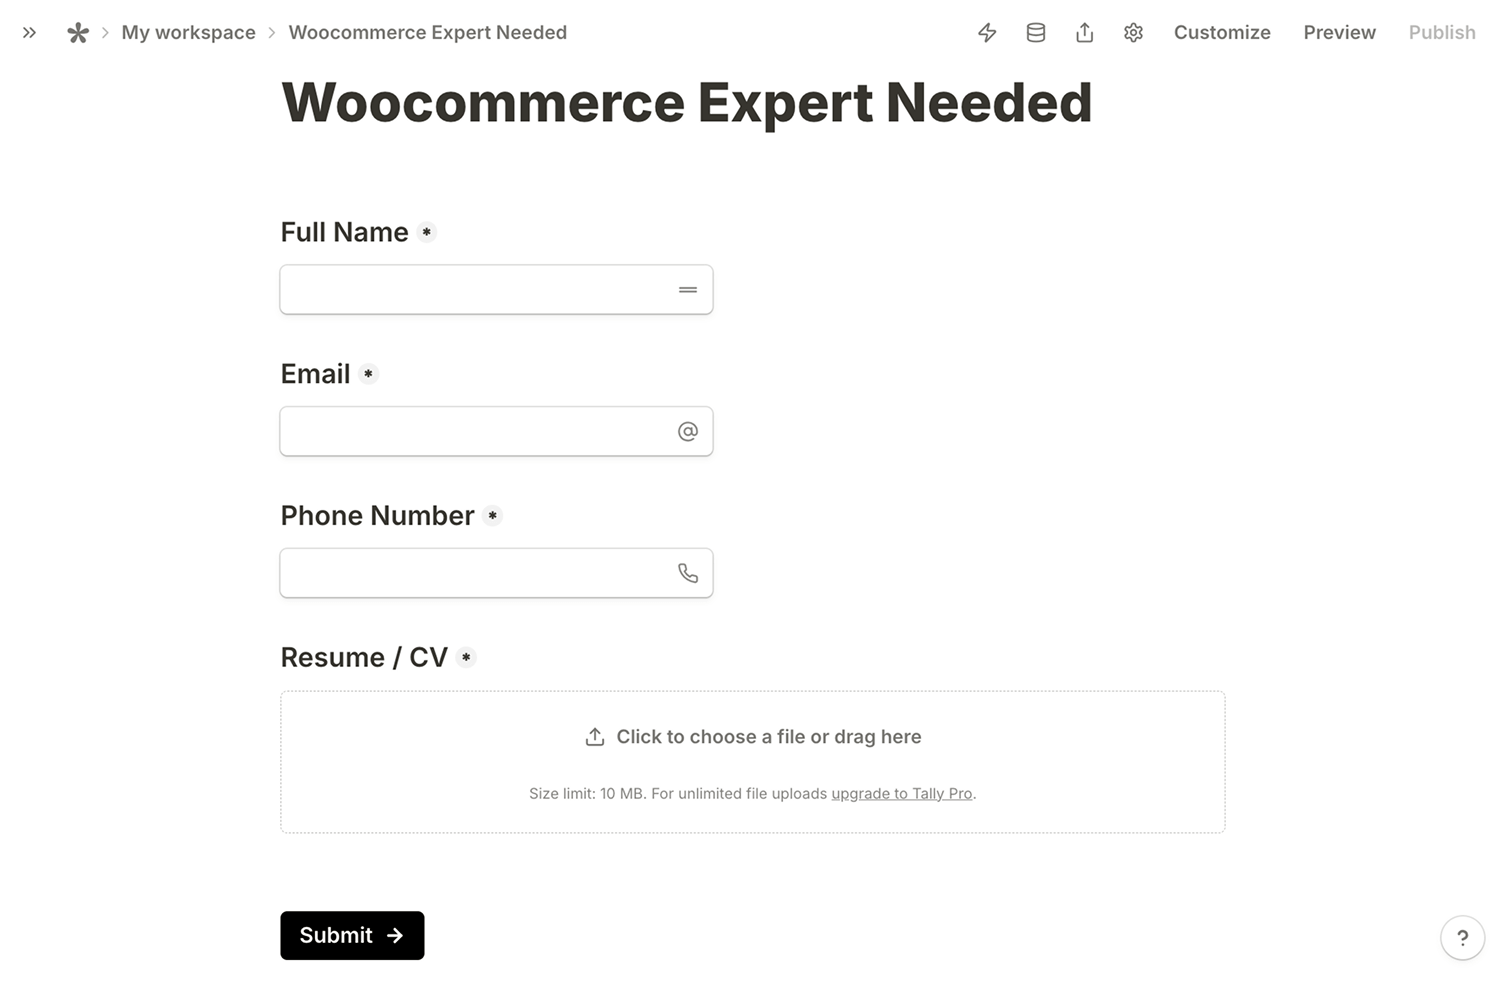
After that, build a form with the following fields and publish it:
- Type “Woocommerce Expert Needed” for the “Form title” field
- Next, add the “Short Answer” field and label it as “Full name”
- Then, add the “Email” field and label it as “Email”
- After, add the “Phone number” field and label it as “Phone number”
- Finally, add a “File upload” field and label it as “Resume/CV”.
Here is how the finished form looks like:
A lot more critical fields go into a resume submission form.
I didn't add them for reducing the complexity of the automation.
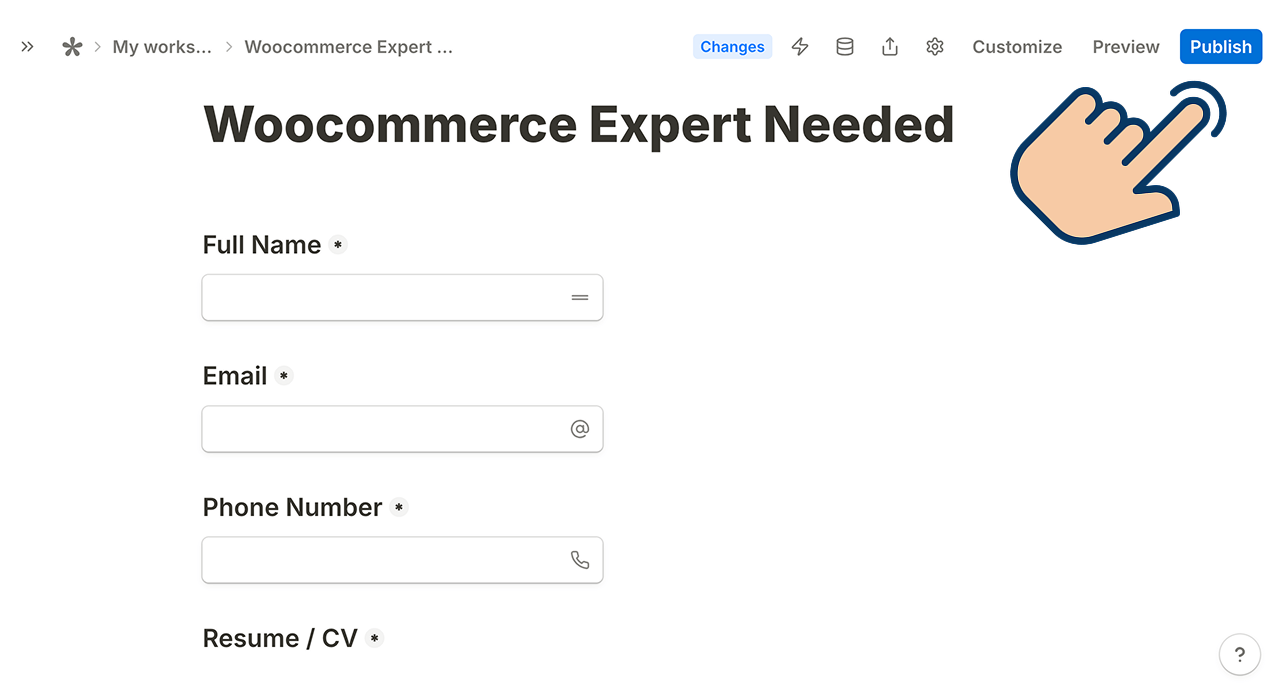
Anyway, once you are creating the form, click on the “Publish” button:
And as soon as the form is published, you'll get a URL for sharing the form with the applicants:
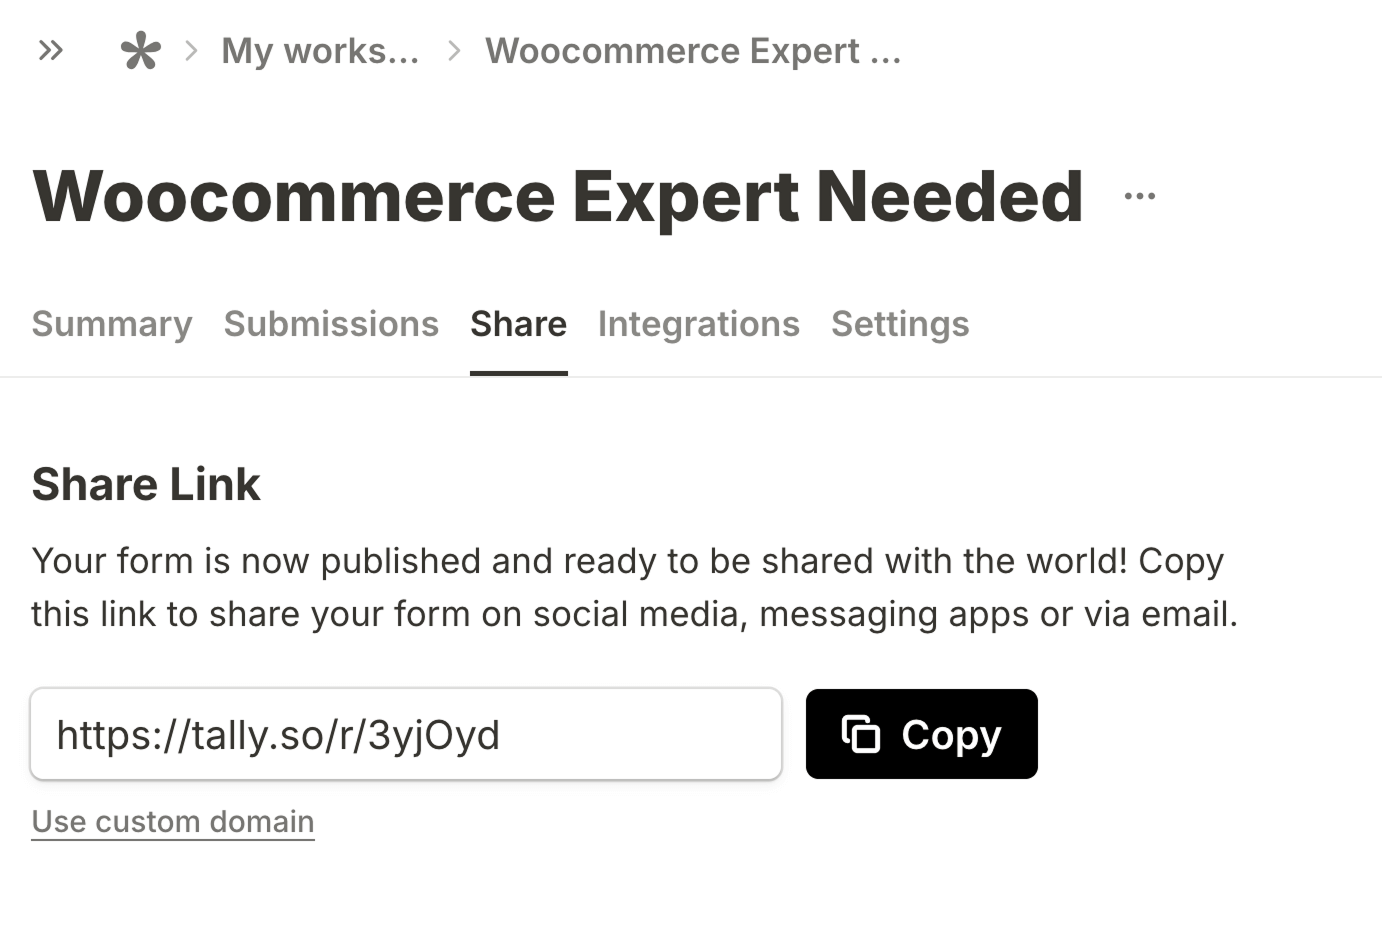
Come on, copy the link, open it up in a new tab and submit a test form.
You must test the form so that you can understand the user experience and improve it if necessary.
"Got it. Also, how do get the API key for Tally.so?"
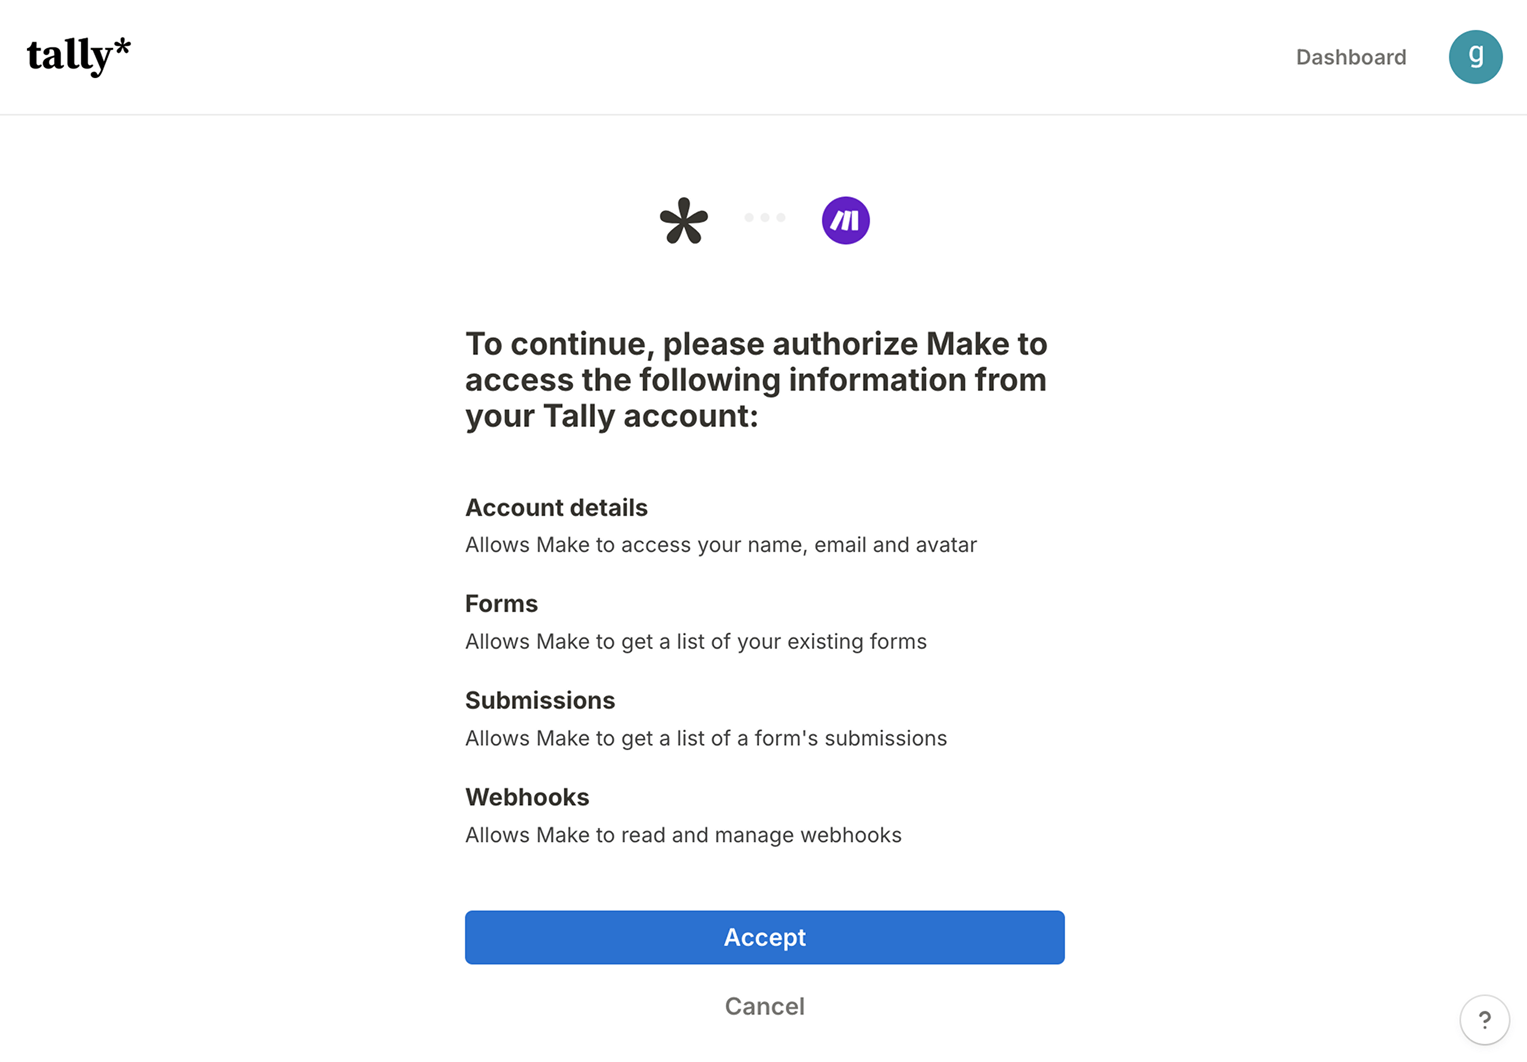
What does this screen say?
"Oh! Tally.so uses OAuth instead of API keys".
Correct :)
You have become sharper.
Tally.so uses OAuth authentication to let you access its API. It doesn't provide API keys.
That's all the Tally set up we need to do for now.
Next, get an API key from ChatGPT
Adding $5 credit to the OpenAI account
For analysing “Pros” and “Cons” of an applicant's resume, we will rely on the reasoning abilities of the ChatGPT.
But we cannot use ChatGPT API for free.
“Got it. I have access to the 'Pro' plan of ChatGPT. I can get an API key using the 'Pro' plan, right?”
Nope.

We need to add at a credit balance of at least $5 to access the API, irrespective of your existing ChatGPT plan.
ChatGPT API is not accessible via the “Pro” plan or the “Free” plan. These are considered as personal plans.
The API access works on a credit system.
You must deposit an amount between $5 and $98 to access the API.
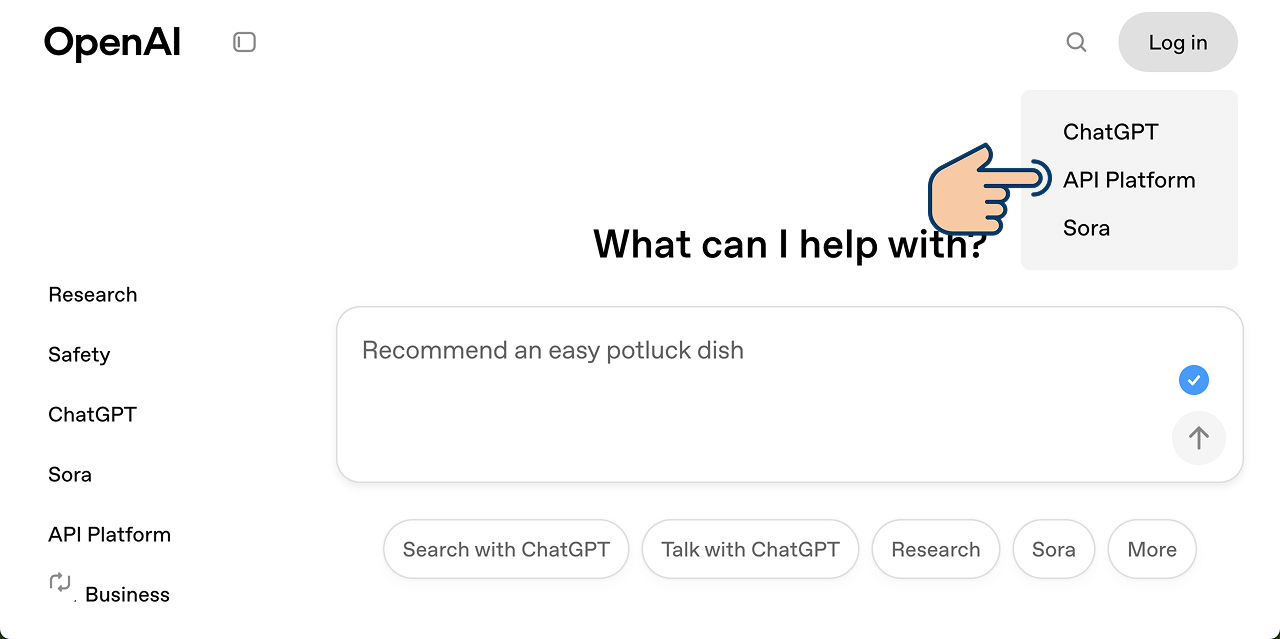
So, first, go to the OpenAI website and from the “Login” dropdown menu, click on “API Platform”:
Next, click on the “Settings” icon that is located on the top right-hand side of the screen to be able to access the billing options.
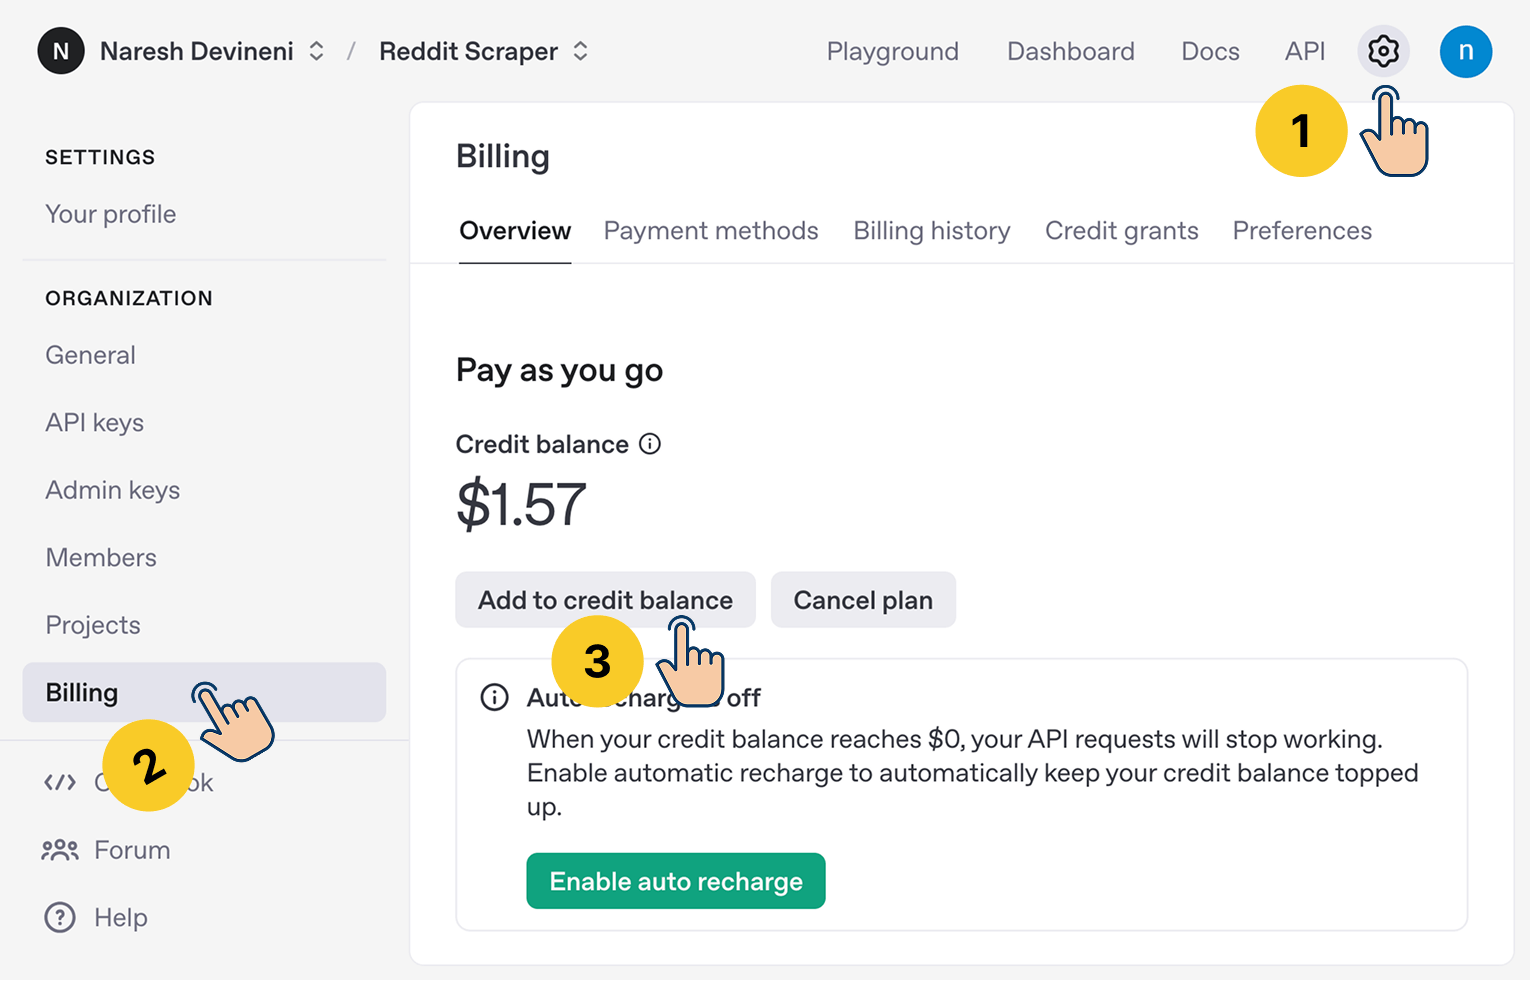
- Then, click on the “Billing” link from the sidebar menu on the left-hand side of the screen.
- Finally, click on the “Add to credit balance” and add $5 as credit balance.
Once you are done adding the credit balance, we need to generate a secret key.
Unlike Tally, OpenAI relies on API keys to let you access its API.
And OpenAI calls its API key as “Secret Key”.
Anyway, to generate the secret key, go to API keys from the sidebar menu and then click on the “Create a new secret key” button:
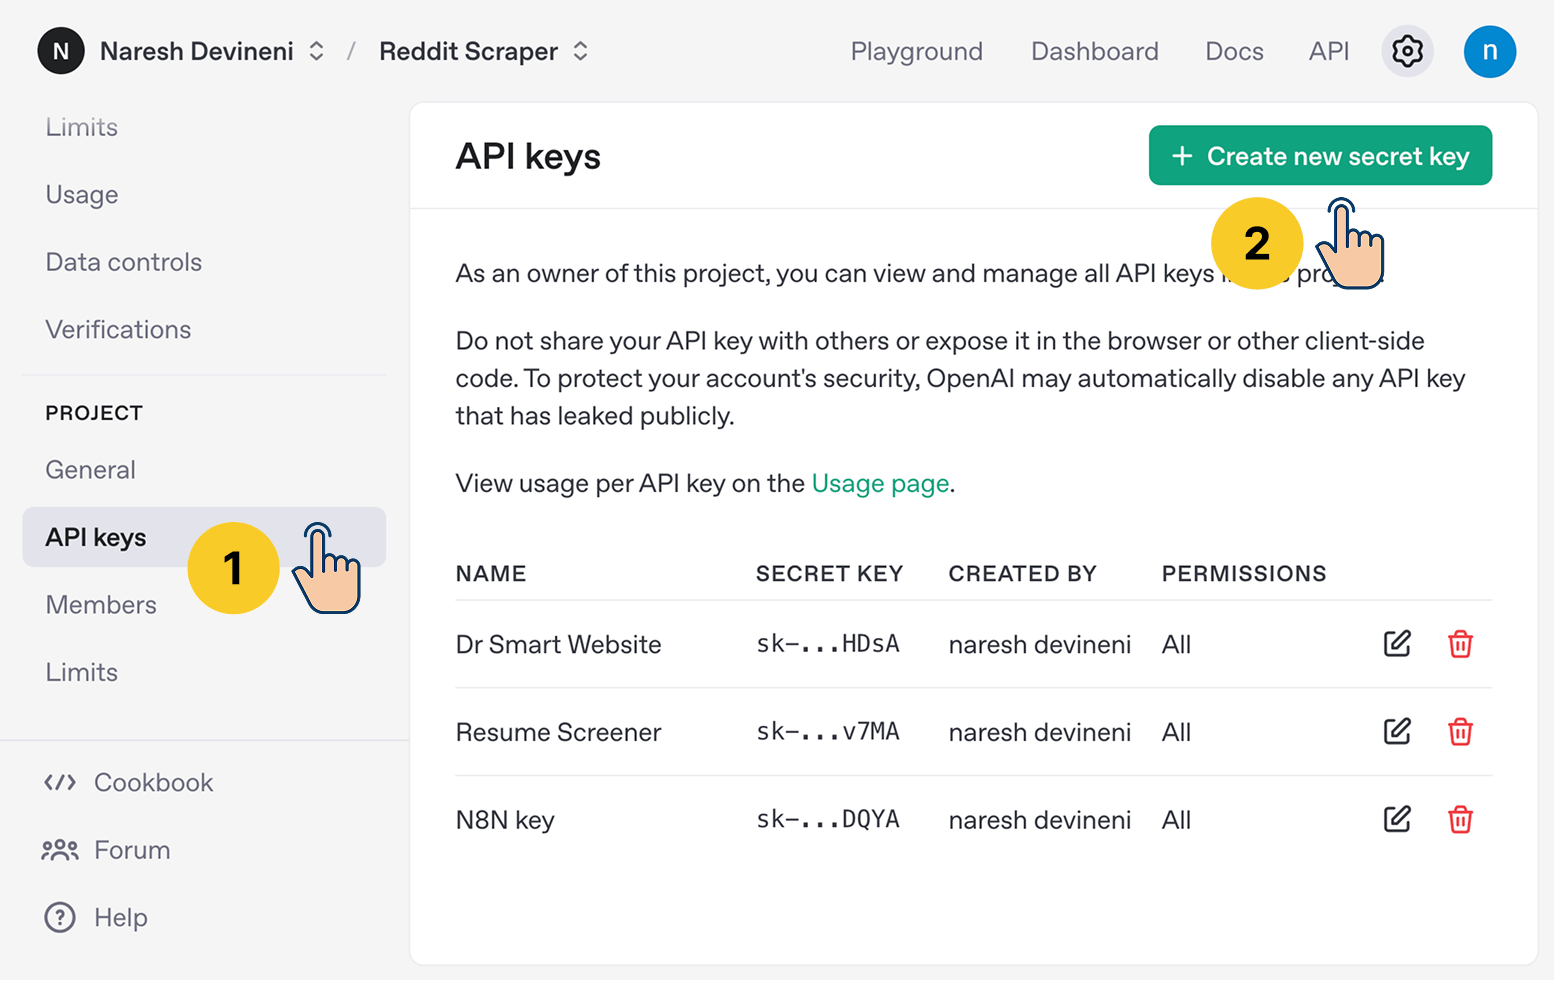
This will bring up the “Create new secret key” dialog box:
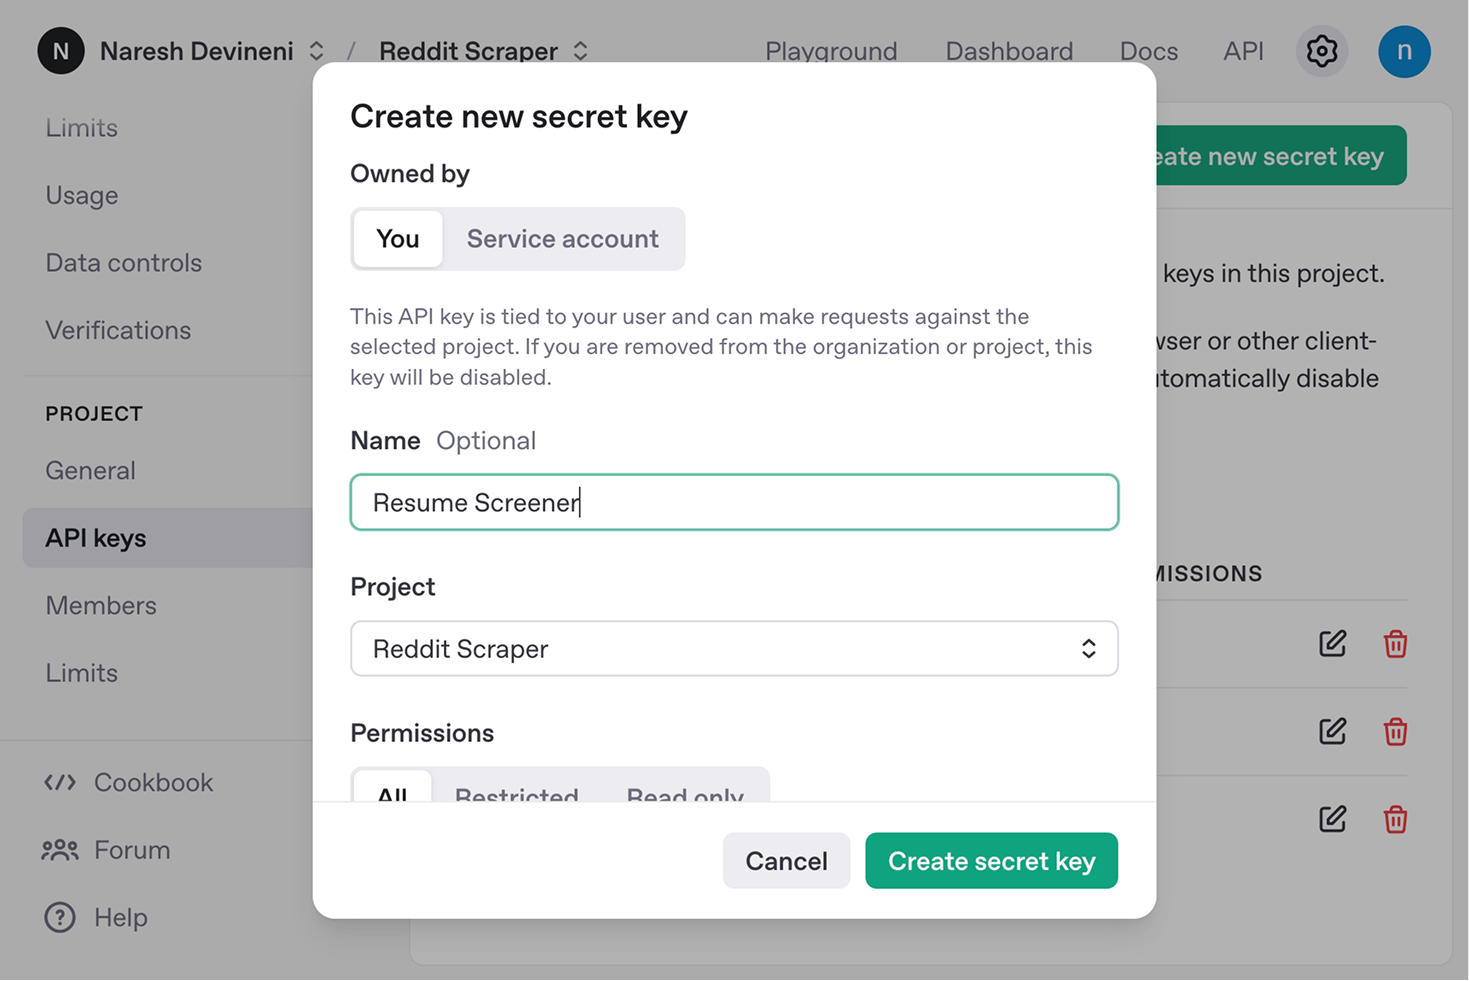
Name the secret key as “Resume Screener” or something similar so that you can easily recognize it when using the key.
Next, click on the “Create secret key” button to create an API key for OpenAI.
This will bring up another popup with the newly created API key:
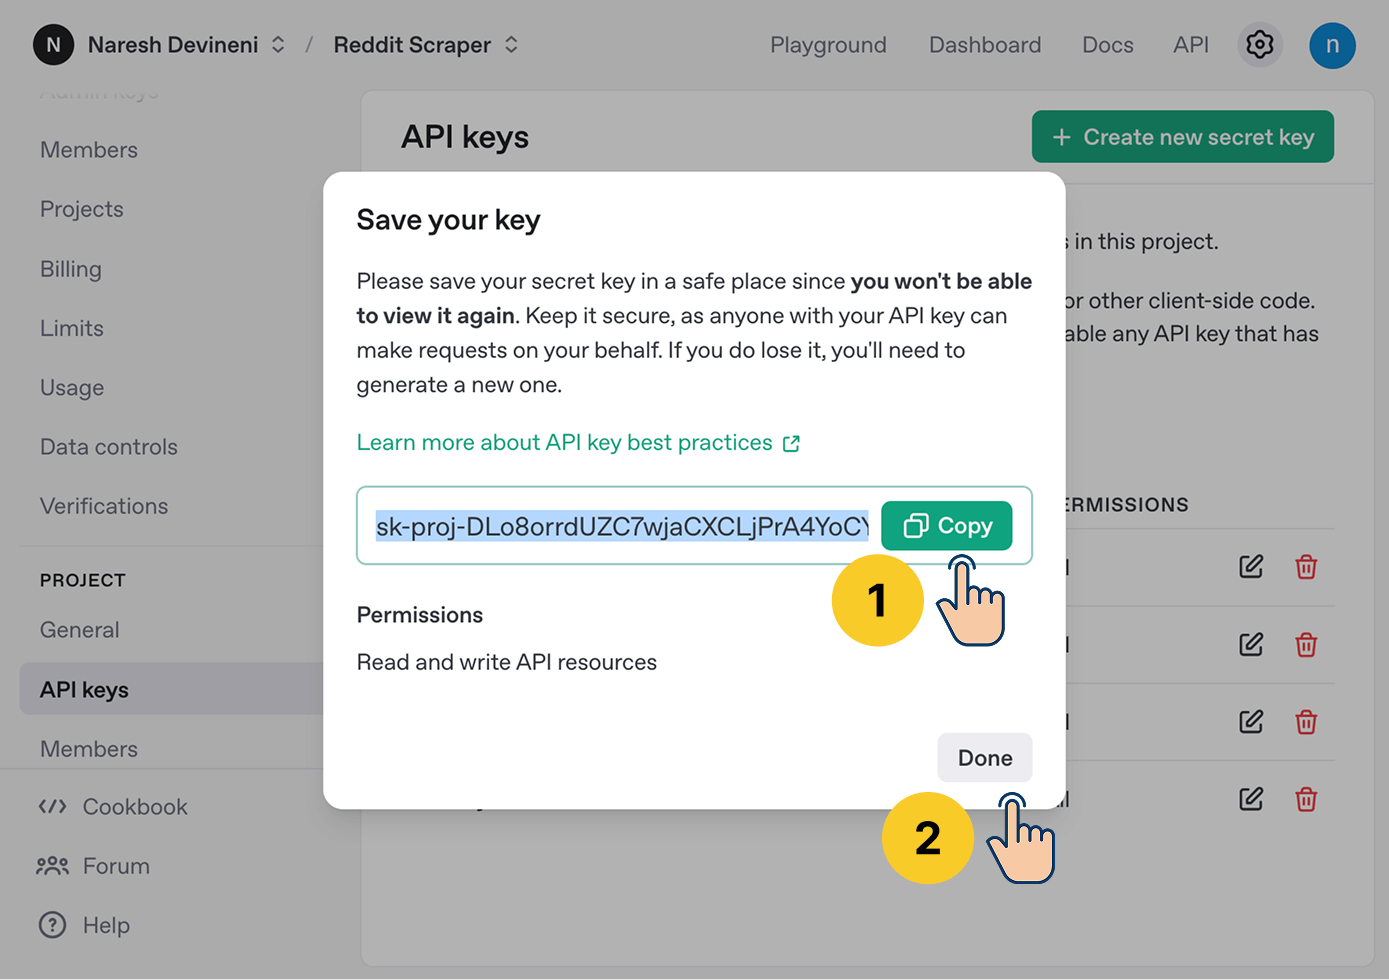
Just copy the API key and store is somewhere safe so that we can use it when we add the ChatGPT module to our automation pipeline.
After that, click on the “Done” button to close the popup.
Note: If you have lost the secret key, don't worry. You can create another API key by following the same process. You can create as many as API keys as you want (not a good practice, though).
That's all we need from the OpenAI website for now.
It's time to set up the “Resume Analysis” spreadsheet on Airtable
Airtable is a spreadsheet software like Google Sheets.
But I have many reasons to pick Airtable over Google sheets.
Airtable is much more power than Google Sheets according to my experience.
Here why Airtable is powerful
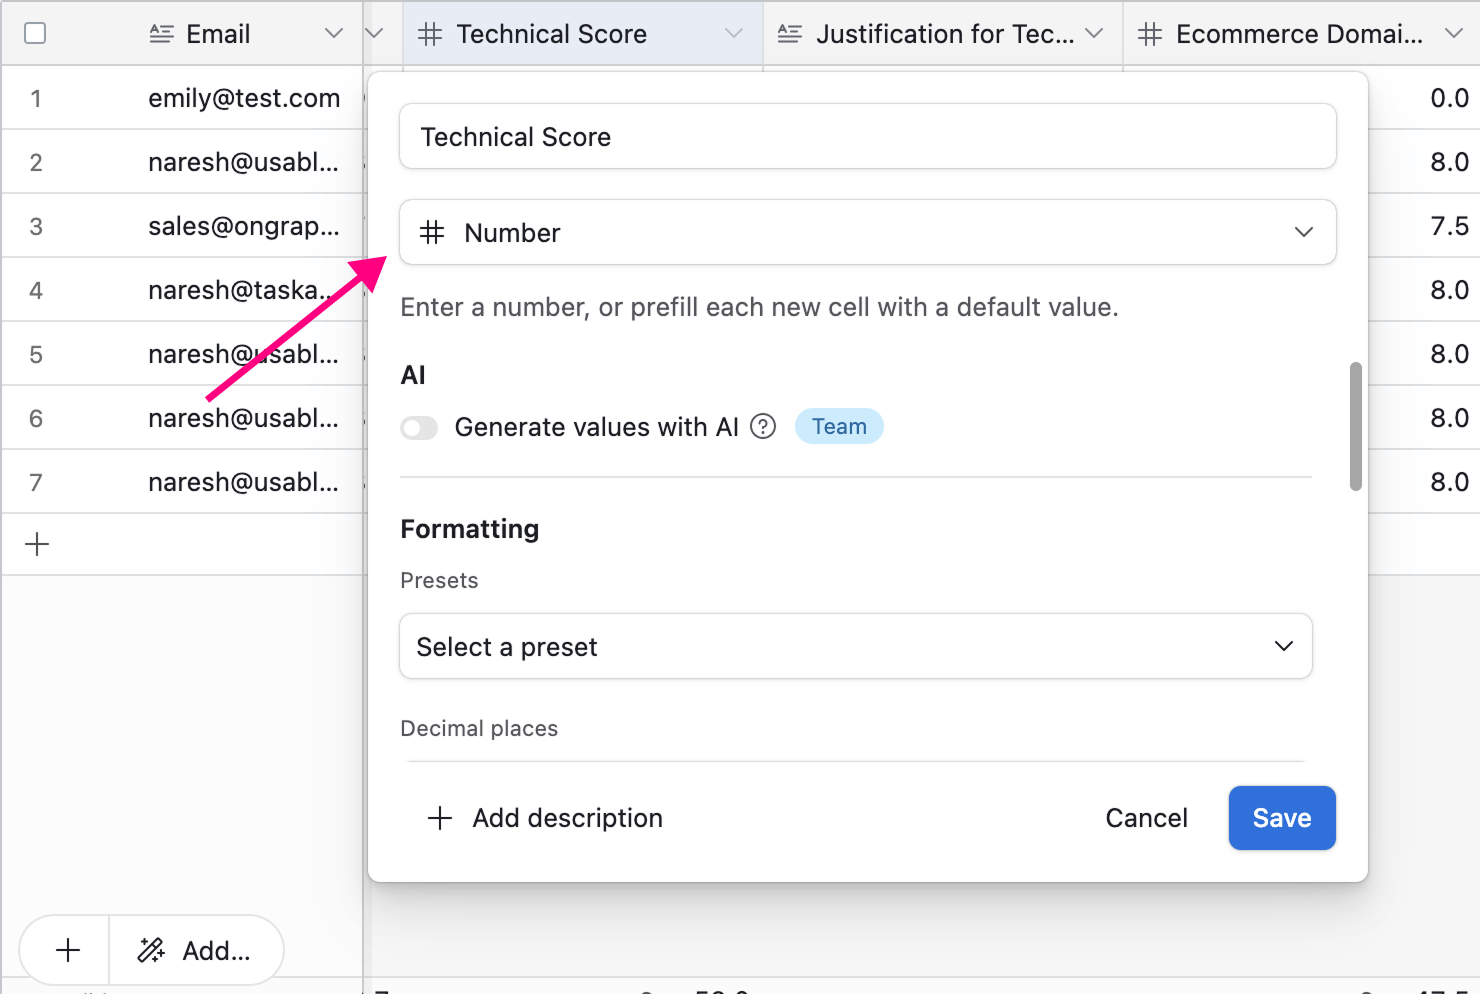
1) Airtable enforces data integrity by forcing you to assign a data type to a column.
For example, if a column stores numbers, you must pick the “# Number” as the data type:
Now, after assigning a particular data type to a column, if you try to store a value of any other data type, Airtable will not let you do it:
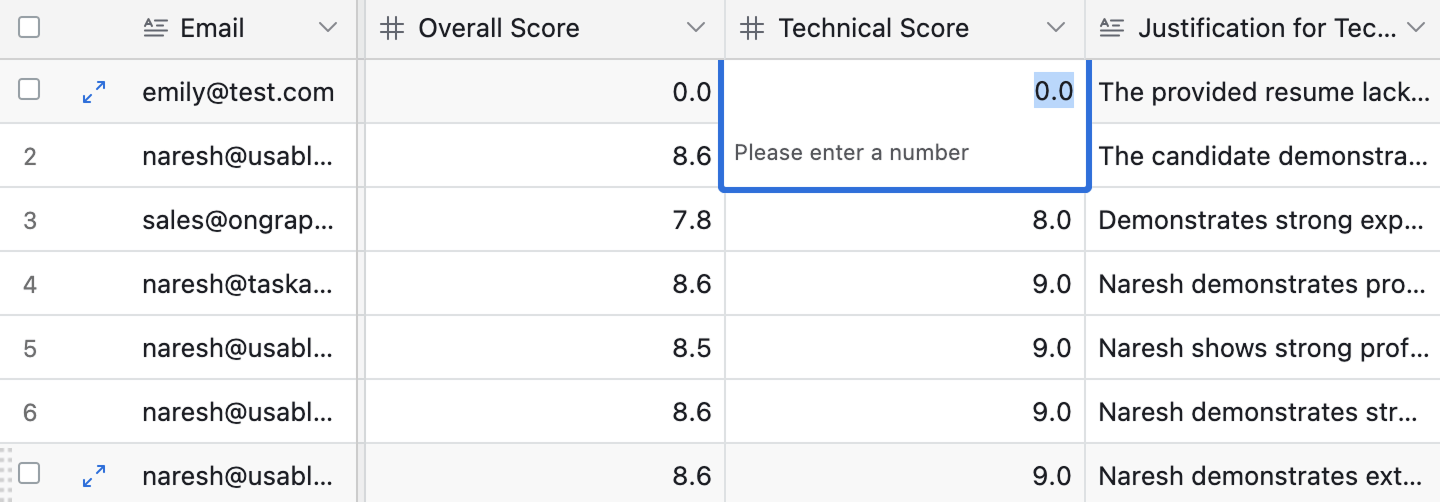
For example, If you're trying to enter a string of text into a column with “Number” as its data type, Airtable blocks you from entering alphabets from A-Z and a-z by saying “Please enter a number”.
This kind of data integrity is not supported out of the box by Google Sheets. We can enter any value with any data type inside a column.
Having said that, the strict data integrity feature of Airtable is sometimes a curse.
This is especially true if we're automatically entering data into an Airtable sheet by using automation tools like Make.com.
We have to perform data type conversion even if it is not necessary.
Anyway, another feature I really love about Airtable is its data filtering capability.
It is ultra-easy to filter any kind of simple or complex data, and it is not at all time-consuming.
And you get all this functionality for free.
Airtable has both free and paid plans.
According to my experience, the only limiting feature of the free plan is 1000 records (rows) per table (sheet).
Inside Airtable, we call:
- Entire spreadsheet as a "Base"
- A sheet of a spreadsheet as "Table"
- Rows of a sheet as "Records"
If you like to store more than 1000 records per table, you need to upgrade to a premium plan.
Apart from that, I didn't find anything else was limiting me. At least for automation purposes.
And this is only limiting if you are scraping a ton of data.
And the “1000 records per table” rule is not at all limiting for our Resume Screener automation.
So, come on, go ahead and create a free account on Airtable
After that, click on the link below and copy the Airtable base that I have created for this automation:
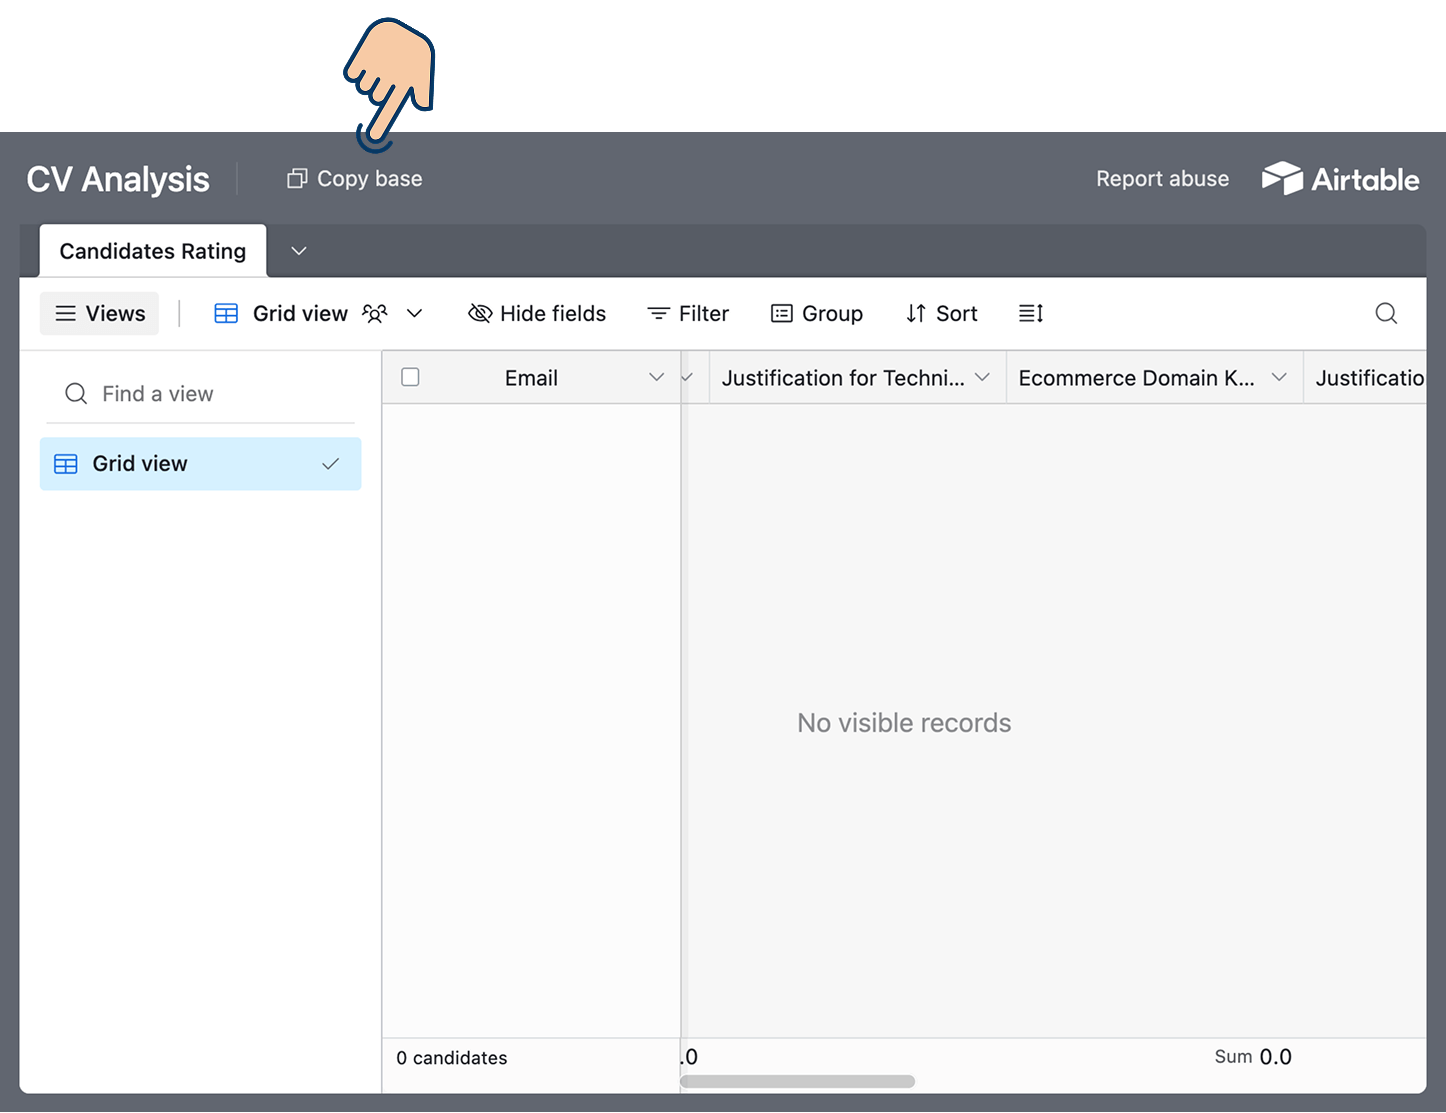
This will create a new base (spreadsheet) with “Candidates Rating” table (sheet) inside your Airtable account.
The base doesn't have any records inside it. A record get added every time an applicant submits a Tally form.
If you would like to create the “CV Analysis” base from scratch, create the following columns by selecting an appropriate data type for each:
| Column Name | Data type to select | Populated using |
| Resume submission form | ||
| Name | Single line text | Resume submission form |
| Phone number | Phone number | Resume submission form |
| Resume | Attachment | Resume submission form |
| Final Recommendation | Single line text | ChatGPT |
| Overall Score | Number | ChatGPT |
| Justification for Technical Score | Long text | ChatGPT |
| Ecommerce Domain Knowledge | Number | ChatGPT |
| Justification for Ecommerce Domain Knowledge | Long text | ChatGPT |
| Skills Verification Score | Number | ChatGPT |
| Justification for Skills Verification | Long text | ChatGPT |
| Strengths | Long text | ChatGPT |
| Areas of Improvement | Long text | ChatGPT |
Please remember that, unlike the columns of a Google Sheet, When creating a column inside Airtable, we need to assign a data type to it.
Wow! We are going to collect a lot of data about a resume in an exhaustive way with the help of ChatGPT.
I created this for an HR team and they loved it.
Also, just like Tally.so, Airtable uses OAuth authentication to let you access its API. It doesn't provide API keys.
It used to. But now it totally switched to OAuth.
Anyway, that's all for now about Airtable.
We are almost there now.
Creating an API key for Convertio
Why Convertio?
As I said in the previous lesson, applicants mostly use .pdf and .docx files for submitting their resumes, but ChatGPT only understands text files when working with its API.
So, we have to use a file conversion service like Convertio for converting the resume docs into text files so that ChatGPT can digest the individual resume content.
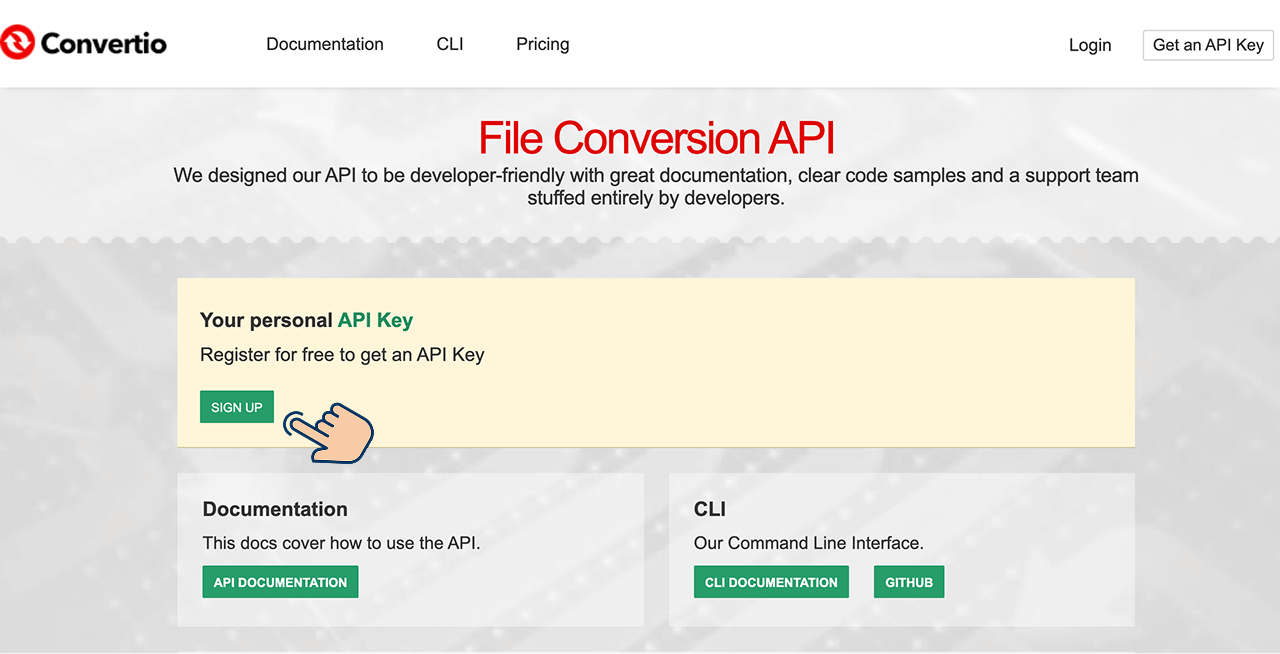
Convertio offers a generous free plan too, and I have second thoughts about it.
So, visit the “developers” version of Convertio website and sign up for a free plan to get an API key:
After creating an account, you will be taken to the premium pricing page of the API:
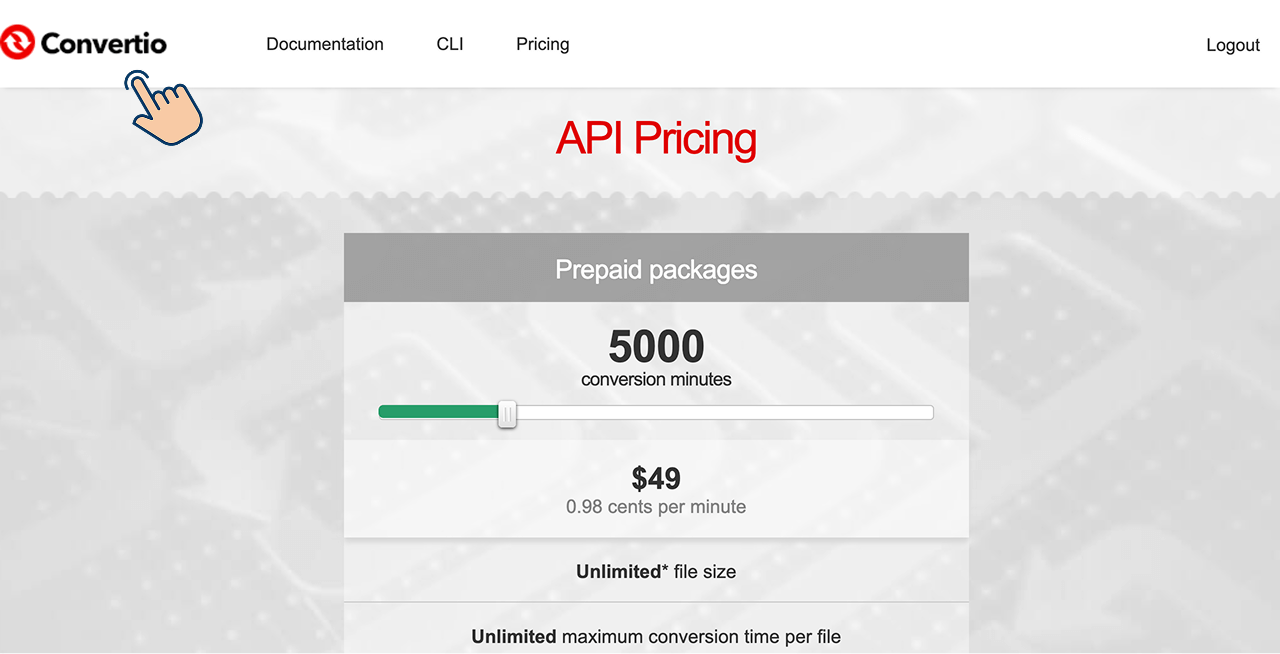
But we don't want to purchase a premium API plan for the purposes of the course.
So, Click on the Convertio's logo located in the top-left-hand corner of the screen to visit the Homepage:
https://developers.convertio.co
And there will you find the API key for using Convertio's service inside our automation:
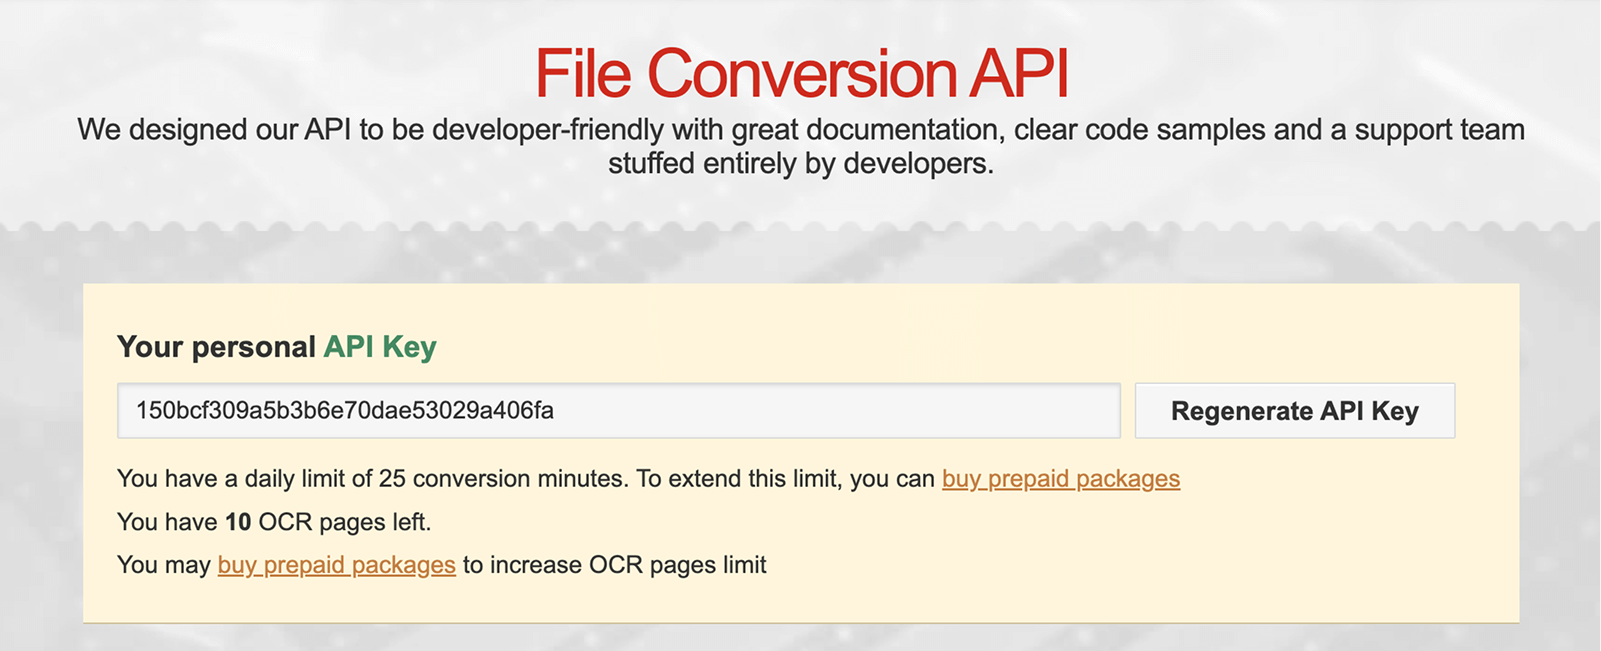
We will come back to this page when we add a Convertio module to our automation pipeline.
Anyway, we have now set up a perfect stage for building our automation.
Next…
Step 3: Implementing the automation
In the next lesson, we will start implementing the automation pretty quickly because we have almost figured out everything already.