Running the automation and dealing with any aftermath

It is time to test our automation.
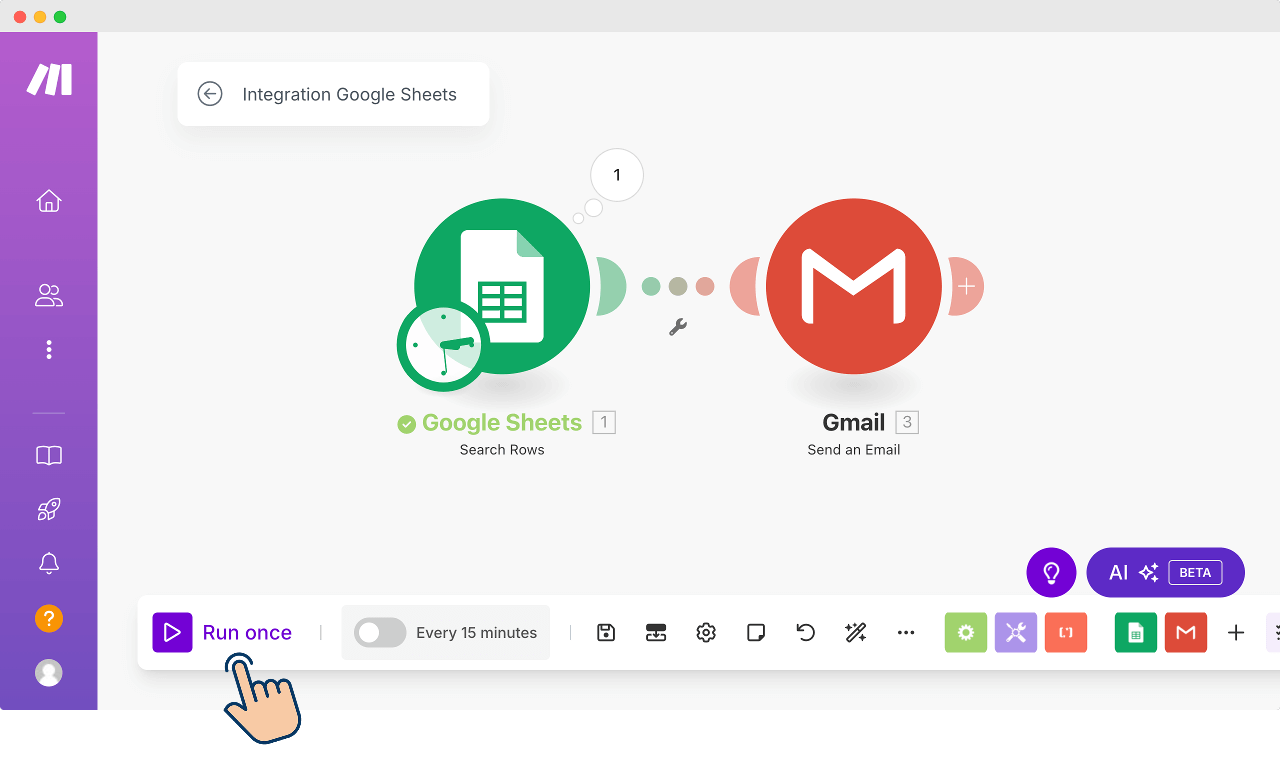
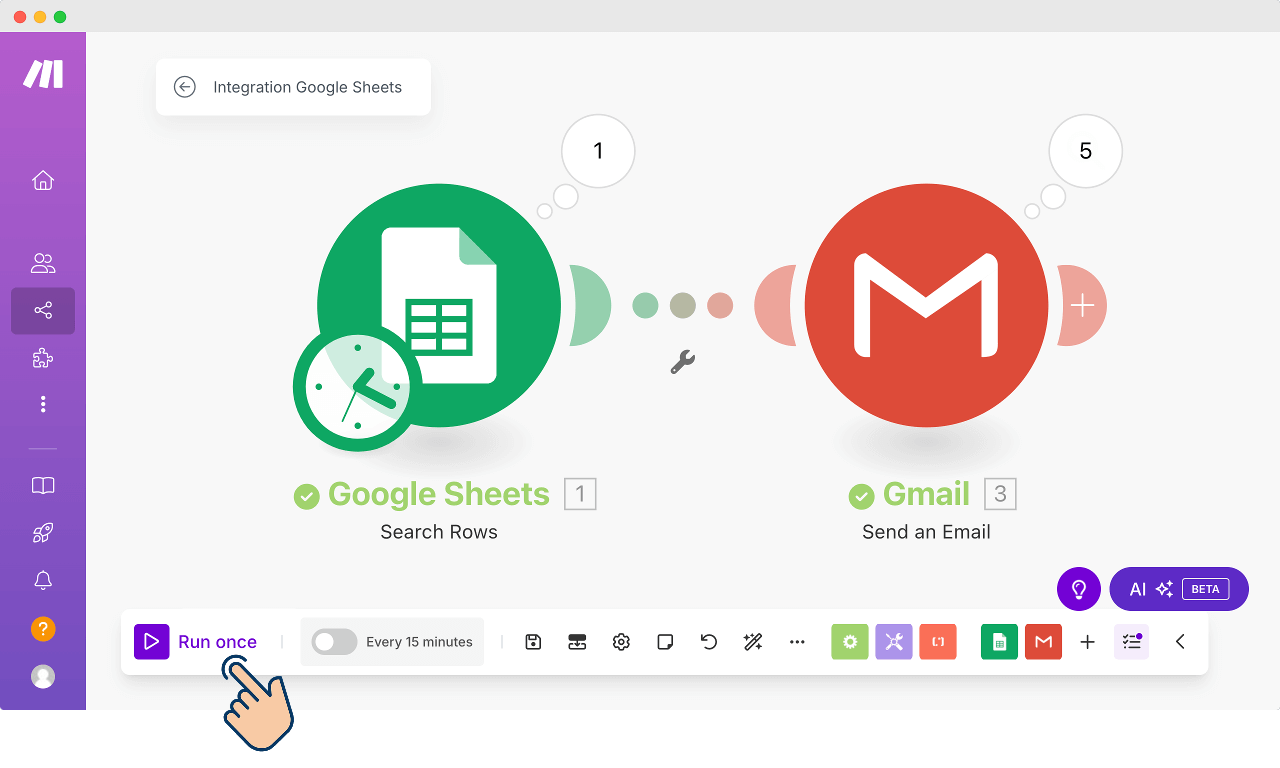
To run the automation, click on the “Run once” button:
That's all, emails with quotes are now sent to the leads as expected:

Come on, let's test this out.
Go ahead and see the “Sent” screen of your inbox.
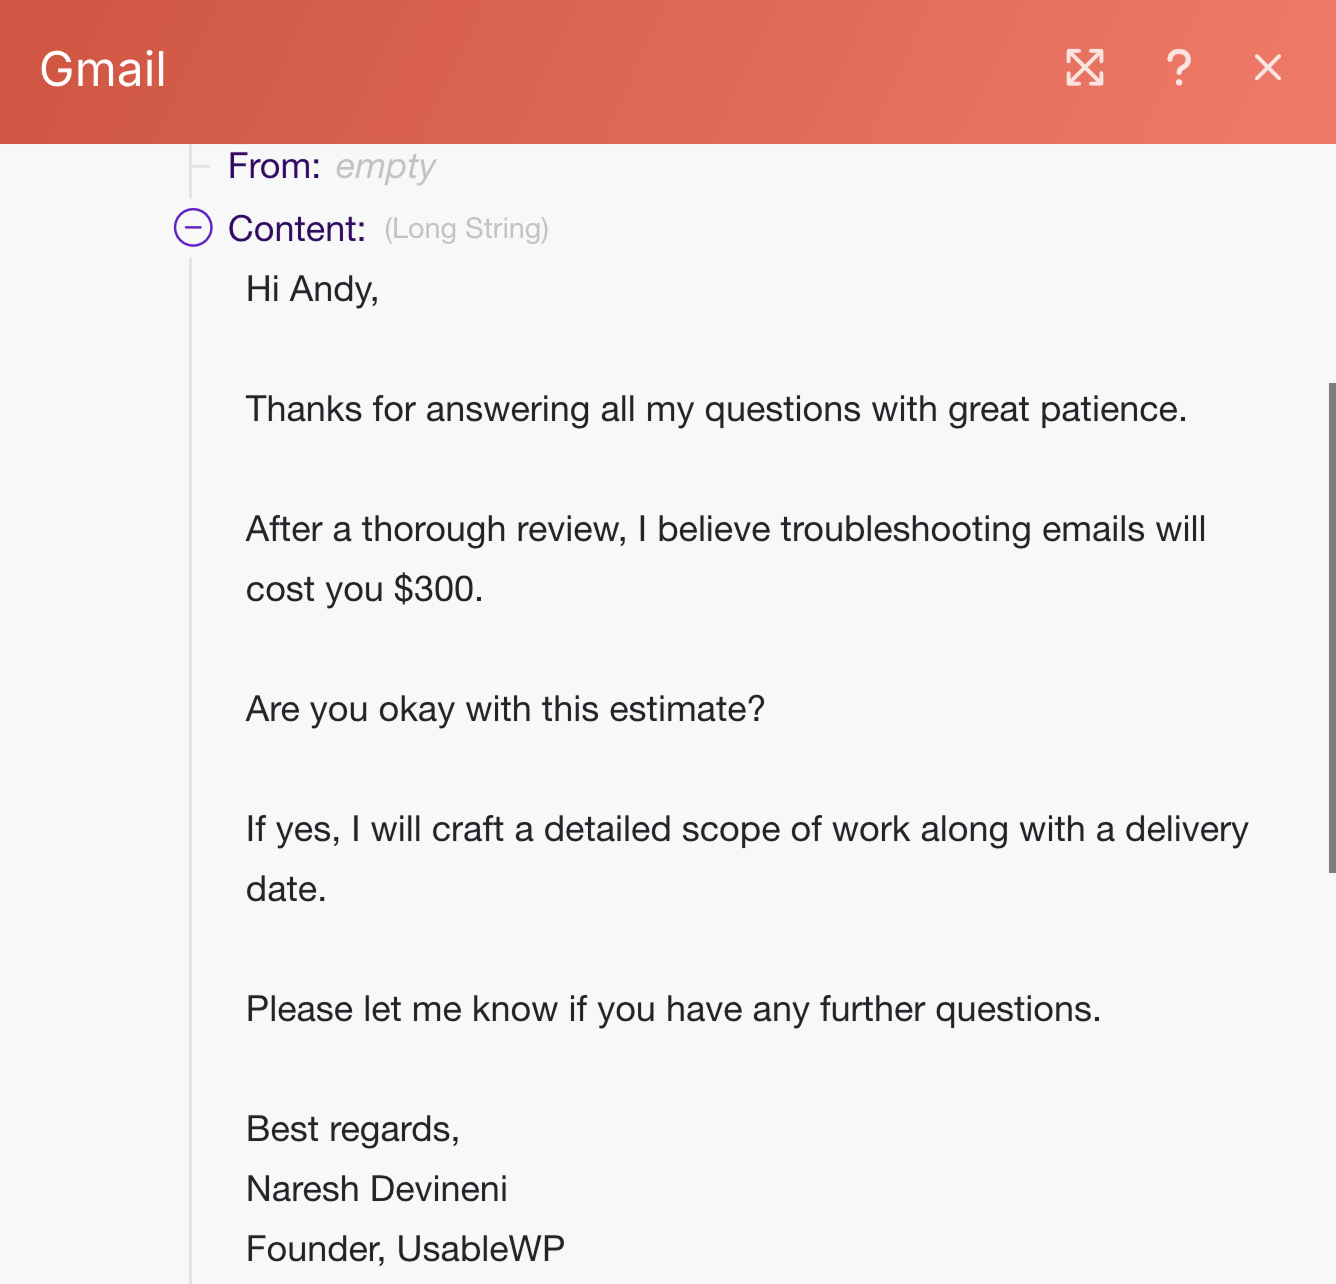
Next, preview one of the emails sent:
And bang!
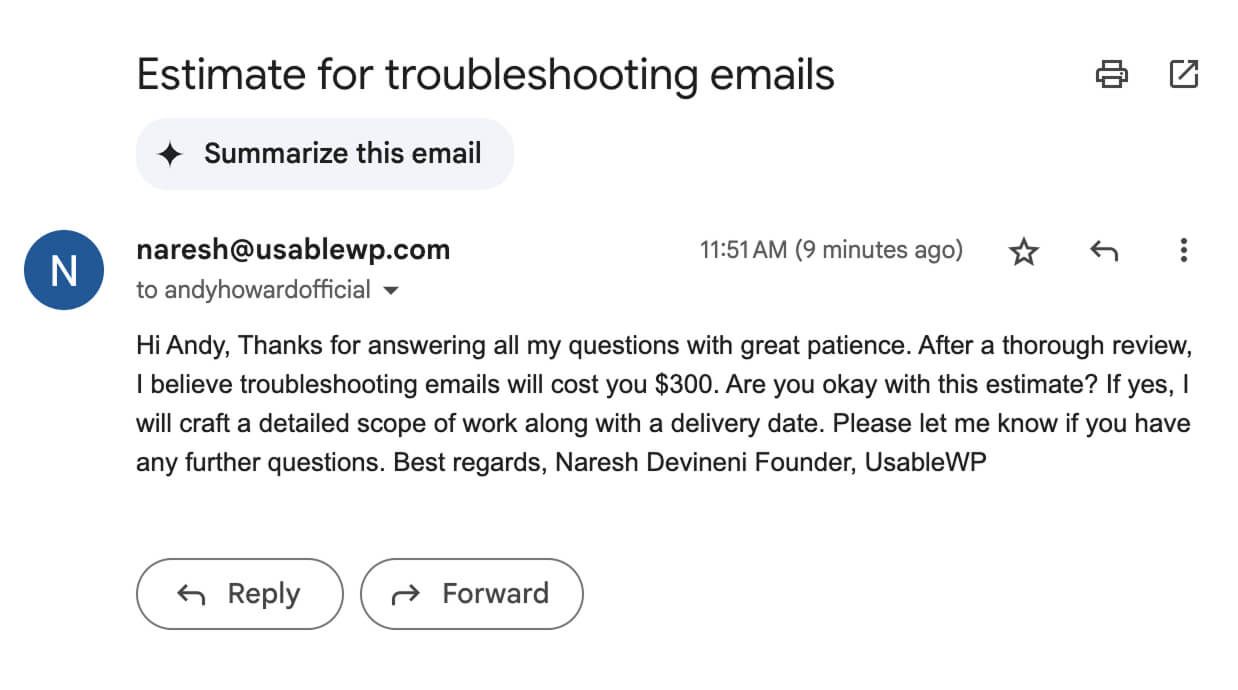
Aftermath: The email message has lost its formatting.
It was supposed to look like this with a good gap between the lines:
I went ahead and checked other emails and all had the same formatting problem.
“What went wrong?”
It was my mistake.
The “Content” field indeed preserved the line breaks we manually added.
We can confirm it by checking the input given to the “Send an Email” module:
But it looks like the Gmail API didn't respect the manual newlines.
This means, although sending the content (input) to a particular service is in our hands, we have no control over how that service handles it.
“Got it! But how do we fix it!”
There are two ways we can fix it:
1) Using HTML <br> tags inside the content box
2) Using the “newline” dynamic placeholder from the Data Mapping Panel. The panel is more than what you think:
Having said that, when I tried the “newline” placeholder with Gmail's content field, the Gmail API didn't respect it for the line spacing.
We can also say that this could be an inconsistency from the Make.com side.
This also means that the “newline” placeholder can work as expected with other apps of the Make.com.
It worked well with a few other apps I tried. But currently, it is not just working with the Gmail API.
So, the only solution for fixing our current problem is…
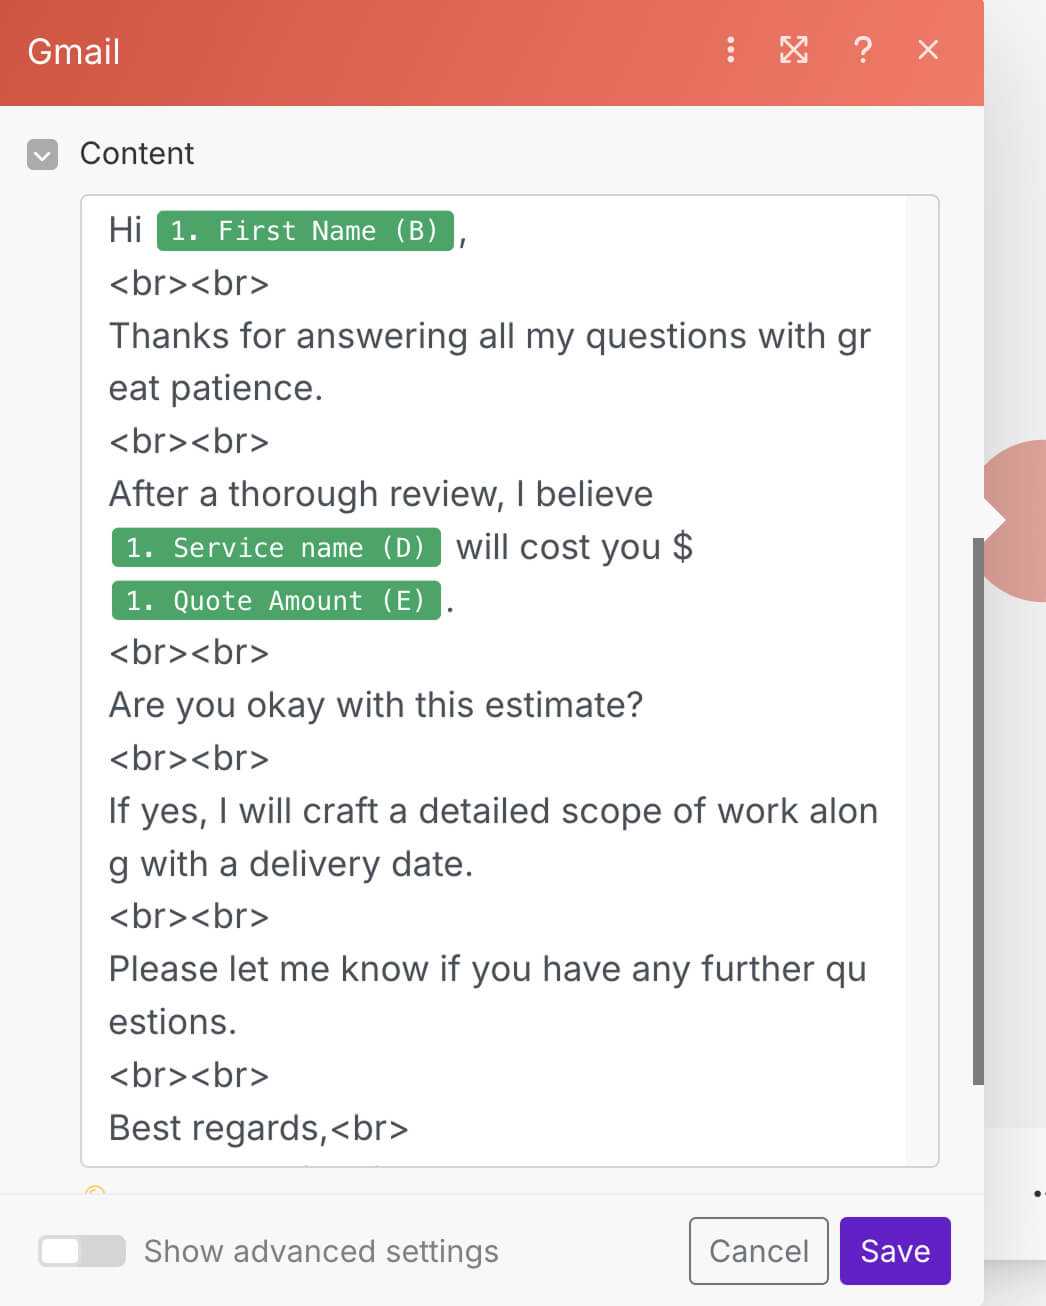
Using HTML <br> tags inside the content box
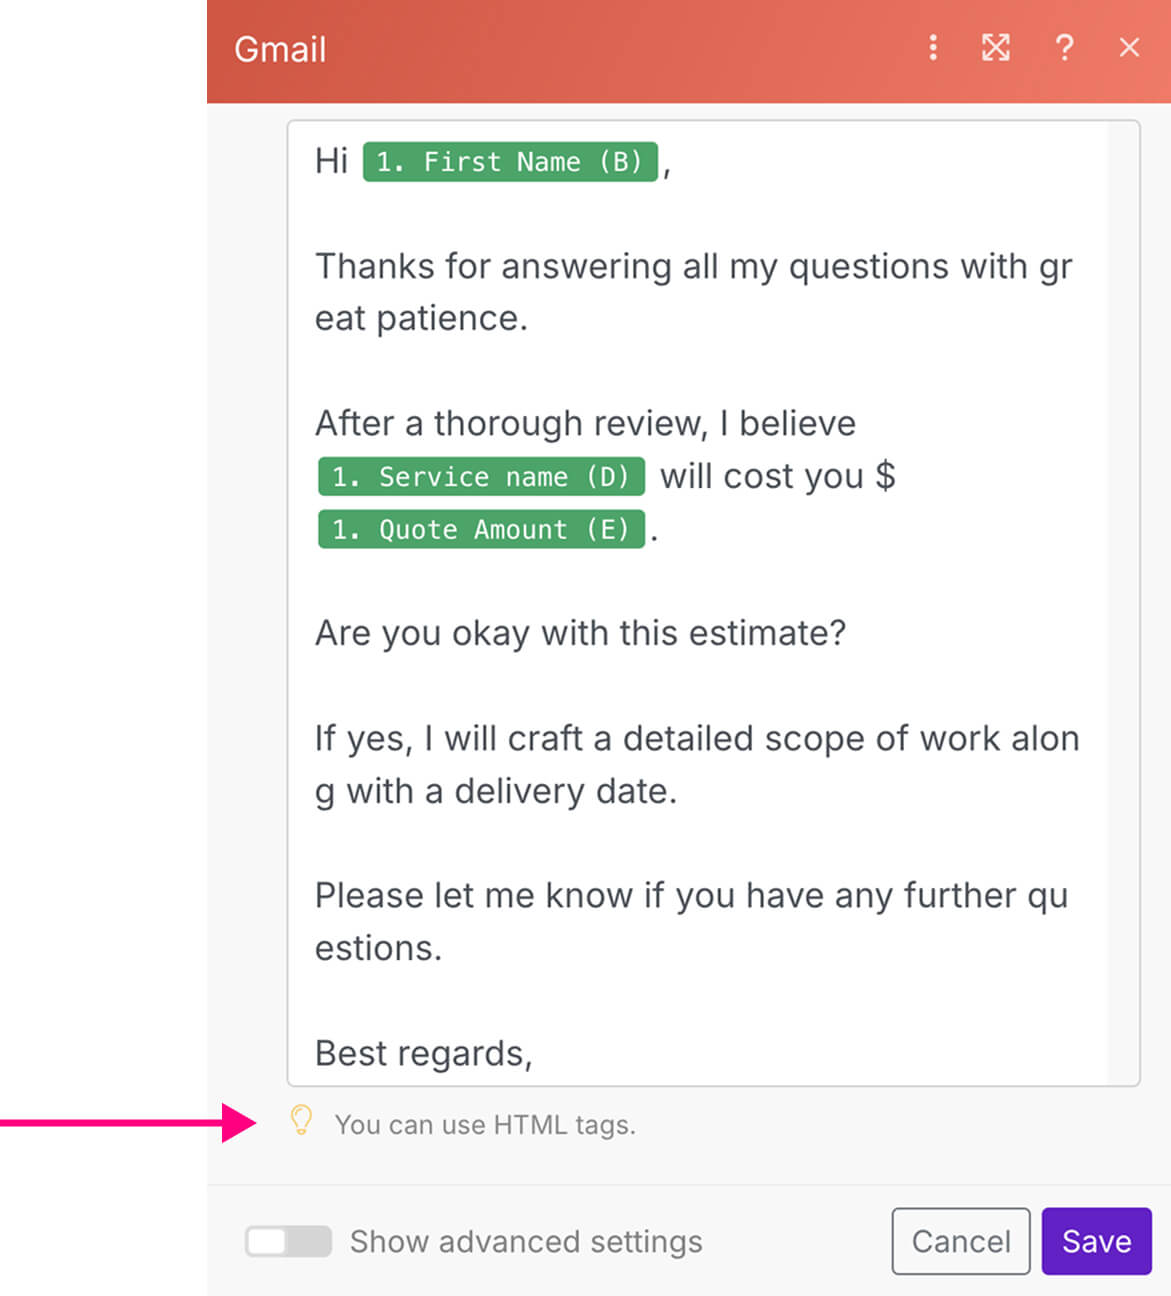
If you notice, at the bottom of the “Content” field, there is an instruction that says you can use HTML tags.
So, technically, we can add <br> tags anywhere inside our message to achieve spacing between the lines:
Hi Andy,
<br><br>
Thanks for answering all my questions with great patience.
<br><br>
After a thorough review, I believe troubleshooting emails will cost you $300.
<br><br>
Are you okay with this estimate?
<br><br>
If yes, I will craft a detailed scope of work along with a delivery date.
<br><br>
Please let me know if you have any further questions.
<br><br>
Best regards,<br>
Naresh Devineni<br>
Founder, UsableWP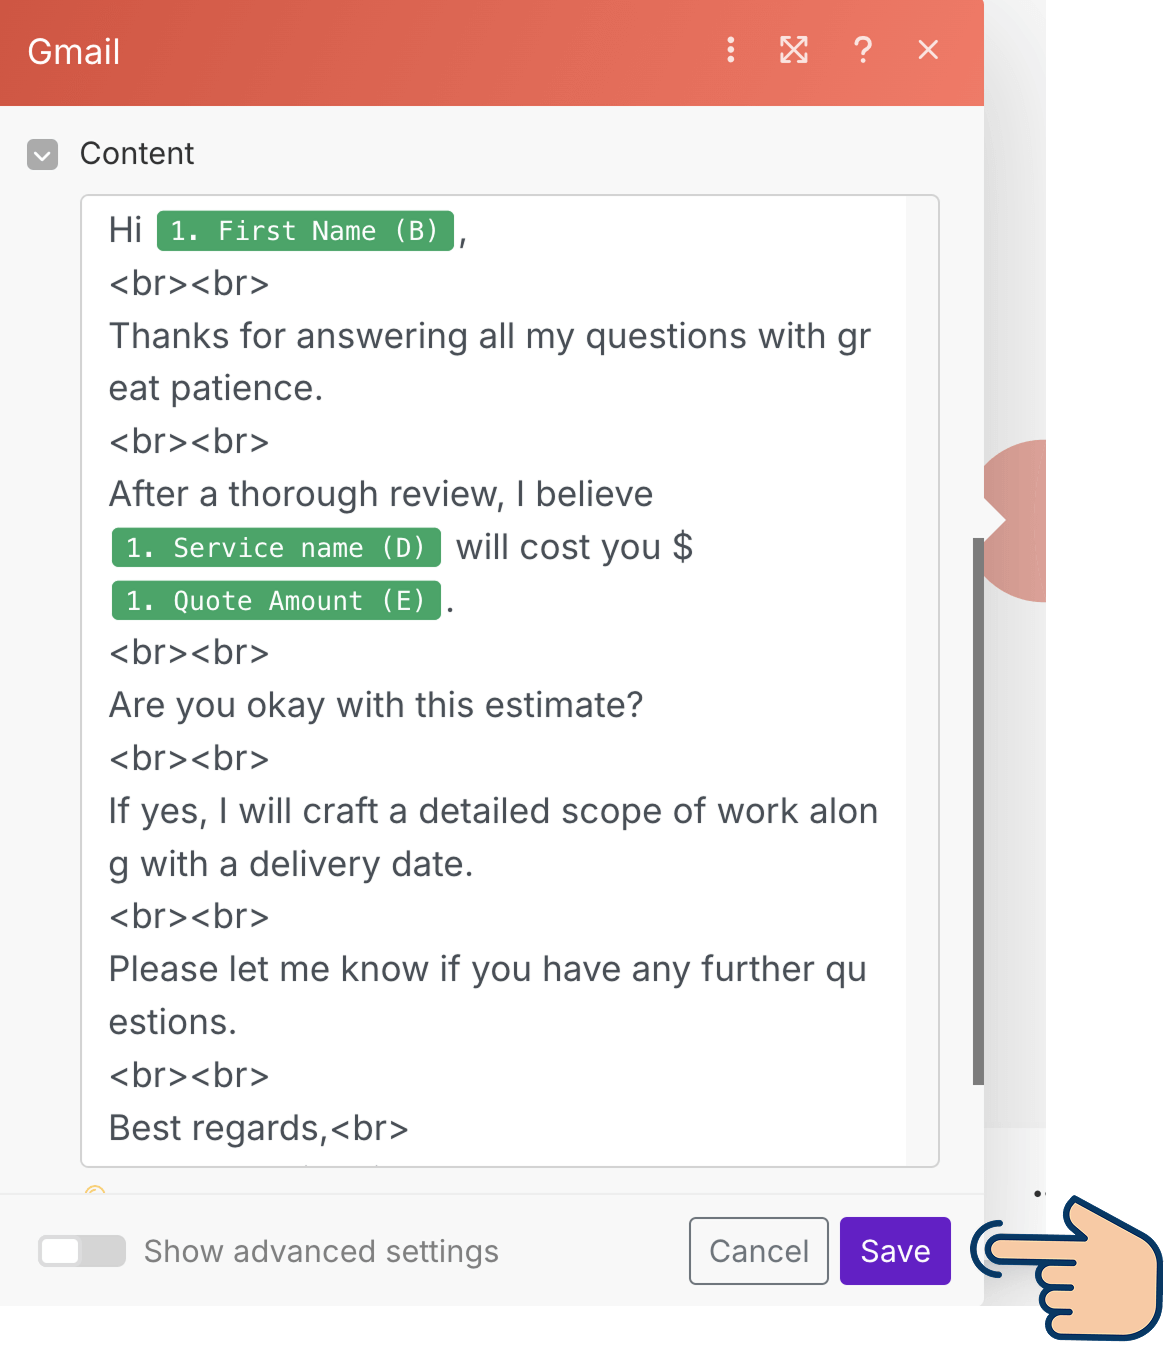
The <br> tag in HTML is used for line breaks in a text. br stands for “Break”.
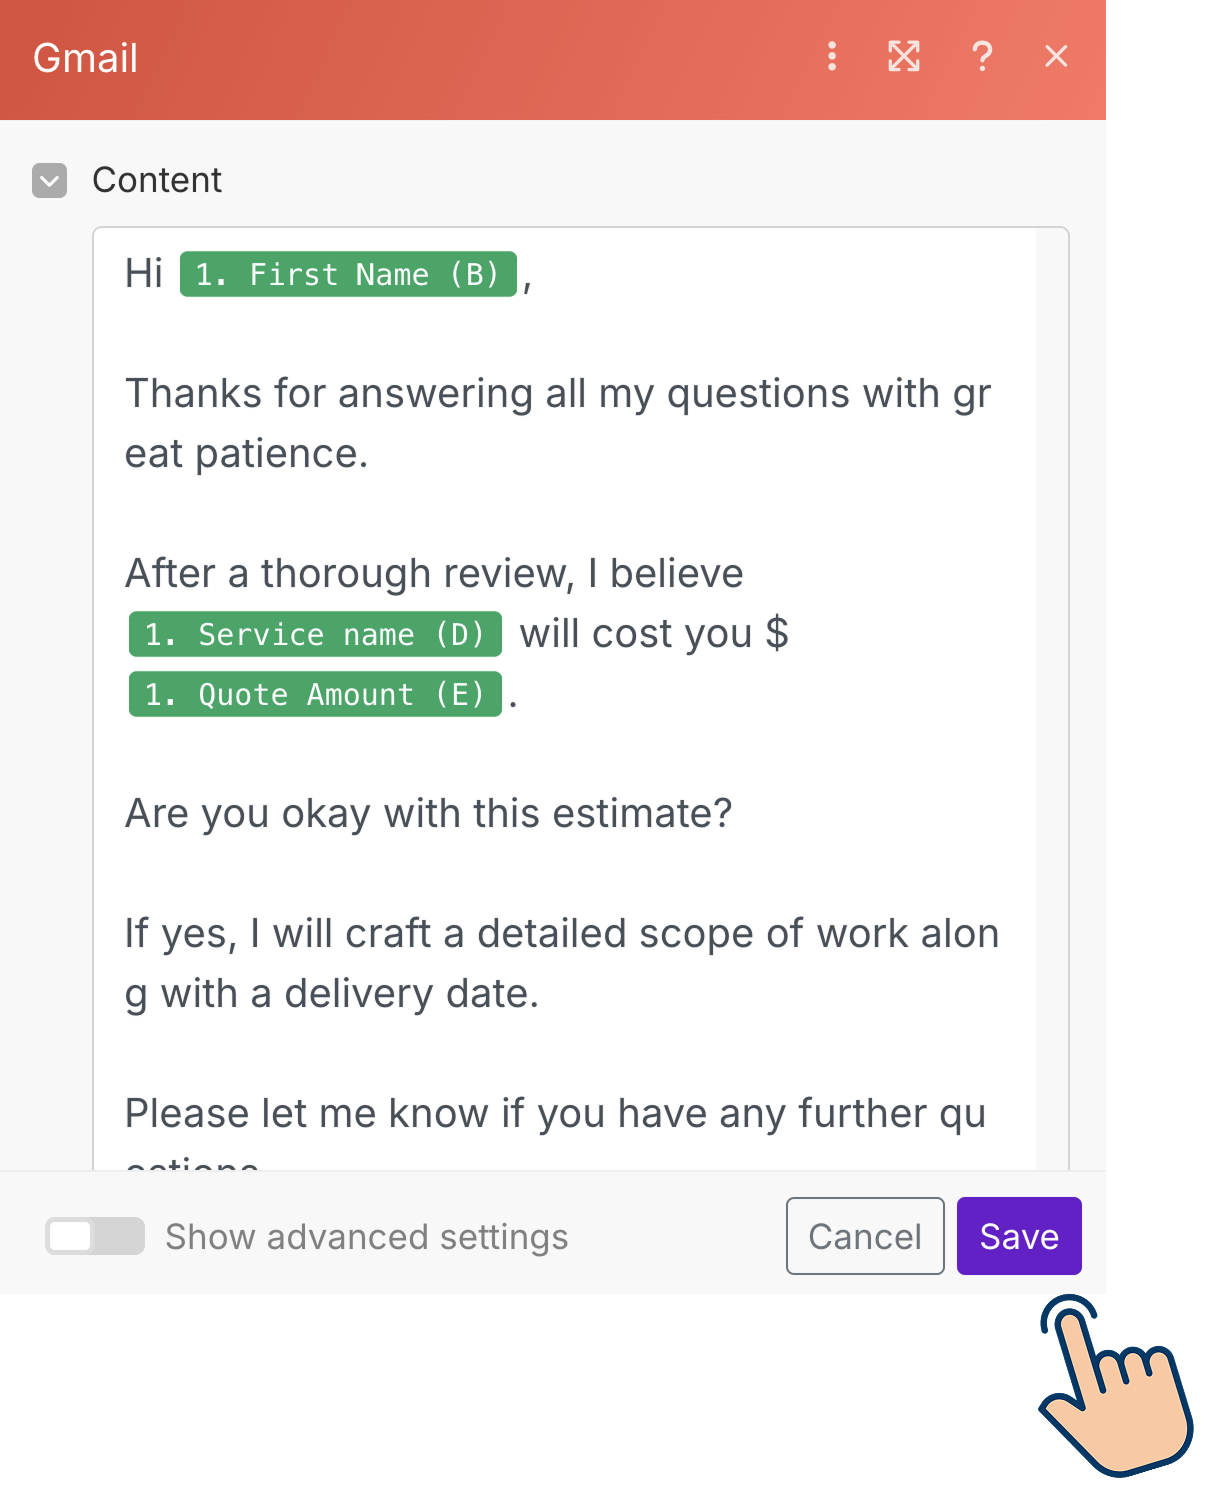
So, let's go ahead and add <br> tags in the appropriate locations.
I added two <br> tags after each line because I want “double” line spacing between each paragraph.
Did you add the <br> tags too?
“Yep!”
Nice!
Next, click on the “Save” button to save the changes and run the automation once again:
A new set of emails are now sent again to the respective leads.
So, let's go to our inbox and see if we got the formatting correct this time:
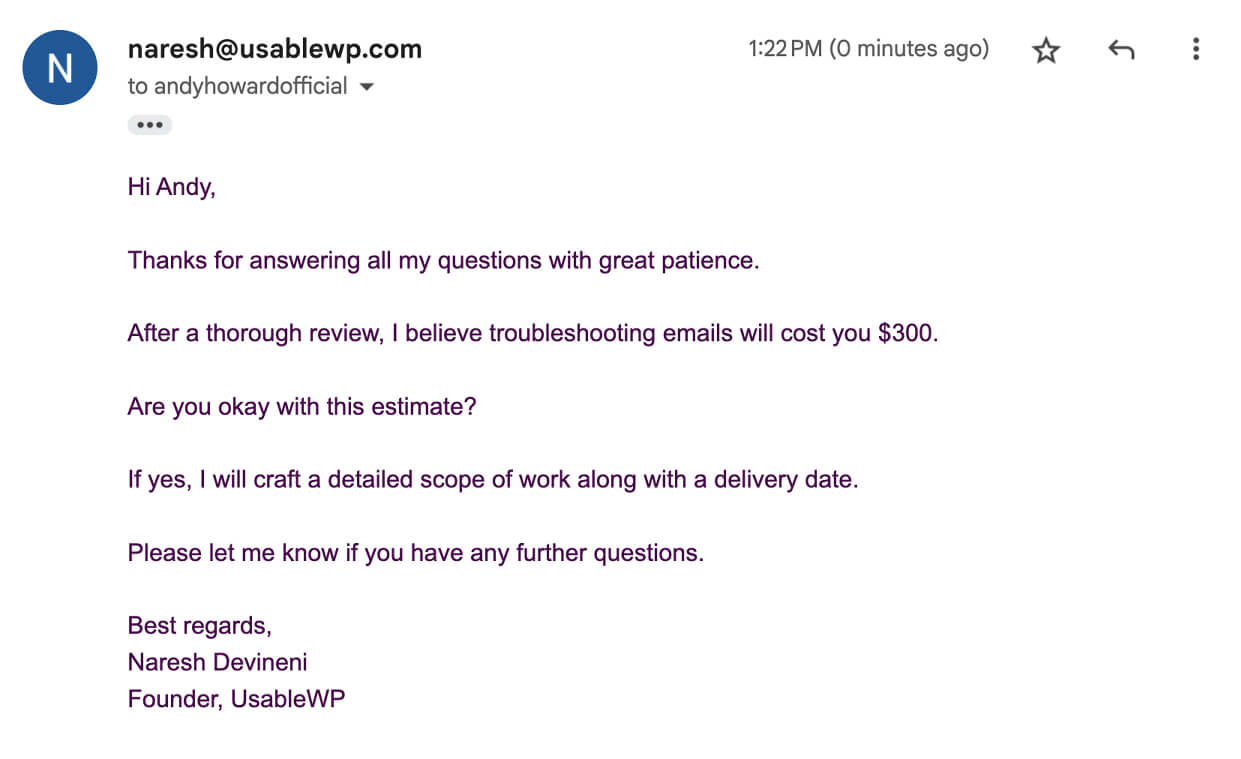
Indeed!
Adding <br> tags has fixed the line-spacing for us.
Anyway, now that our automation is working as expected, we need to:
- Rename the automation in a better way than “Integration Google Sheets”
- Save the automation so that we can re-access it whenever we want.
And we will do that in the next lesson.