Project: Automatic quote generation
During the day, I am a WordPress expert with over 15 years of freelance career.
Here is the most important thing I have learned: Any kind of freelancing is a numbers game.
The more leads you interact with, the higher chances of turning some of them into your paying clients.
So, for me, the goal is simple:
- Interact with 20 leads a day (Inbound and outbound)
- Send at least 5 quotes
- Convert at least one into a paying client
Sending 5 quotes a day was crucial for me.
And it was totally a manual process before I learned automation.
I used to copy, paste, and modify the same quote template for every client:
Subject: Estimate for [Service Name]

Hi [First Name],

Thanks for answering all my questions with great patience.

After a thorough review, I believe [Service Name] will cost you $[Quote Amount].

Are you okay with this estimate?

If yes, I will craft a detailed scope of work along with a delivery date.

Please let me know if you have any further questions.

Best regards,
Naresh Devineni
Founder, UsableWP
It worked great for me, but manual tasks like above always leave room for error, and I found myself making mistakes like:
- Addressing the wrong client by name
- Quoting the wrong price
- Forgetting to send estimates altogether when deep into other projects
Overtime, I have felt embarrassed with the above mistakes because I ended up losing some good projects and clients.
So, I have decided to automate the process.
After a few trial and errors, I built an automatic system that generates and sends accurate quotes in a reliable way.
I thought it will be complicated, but it was exact opposite.
And starting from this lesson, we’ll recreate the exact automation I use—one that eliminates mistakes and saves time along the way.
We will start simple and gradually improvise it by utilising some important features of make.com.
Sound good?
Let's begin :D
We will divide building the automation into three steps:
- Planning the automation
- Preparing the data for automation
- Implementing the automation
This lesson is all about planning and preparation.
Step 1: Planning the automation
Before building any automation, it is important to plan it properly.
And the best way to do this is by answering the following four questions.
Note: A well-designed automation begins by defining the desired output before identifying the necessary input data. This approach ensures that only relevant data is collected by saving your time.
Question 1: What is the goal of the automation?
Answer: We have a spreadsheet with five rows:

Each row represents details of a quote.
The goal is to generate a personalised quote message for each row and send it via email to the respective lead.
For example, if there are five rows, five unique emails should be generated and sent.
Question 2: What kind of output does the automation need to produce?
Answer: Since our goal is to send personalised emails, the automation must generate a quote message for each lead.
The following template must be used:
Subject: Estimate for [Service Name]
Hi [First Name],
Thanks for answering all my questions with great patience.
After a thorough review, I believe [Service Name] will cost you $[Quote Amount].
Are you okay with this estimate?
If yes, I will craft a detailed scope of work along with a delivery date.
Please let me know if you have any further questions.
Best regards,
Naresh Devineni
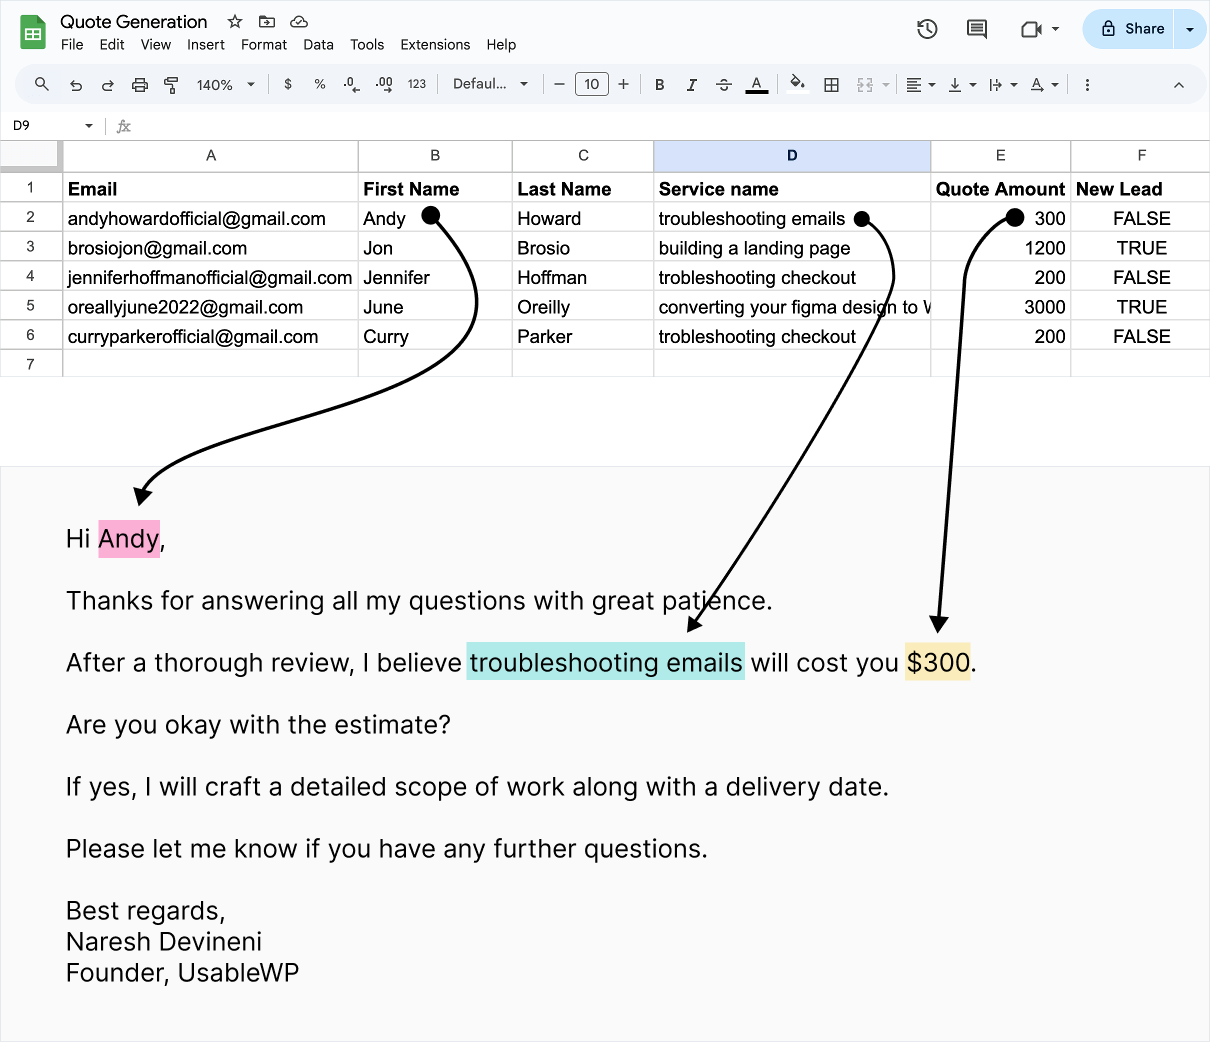
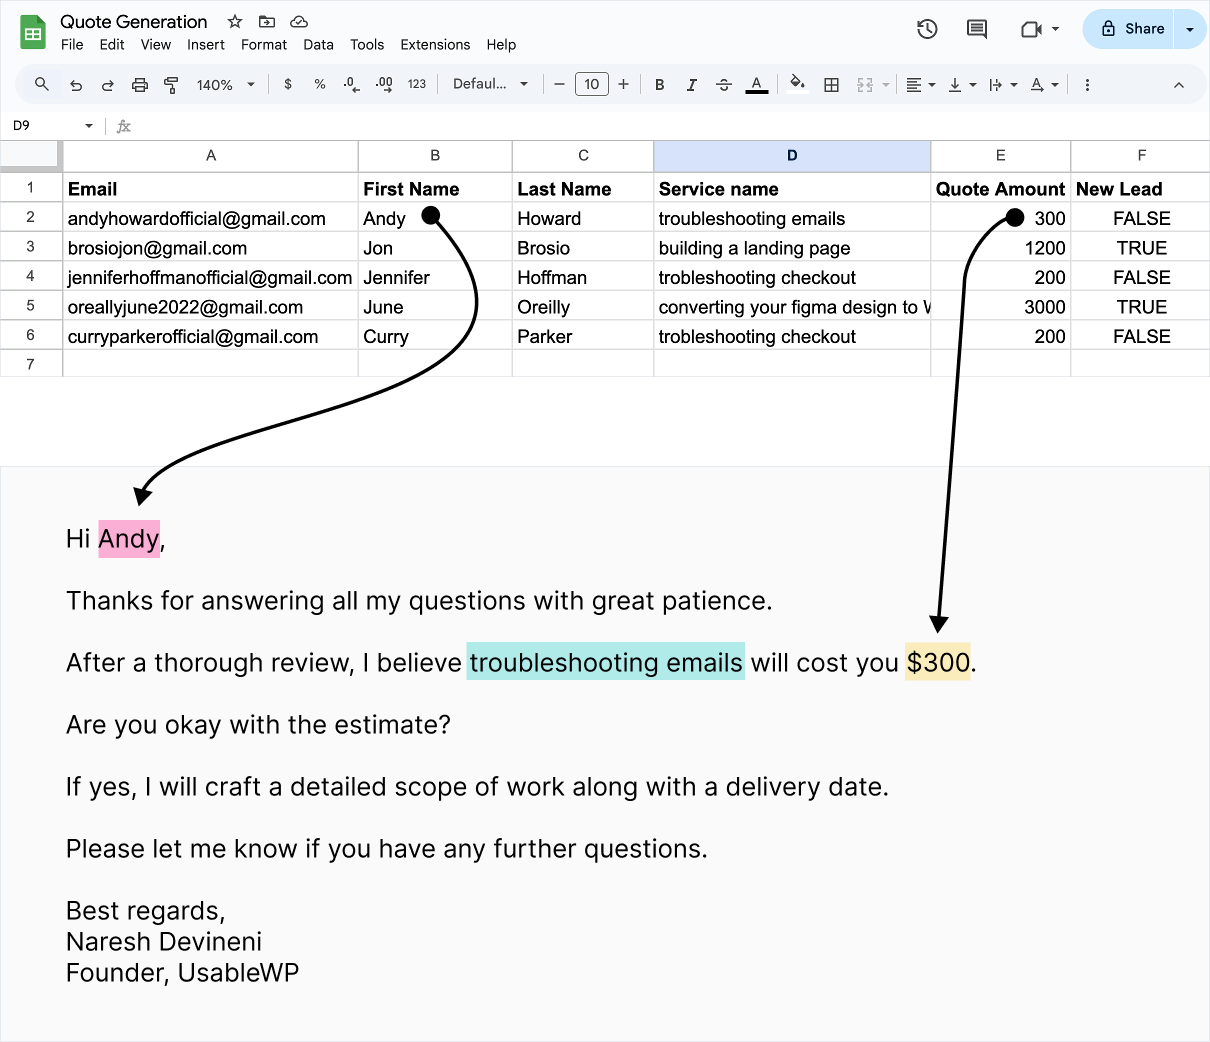
Founder, UsableWPAnd, here is a unique quote message based on the above template (placeholders are replaced with the actual data)
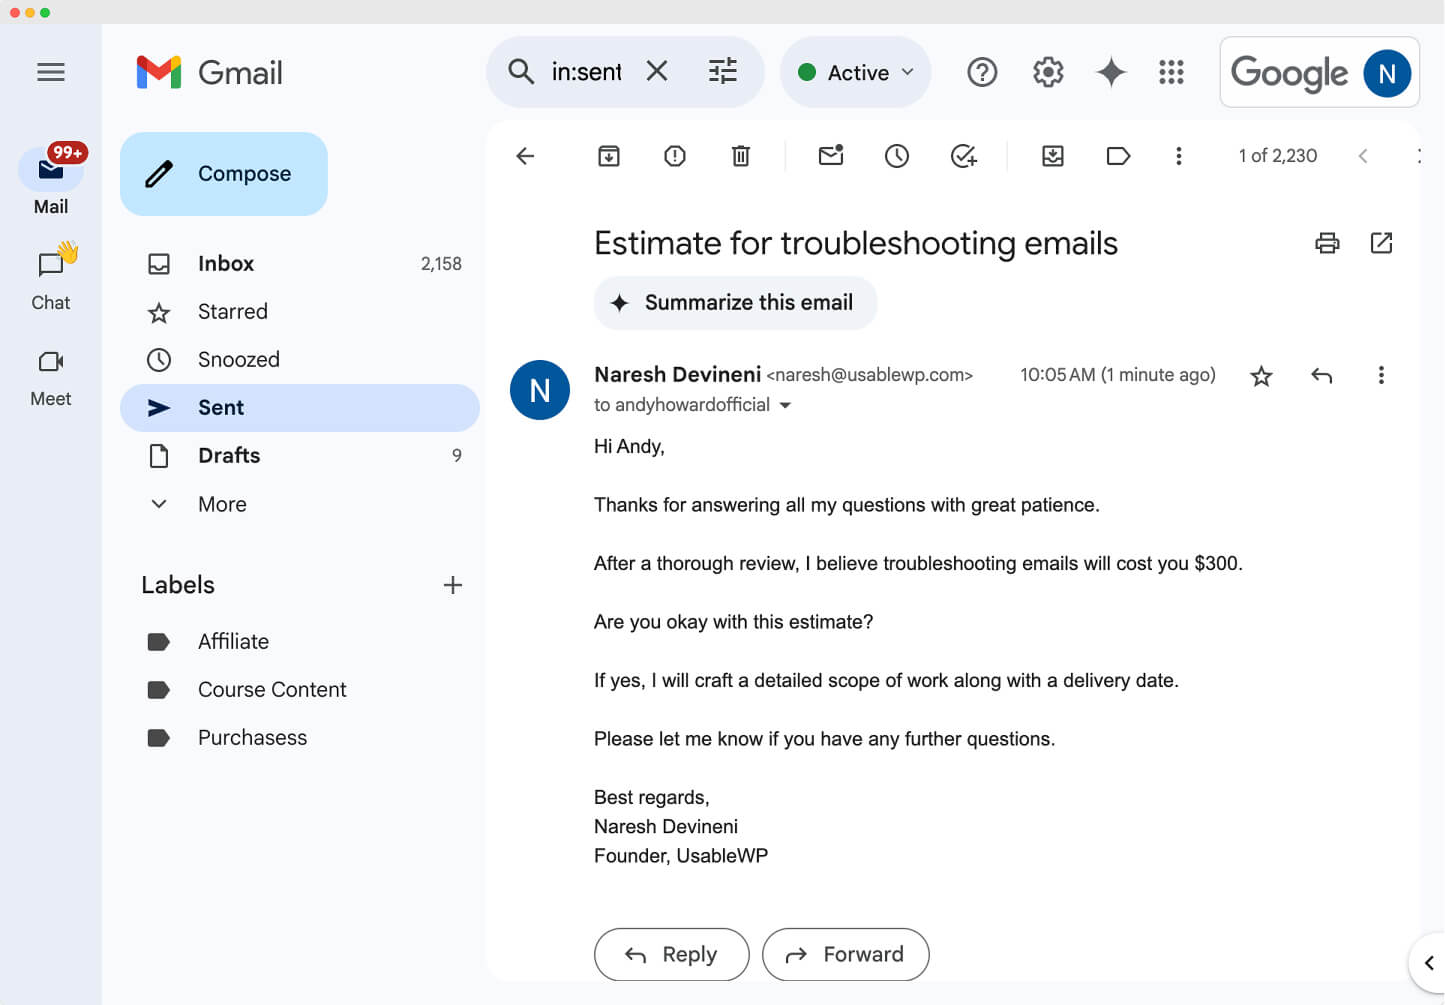
Subject: Estimate for troubleshooting emails

Hi Andy,

Thanks for answering all my questions with great patience.

After a thorough review, I believe troubleshooting emails will cost you $300.

Are you okay with this estimate?

If yes, I will craft a detailed scope of work along with a delivery date.

Please let me know if you have any further questions.

Best regards,
Naresh Devineni
Founder, UsableWP
Question 3: What input data is required to generate output like above and how to gather it?
Answer: Now that we know what the final email should look like, we can determine what input data is necessary:
- Lead's email
- First name
- Last name
- Service name
- Quote amount in dollars
- Lead Type (New Lead or Existing Client) (This will be useful for future improvements.)
Since multiple pieces of input are involved, we will use a spreadsheet as the data source.
You can use Google Sheets or Airtable for creating the spreadsheet.
We will use Google Sheet for the purposes of this lesson:
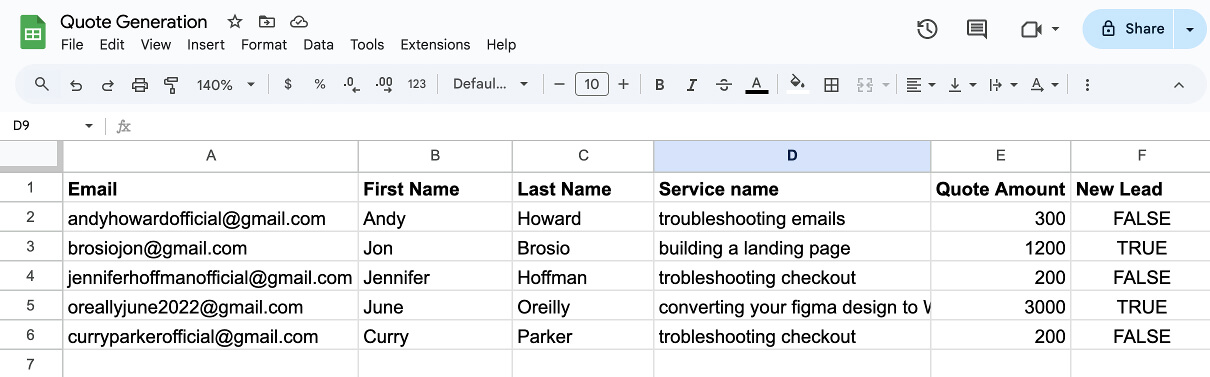
Each row in the above sheet represents a quote, and the placeholders in our email template will be replaced with data from that row.
Question 4: Once the quote message is generated, what do we do with it to achieve our goal?
Answer: Send the quote message as an email to the lead with an appropriate subject line.
And the planning phase of the automation is now complete.
Now that we have everything we need, we can start building the automation pretty quickly.
Summary
- The input data comes from a Google Sheet, where each row contains details for a unique quote.
- The automation generates a personalised quote email using the data from each row.
- It then sends the email to the lead with an appropriate subject line.
Step 2: Prepare the data for automation
- Download the CSV file that contains data for generating quotes. You can also access the spreadsheet here.
- Create a new spreadsheet inside Google Sheets
- Import the downloaded CSV file into the newly created spreadsheet
After the import is complete, your sheet should look like the screenshot below.

All the lead emails are created by me so that you can send test emails without worrying about gathering emails.
If you follow along with we and implement the automation, I will receive the quote emails.
Let's see if I get any :D
Next…
Step 3: Implementing the automation
And we will do this in the next lesson.