Implementing the automation: Step 1

To begin with, make sure you're logged into the Make.com dashboard.
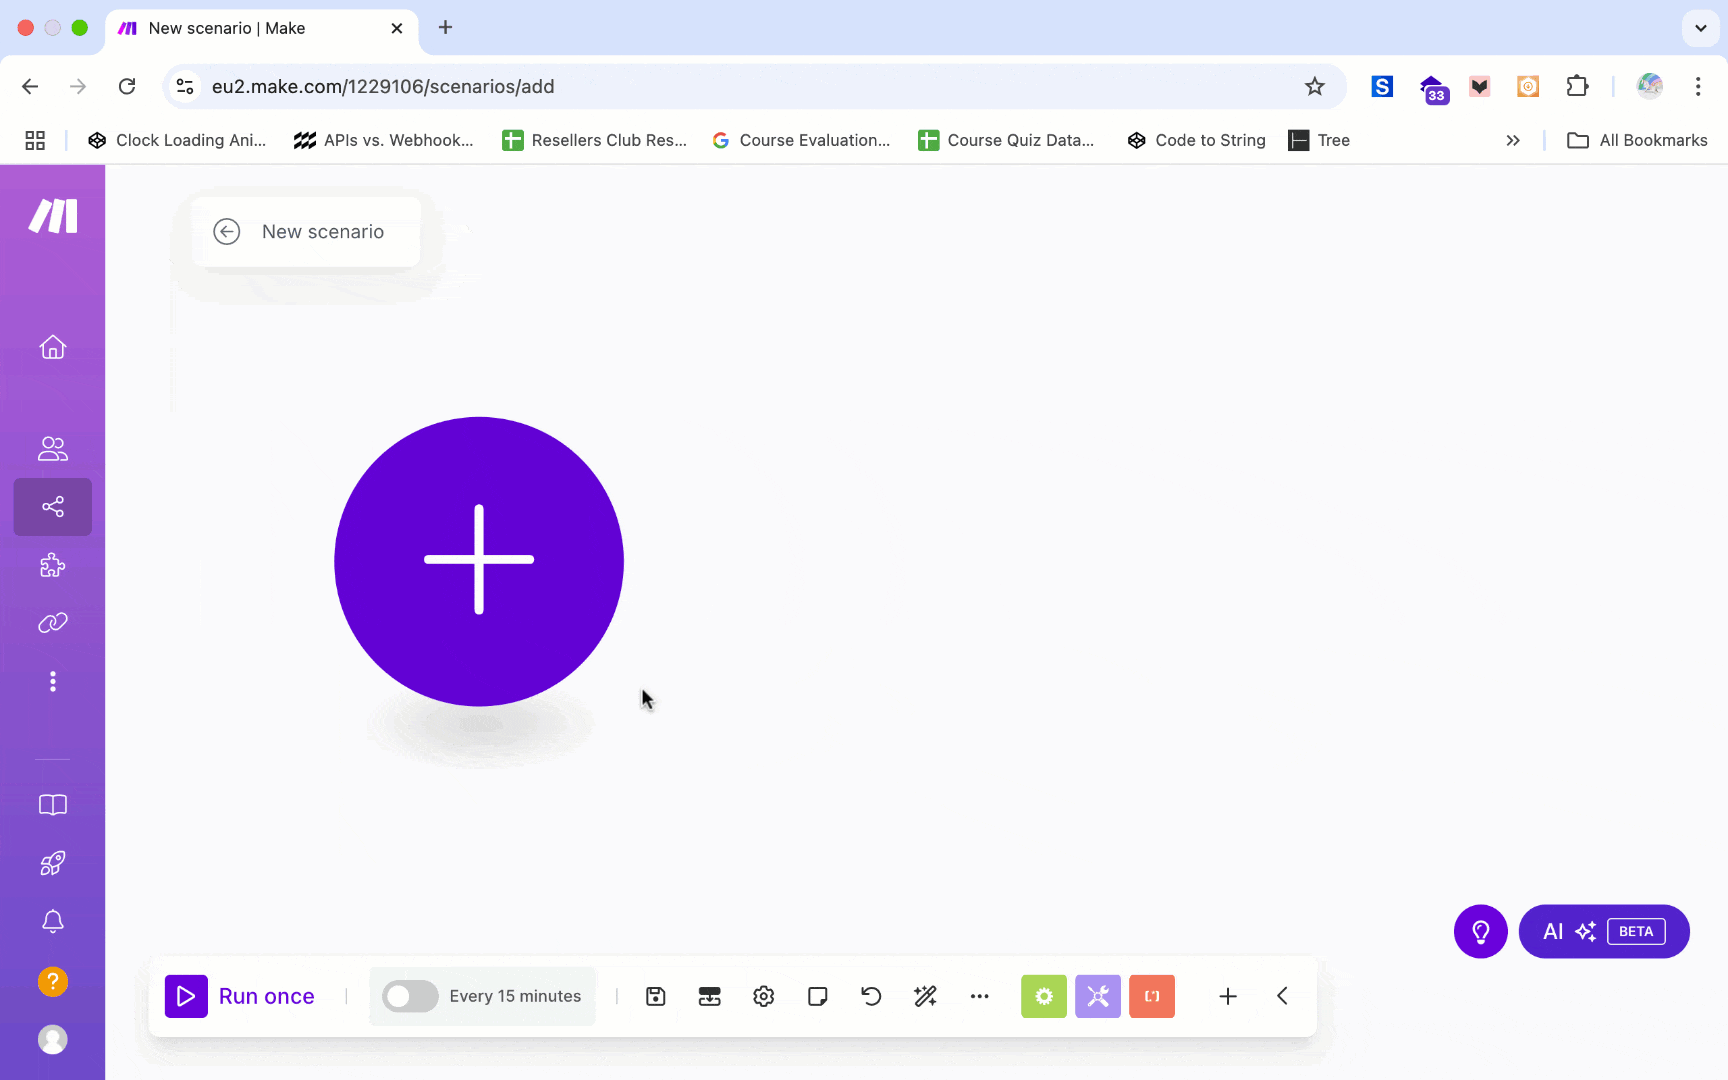
From the main menu on the left, go to the “Scenarios” screen and click on the “Create a new scenario” button to start a new automation.
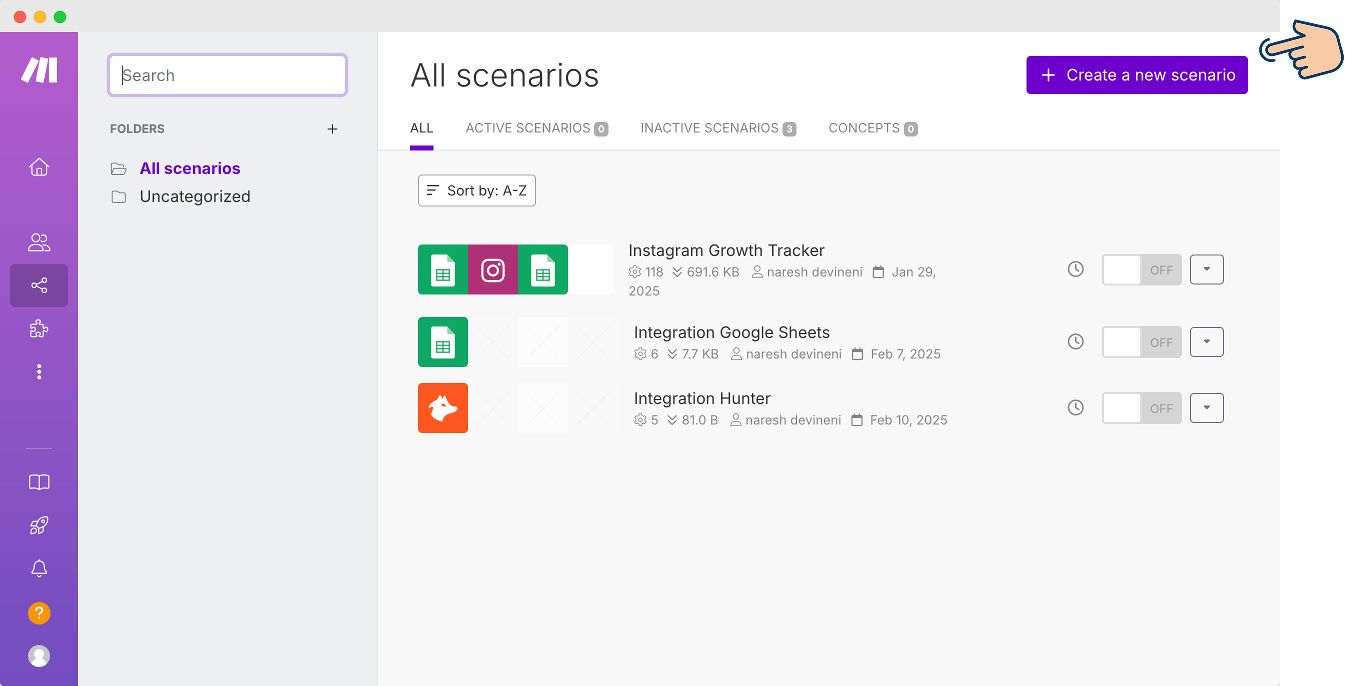
You will land on the “New scenario” screen, where we will build the automation:
From here, we can implement the automation in two easy steps:
- Fetch Quote data from Google Sheets
- Use the fetched data to craft a quote message and send it as an email
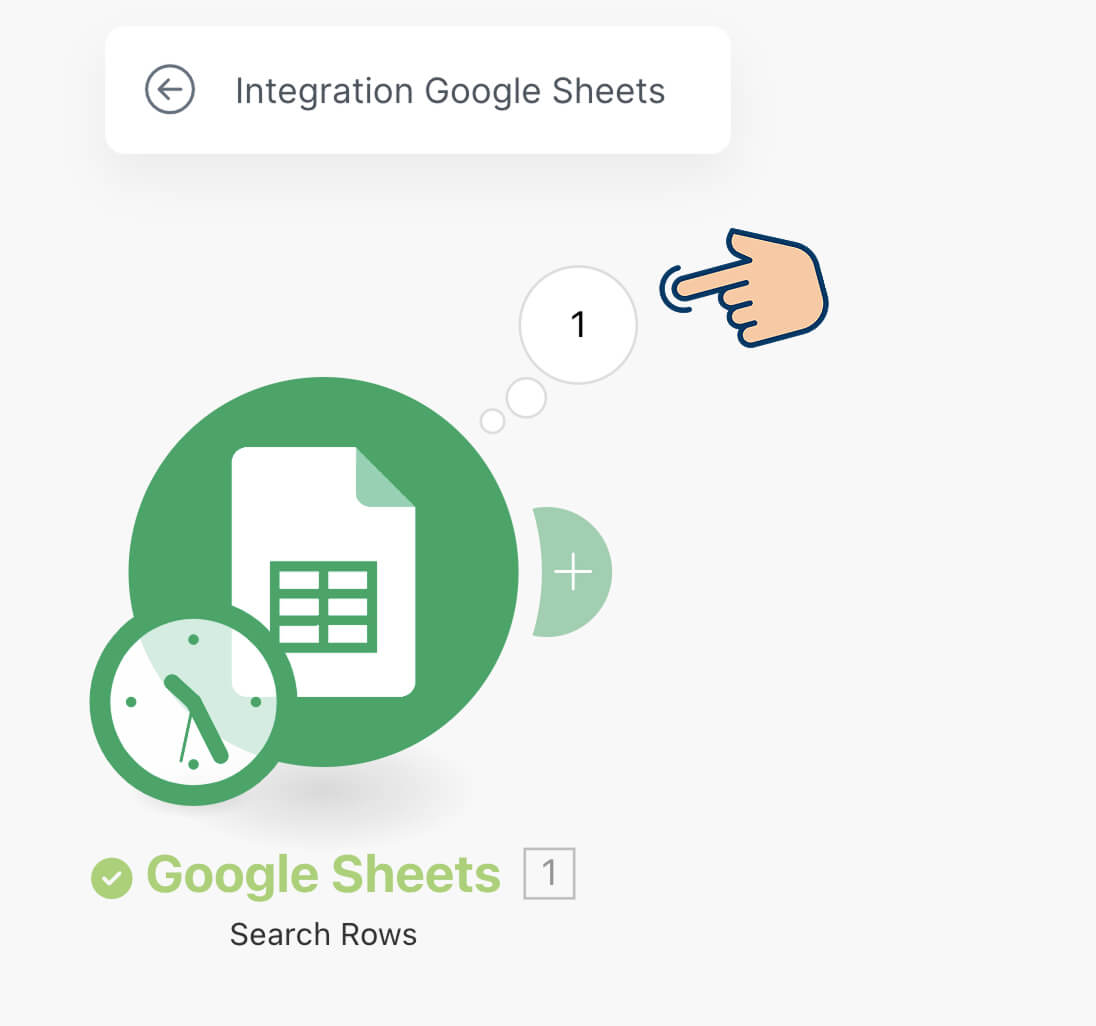
Step 1: Fetch Quote data from Google Sheets
Before we can automate anything, we need to fetch quote data from our spreadsheet.
And our spreadsheet is created using the Google Sheets platform.
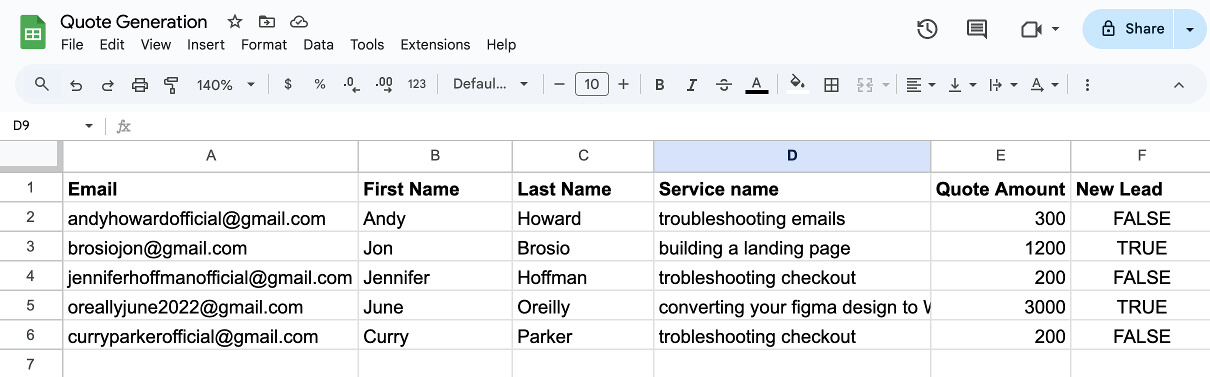
So, we need to connect to the Google Sheets API and access the data inside the “Quote Generation” spreadsheet.
Any idea about what you should do to connect with Google Sheets API using make.com?
“Yep! Make.com has an app dedicated to working with Google Sheets API”.
Correct!
We can easily do this with the help of the "Google Sheets" app and its modules.
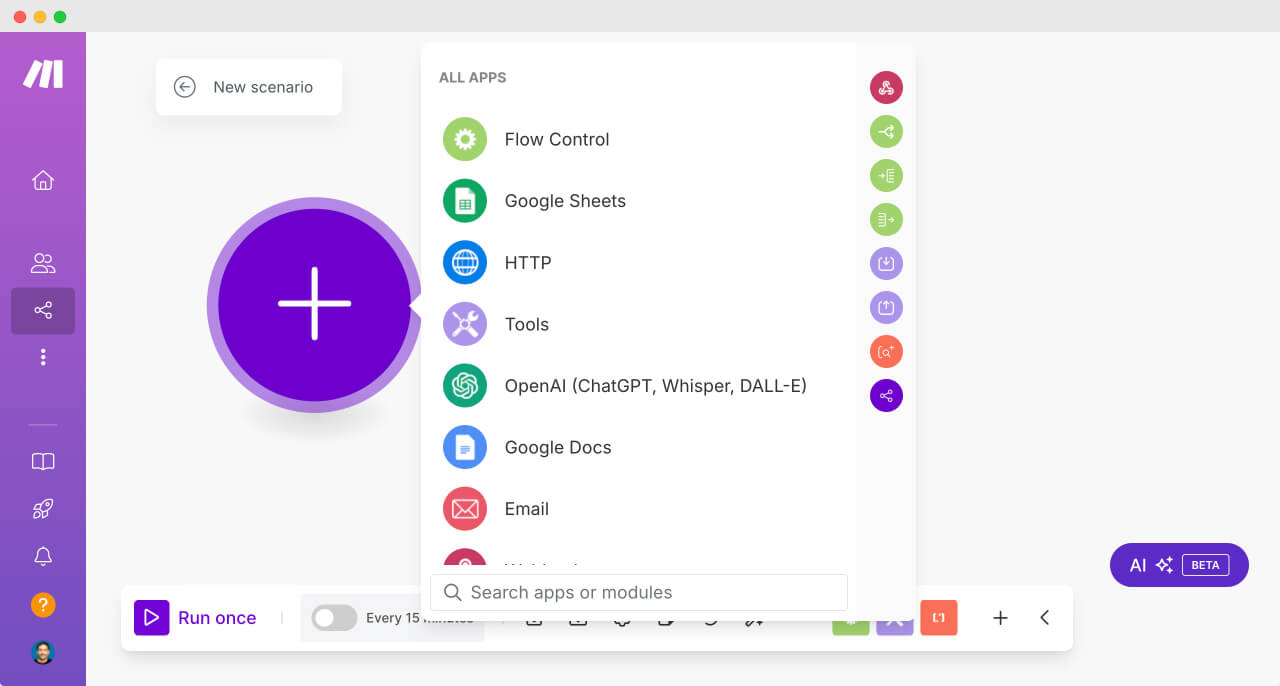
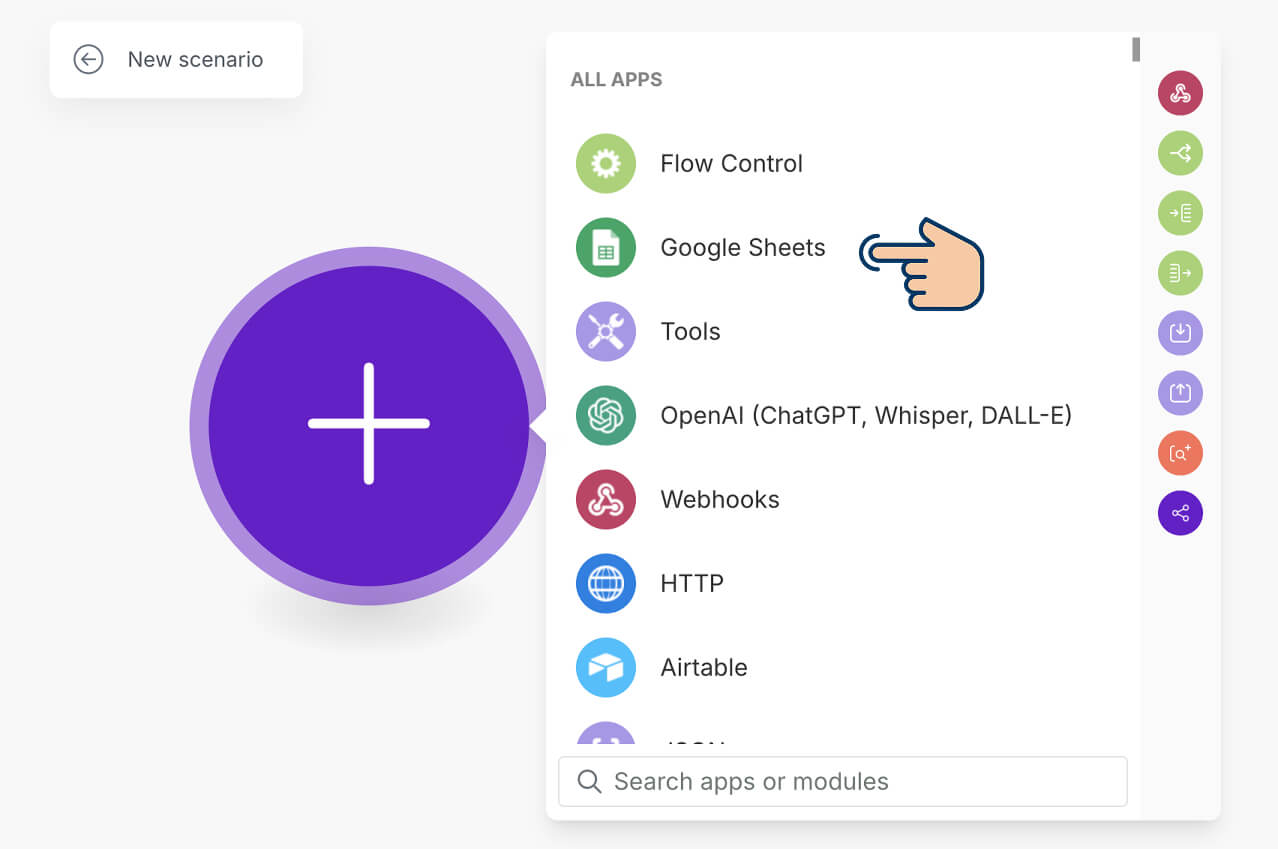
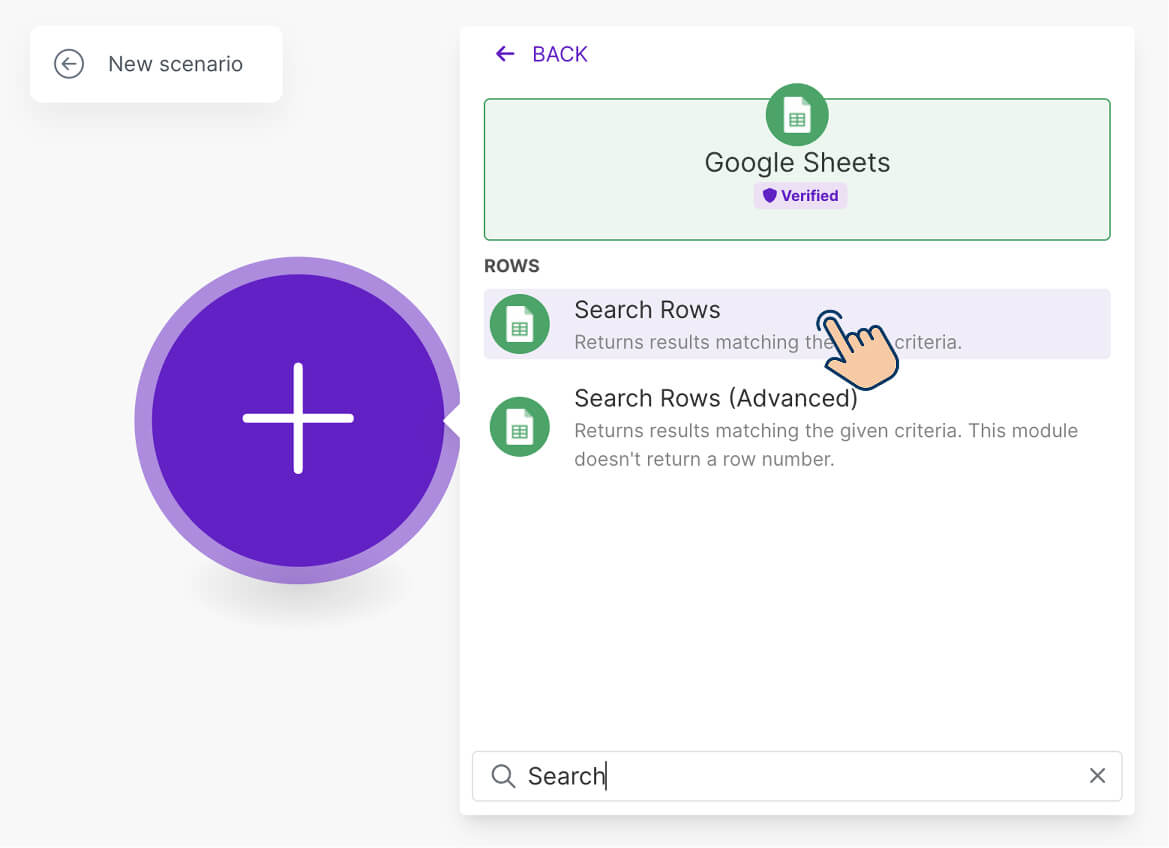
Come on, inside the “New scenario” screen, click on the big “+” button to open up the App Browser.
The big “+” button is called as “Add module” button.
Next, find and click on the Google Sheets App:
This will open up specific actions (modules) that you can perform on the Google Sheets platform:
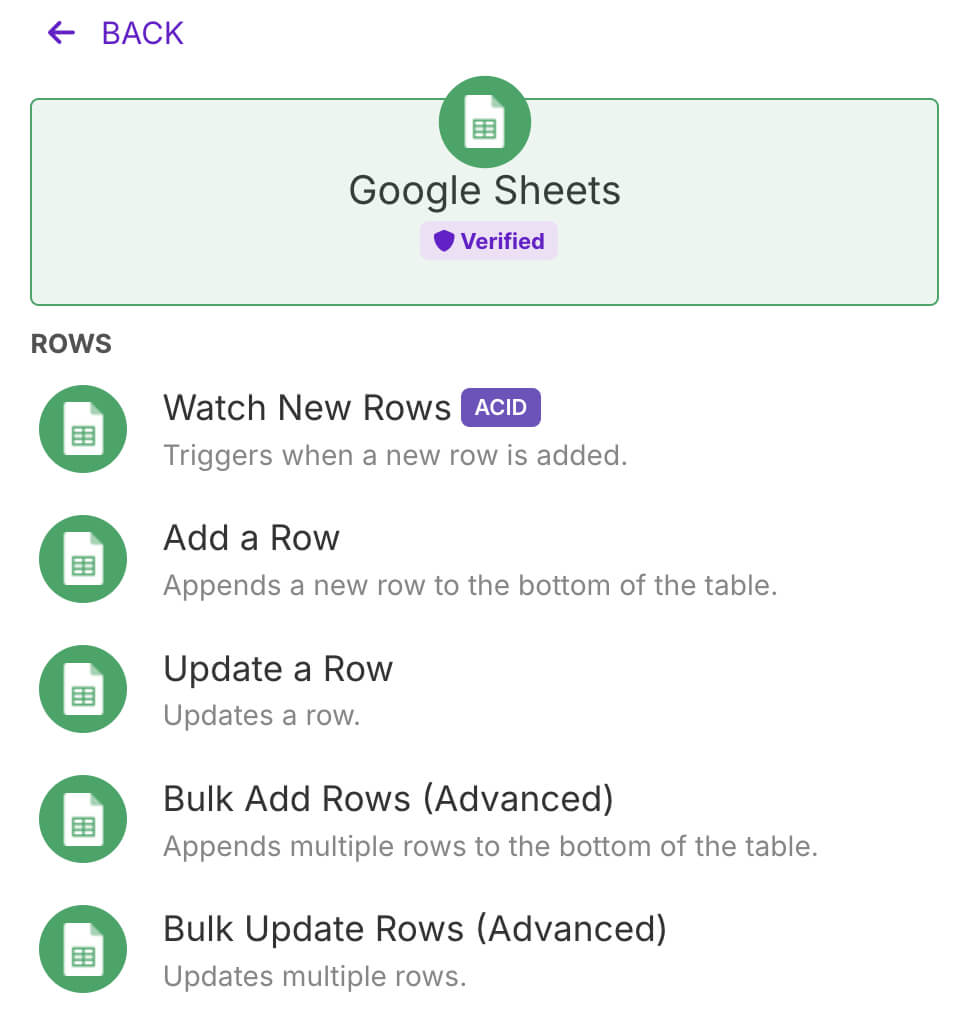
Next, we need to pick a module based on the task at hand.
For example, if you want to add a new row to a spreadsheet, you need to pick the “Add a Row” module.
Similarly, if you want to update an existing row, you have to pick the “Update a Row” module.
You get the idea, right?
In our case, since we need to fetch all the rows from our “Quote Generation” spreadsheet, we’ll use the “Search Rows” module.
The “Search Rows” module can:
- Connect with Google Sheets API
- Fetch all the rows of a selected spreadsheet
- Or fetch only the rows that match specific criteria
So, search for the “Search Rows” module and click on it to add it to your scenario:
Once added, the module’s configuration popup will open automatically.

The configuration popup's main goal is to:
- Authenticate you with Google Sheets API using the OAuth authentication method.
- Authorize make.com on your behalf to manage your spreadsheets and Google Drive files
- Once the above steps are done, it lets you select a spreadsheet from which you want to get data from.
So, let's begin the process by clicking on the “Create a connection” button.
This will bring up a popup that sets up the stage for authorising Make.com to access and manipulate your spreadsheets hosted on Google Sheets platform.
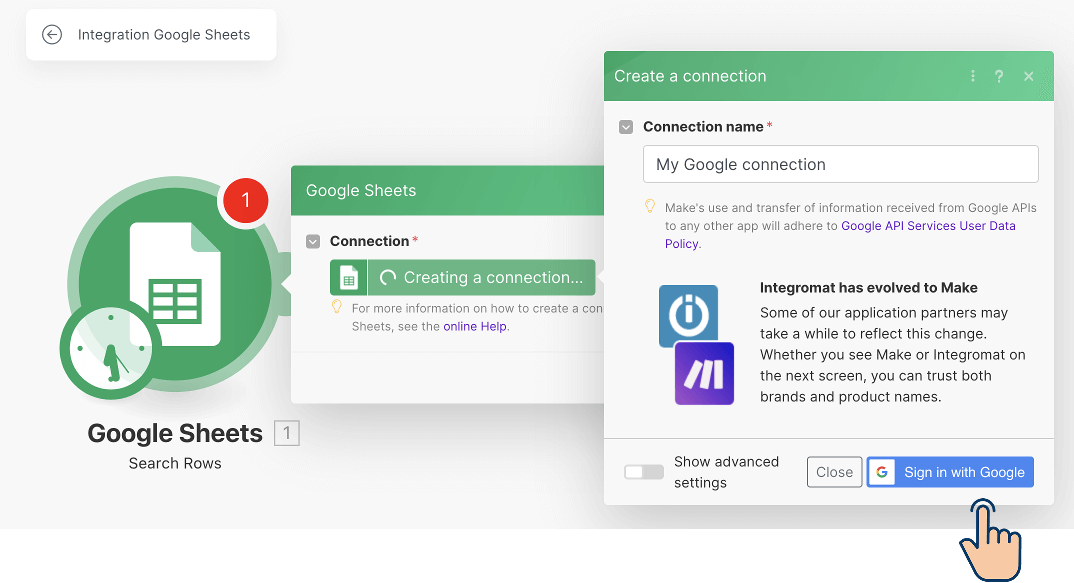
If you notice the popup, there is an option called “Connection name”.
The thing is, we might end up using different Google accounts for different automations.
Sometimes, you'll have to use your client accounts too.
If that is the case with you, I would recommend changing the connection name to something that helps you easily recognise a specific Google account connection.
After that, click on the “Sign in with Google” button and log into the Google account where you have uploaded / created the “Quote Generation” spreadsheet.
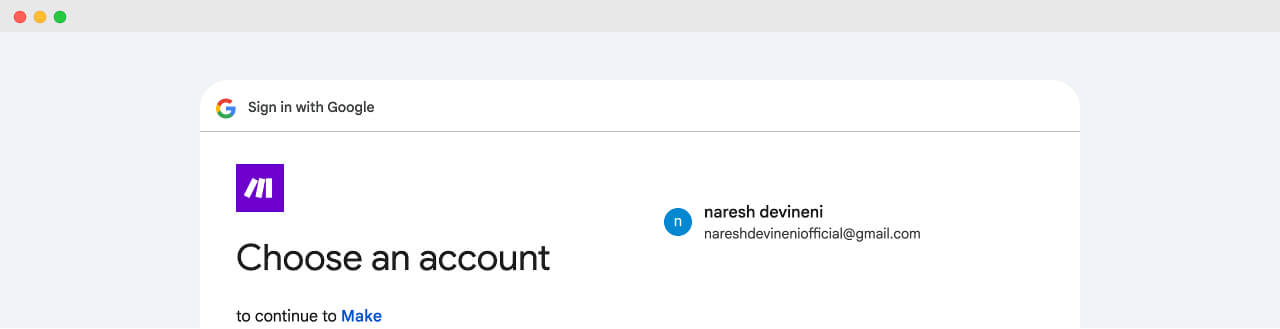
In my case, I have created the sheet on my nareshdevineniofficial Gmail account.
So, I will choose that account from the list.
Next, click on the “Continue” button to share your name, email address, etc. with Make.com.

The next screen from Google says that “Make wants to access your account” so that it can see, edit, create, and, delete all of your Google Drive files and Spreadsheets.
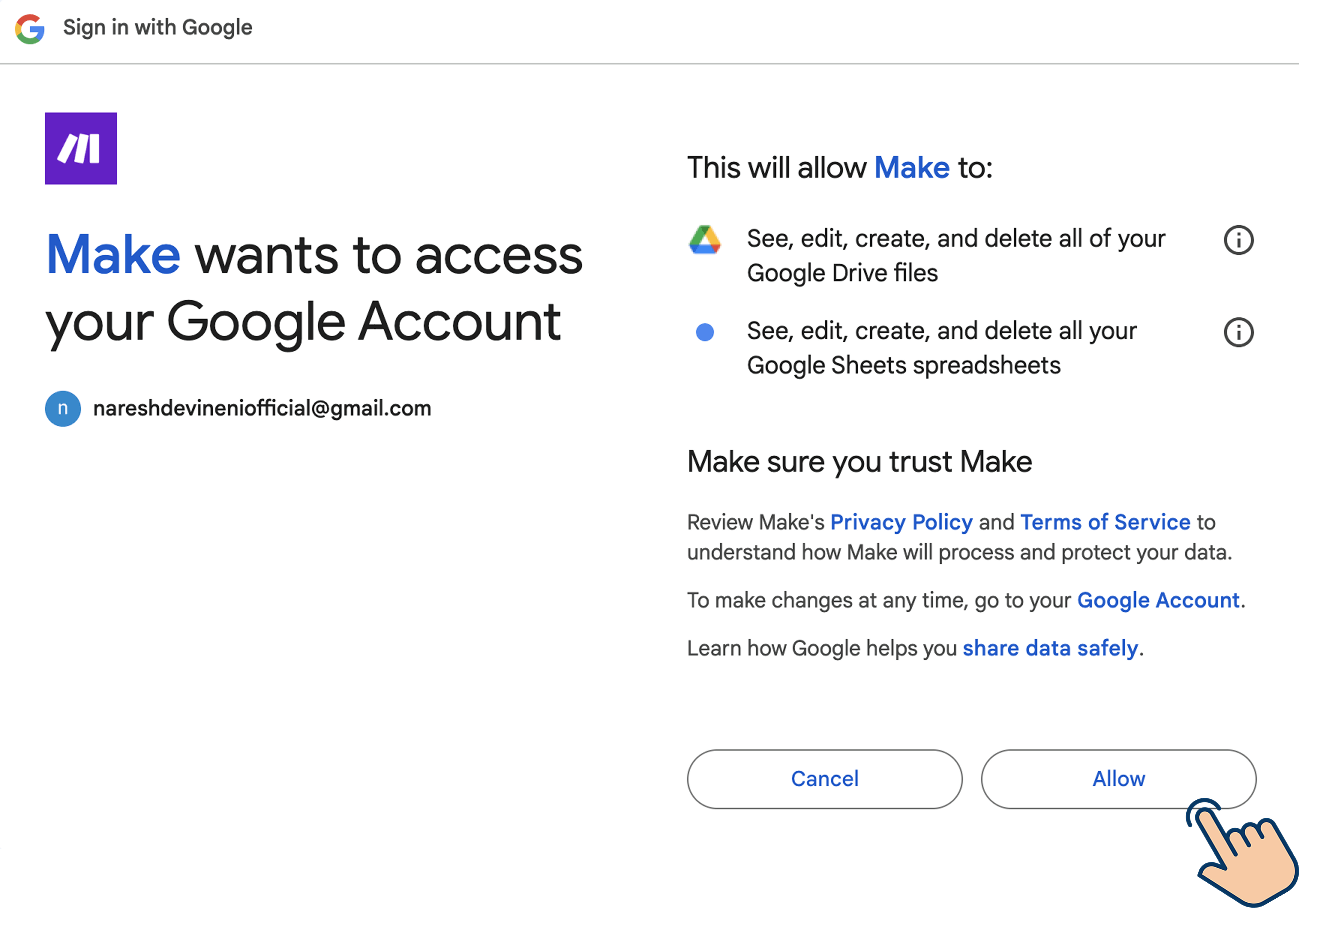
Click on the “Allow” button so that we give enough control to Make.com to fetch “Quote Generation” data from our spreadsheet.
Once authorized, you’ll return to the automation design screen on Make.com.
Next, we need to select our “Quote Generation” spreadsheet because that is where we want to get data from.
And we can select it using the “Spreadsheet ID” option:
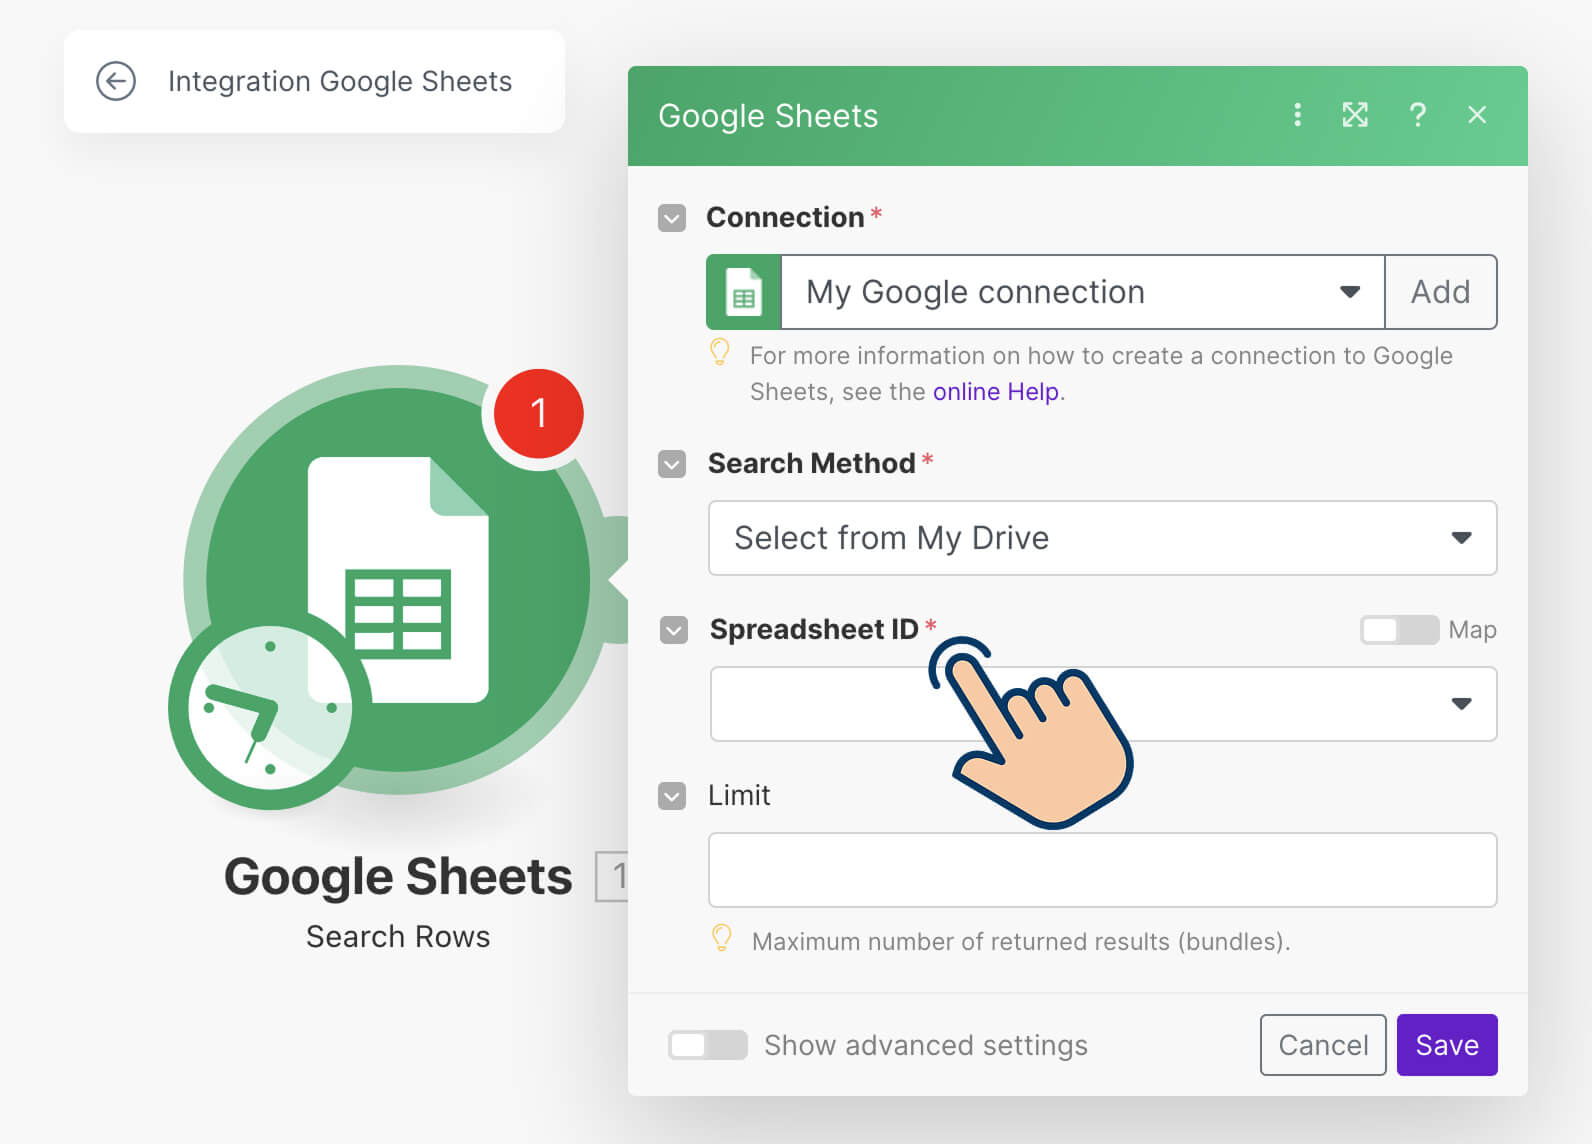
Click on the “Spreadsheet ID” dropdown to search for the “Quote Generation” spreadsheet, and then click on it to select it.
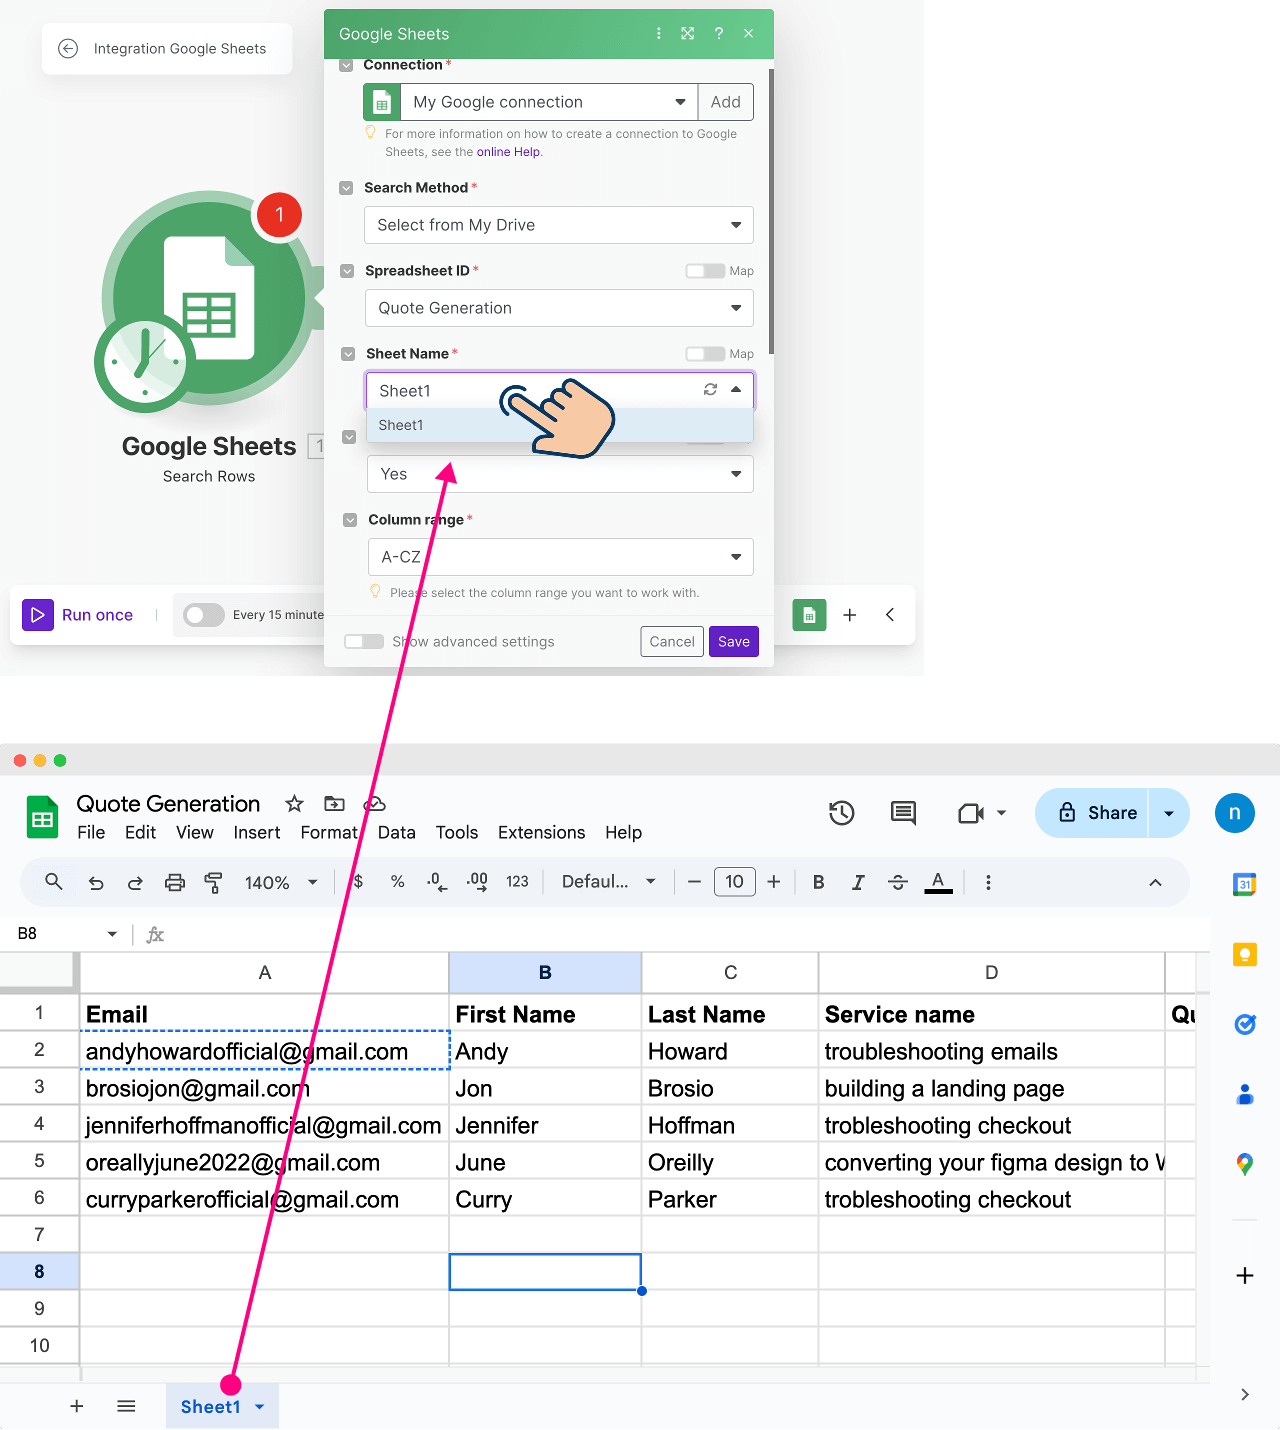
Once the spreadsheet is selected, the “Sheet Name” option will show up, and it will let you select a specific sheet inside the spreadsheet.
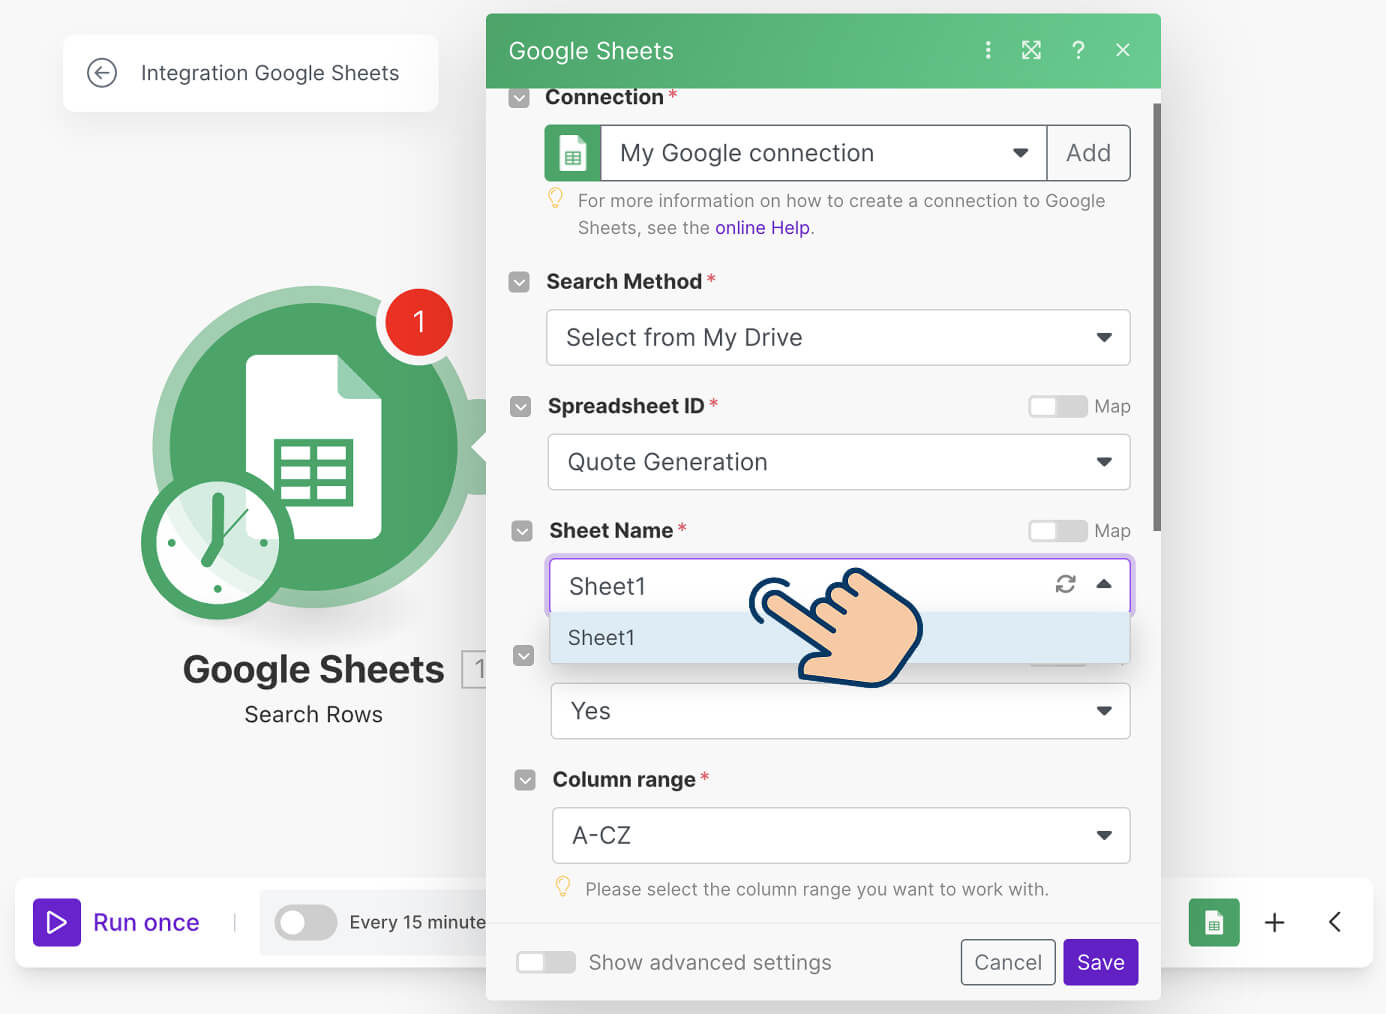
Select the “Sheet 1” inside the “Quote Generation” spreadsheet because that is where we have added the information related to individual quotes.
Finally, click on the “Save” button to save the connection.
We have now successfully created a connection between Make.com, Google account, and Sheet 1 of “Quote Generation” spreadsheet.
In technical words:
- With the help of the Google Sheets App provided by make.com, we have connected to the Google Sheets API using OAuth authentication
- And we gave Make.com permissions to manage your spreadsheets and Google Drive files on our behalf.
So, we should now be able to fetch all the rows from our “Quote Generation” spreadsheet.
But how do we do that?
Simple, right-click anywhere on top of the “Search Rows” module to bring up its action menu:

And then click on the “Run this module only” option.
A few things will happen when we do this:
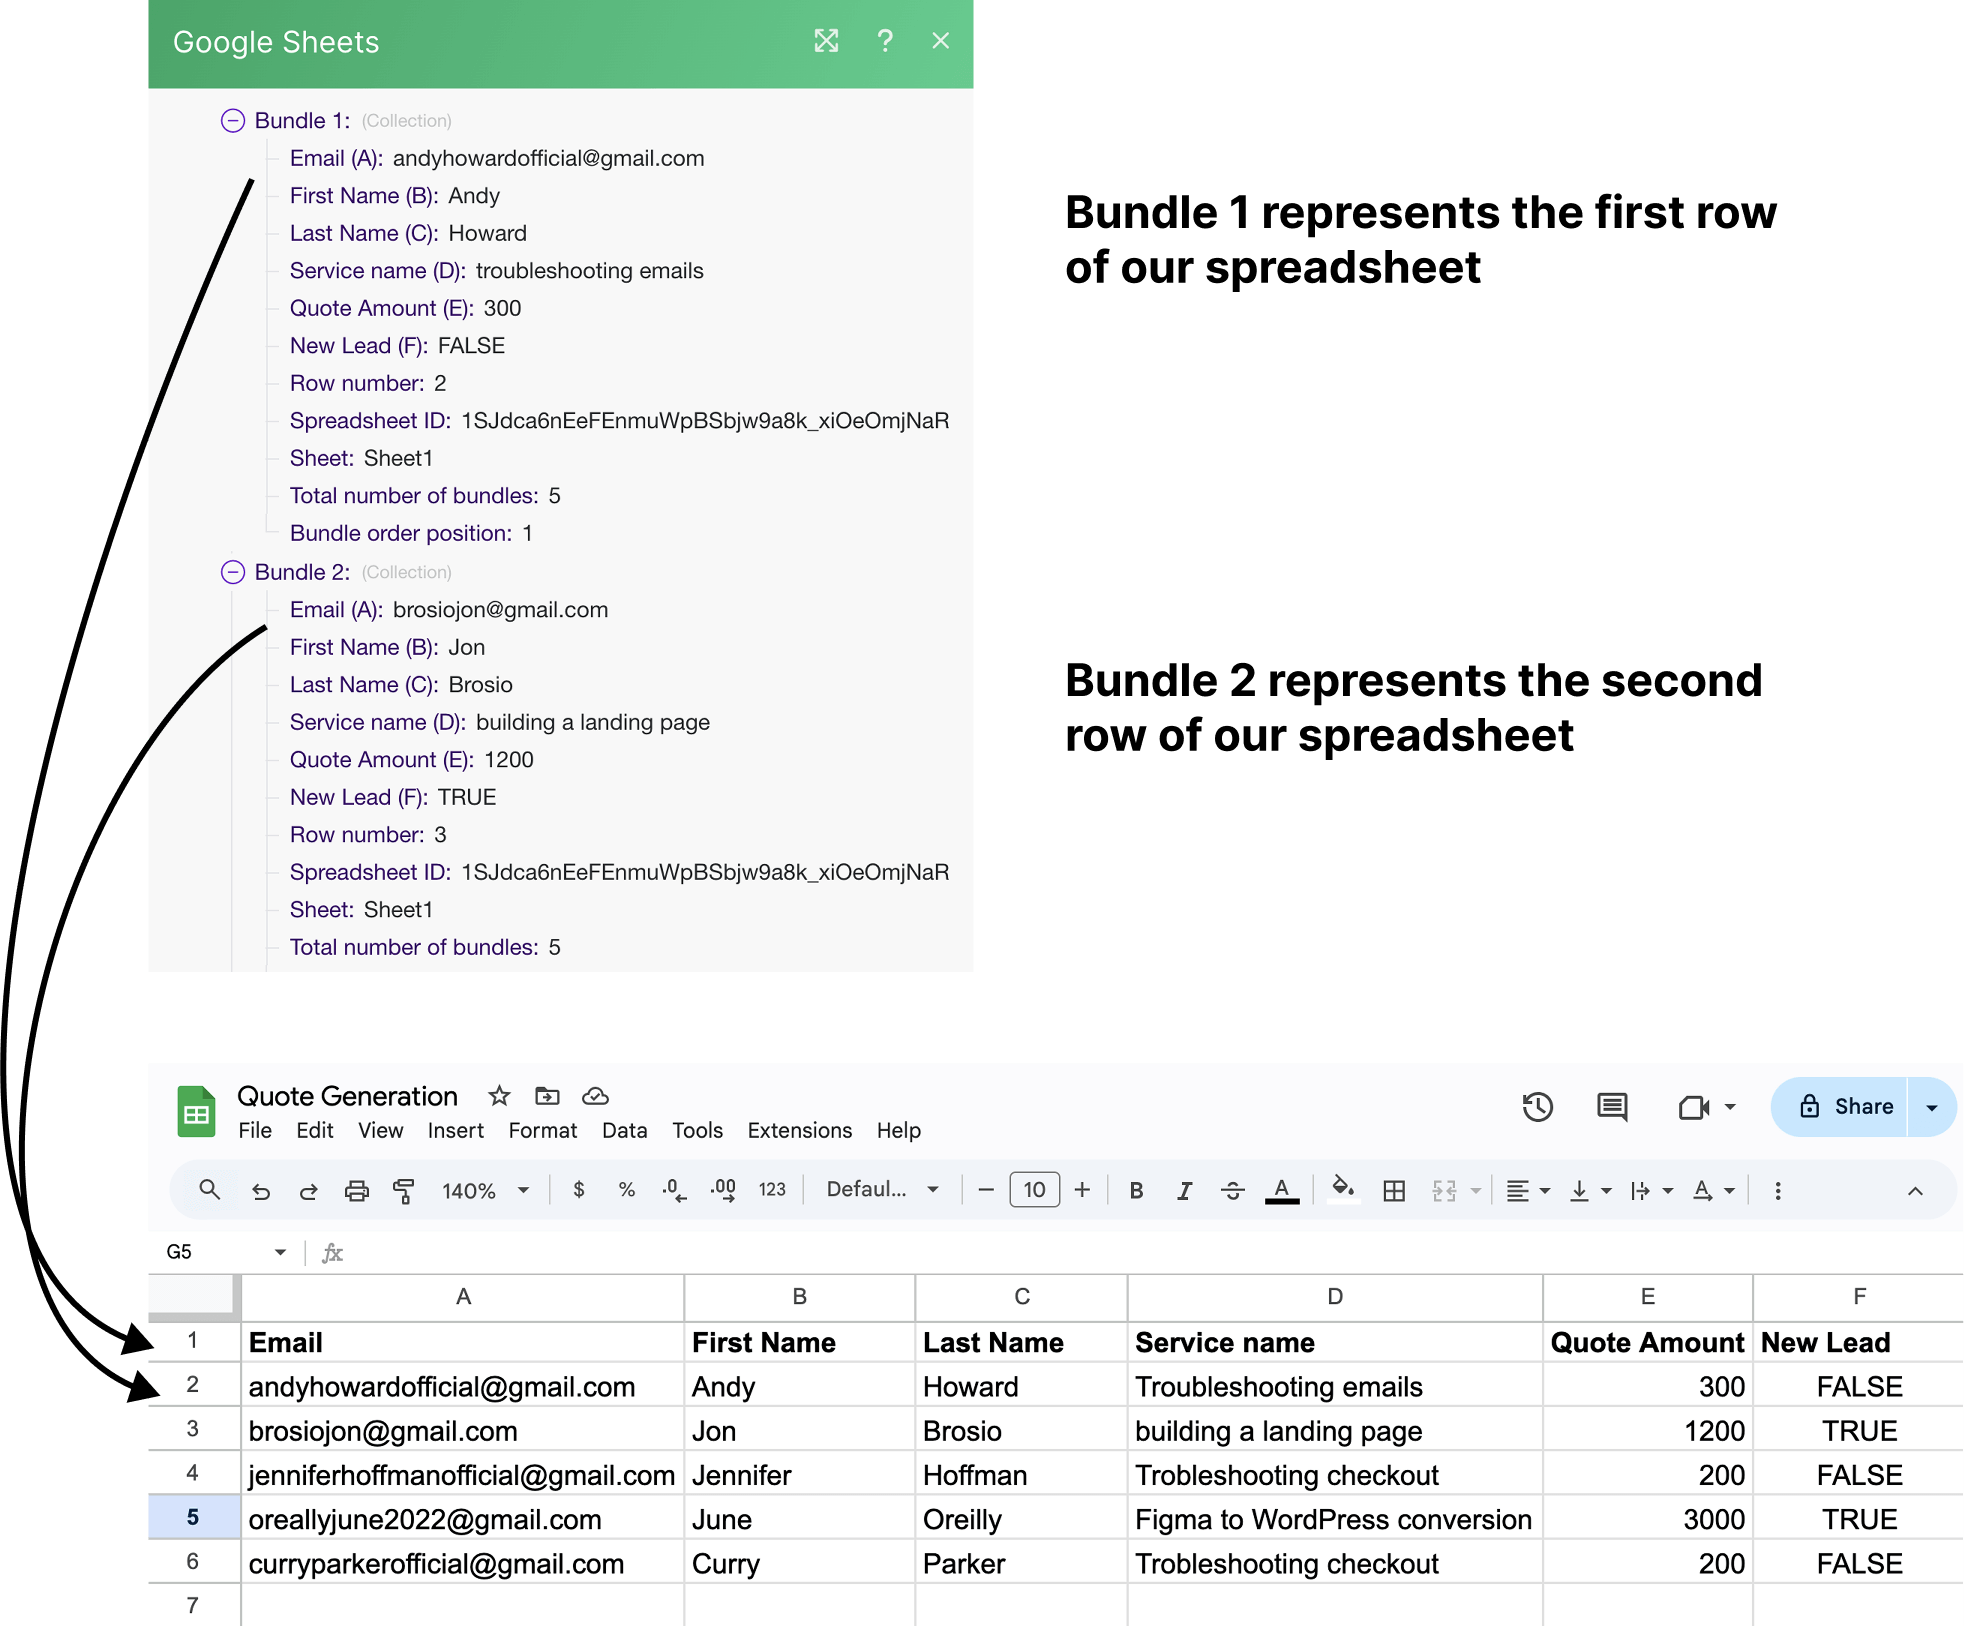
- First, using Google Sheets API, make.com sends a request to access the “Quote Generation” spreadsheet. The access request will be approved because we have authorized Make.com to access the spreadsheet on our behalf.
- Next, Make.com will fetch rows from our spreadsheet in JSON format and make them accessible in the form of bundles. This will enable other modules of the automation to access the quote data easily.
For example, make.com fetched data of five rows from our spreadsheet, and it is making that data available in the form of five bundles.
“Nice! How do I see this bundles data?”
Once the run is complete and if there aren't any errors, you will see a small bubble icon on the top of the module:
The number inside the bubble indicates the number of operations consumed by running the module. We will talk about how operations are consumed in an upcoming lesson.
Anyway, if you click on that bubble, you can see how each spreadsheet row is being represented as a bundle.
“Got it. But I don't understand the concept of bundles and JSON. Can you elaborate?”
Sure.
I only wanted to introduce them when the time comes.
And now is the time.
Let's talk about JSON and why make.com transforms them into bundles in the next lesson.