How to set up a filter on Make.com

Just to recap, here is where we are in terms of payment reminder automation:
- We have cloned the quote generation scenario
- We have changed the spreadsheet inside the “Search rows” module to use the Payment tracker spreadsheet
- We have updated the “Send an email” module with the payment reminder template provided above.
And now, we have to set up a filter to identify clients with outstanding payments and run the automation to send them email reminders.
Setting up a filter in make.com is straight-forward
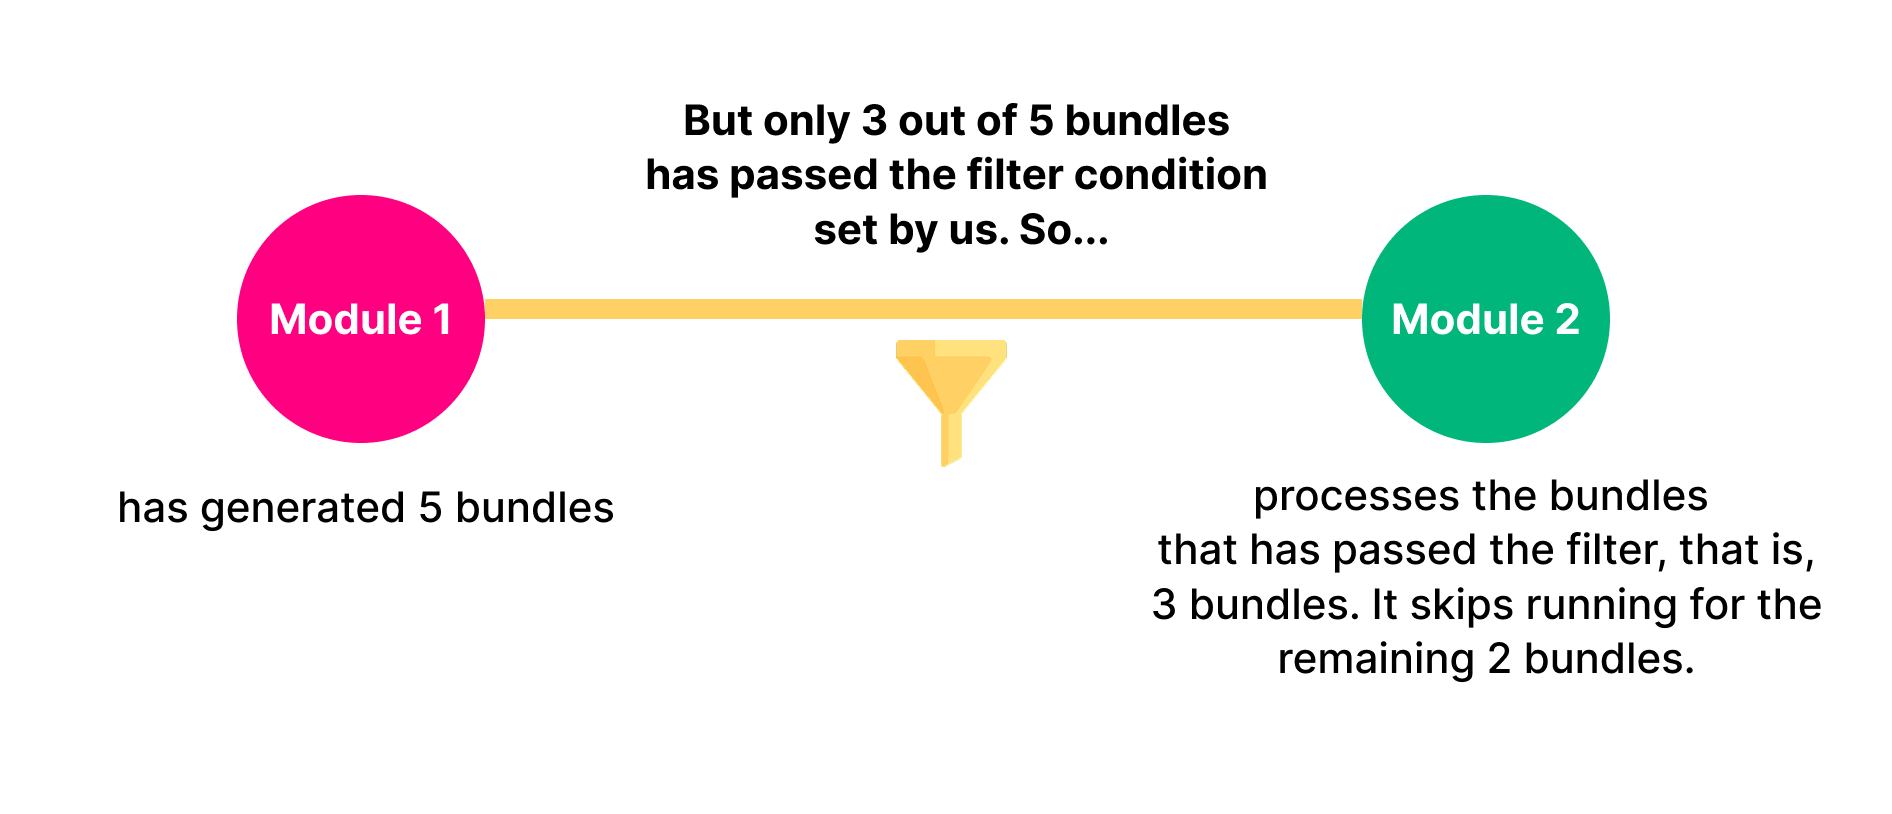
Please remember that whenever we set up a filter between two modules, our intention is to make the second module process the bundles that pass certain criteria.
For example:
- If the first module has generated 5 bundles
- And only if 3 out of those 5 bundles have passed the filter condition set by us
- The second module processes the bundles that have passed the filter, that is, 3 bundles. It skips running for the remaining 2 bundles.
With that in mind, we can set up a filter between any two modules inside our automation.
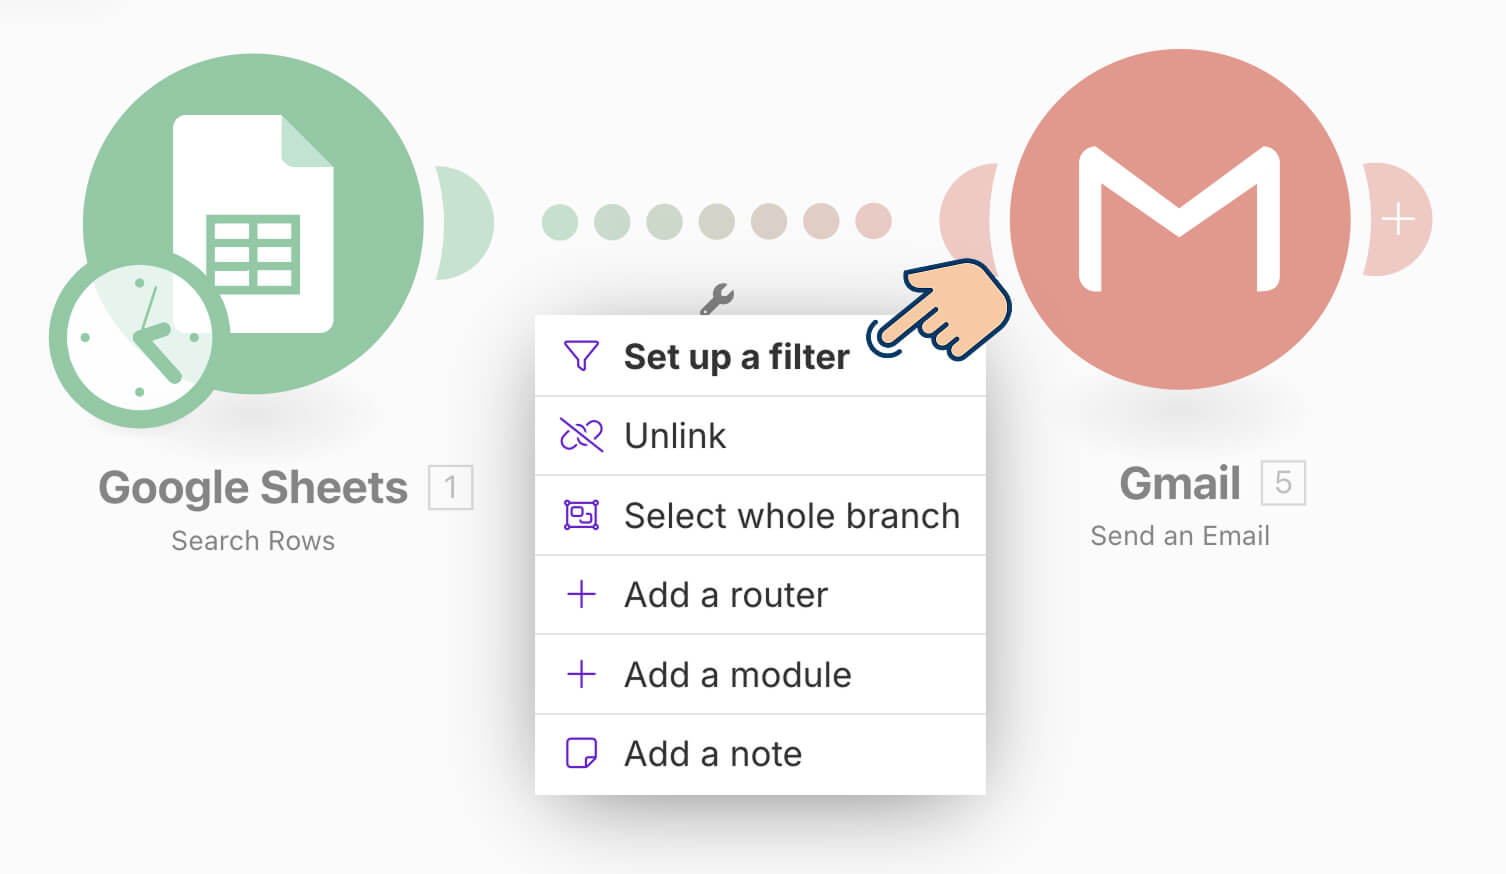
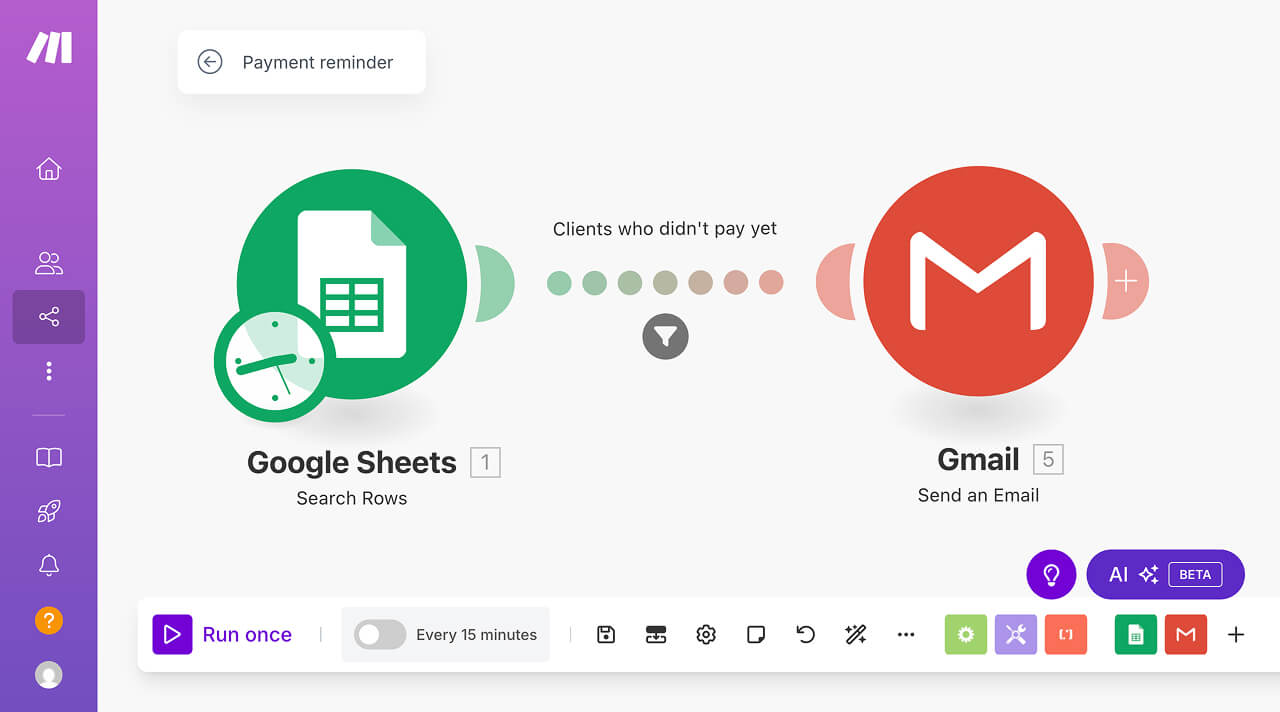
If you notice, there a connecting-line and a “wrench” icon between the two modules of our payment reminder automation:
Clicking on any one of them will bring up the filter panel.
Come on, click on the “wrench” and from the dropdown menu, select the “Set up a filter” option:
This will bring up the filter panel.
First, set the label of the filter as “Clients who didn't pay yet”:
Next, if you notice, there is a section called “Condition”.
The “Condition” section allows us to compare two values using a set of rules.
So, it provides:
- Two input fields where we can enter values for comparison
- An option for selecting an appropriate comparison operator
- A button for selecting “AND” and “OR” rules. We will use these options only if we are checking for conditions.
For the first input field of the “Condition” section, select “Got paid? (G)” key from the Data Mapping Panel:
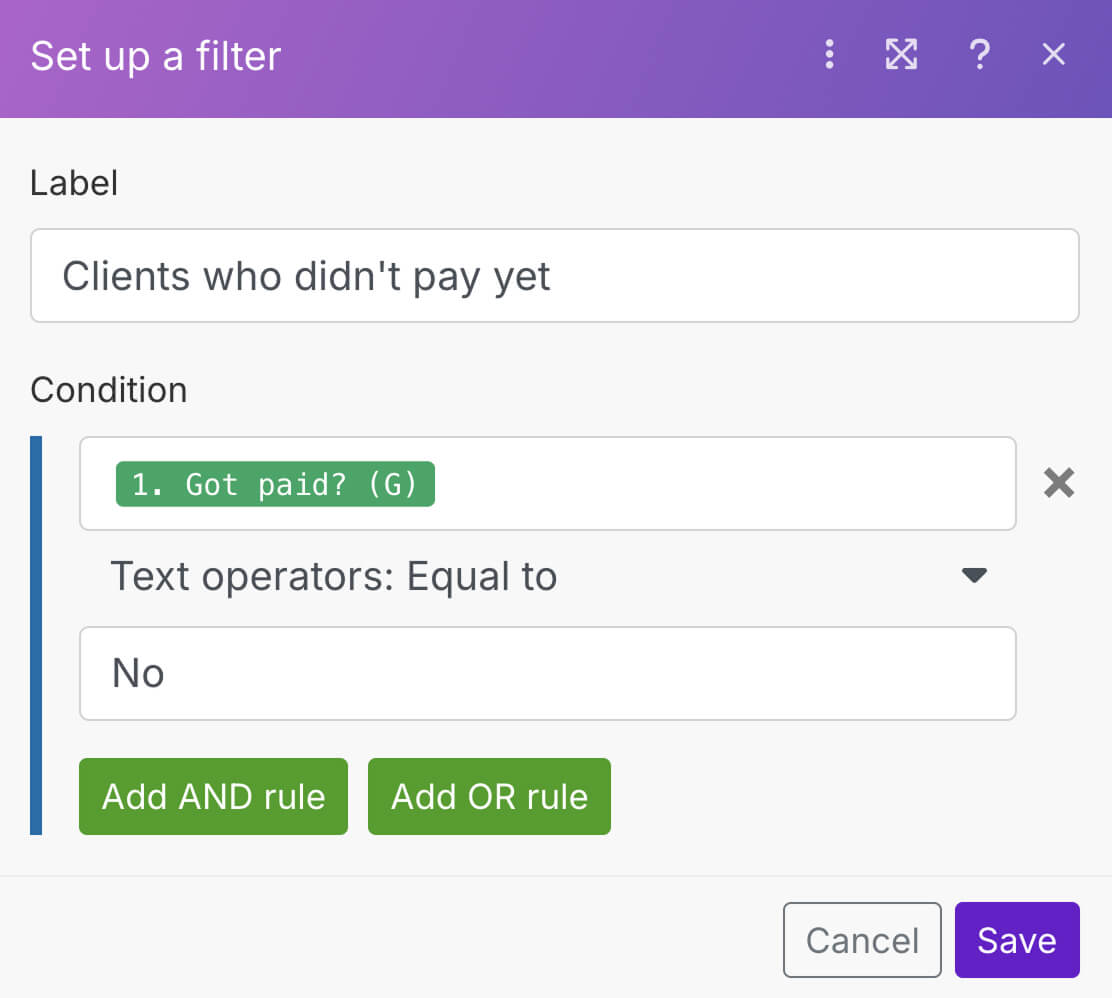
And for the comparison operation, by default, “Text operators: Equal to” is selected.
In our case, we want to compare two text values and check whether they are the same.
So, leave the comparison operator as is.
Finally, for the second input field, type “No” and then click on the “Save” button to save the filter.
If you now notice the automation, there is a filter icon between the two modules:
This is our way of saying: “If a client has 'No' in the 'Got paid?' column of our spreadsheet, they meet our filter condition and should receive a payment reminder email through the 'Send an Email' module.”.
Don't worry if you don't understand it yet. Things will become clear in the next lesson where we go through enter automation flow step by step.
Anyway, with this setup, only clients with outstanding payments will receive reminders when you run the automation.
Come on, let's test this out.
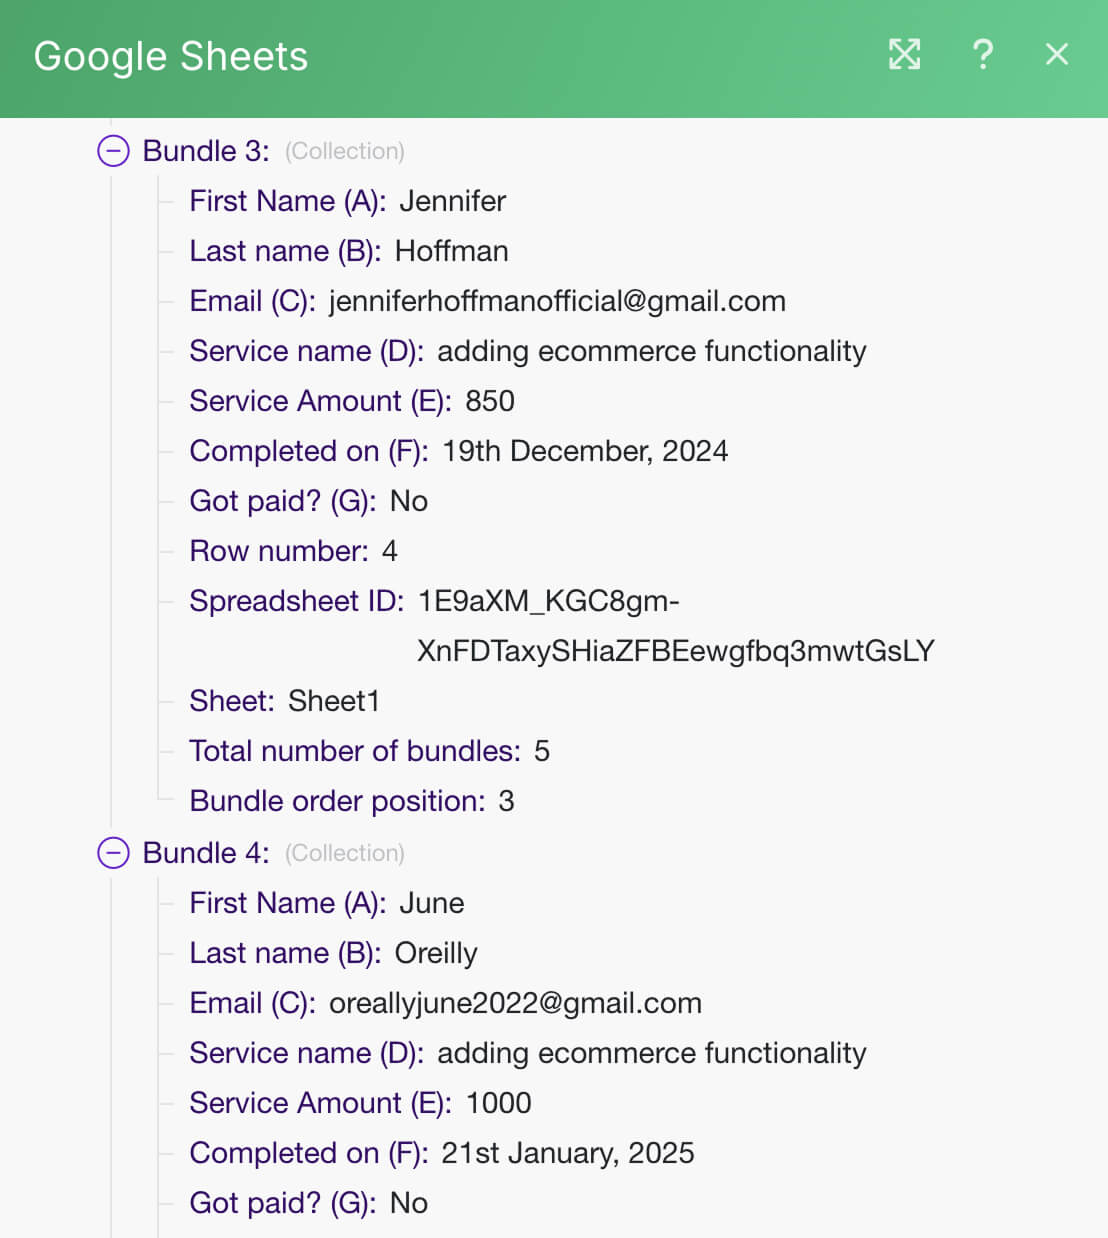
If you notice the “Client Payment Tracker” spreadsheet, there are only two clients who didn't pay their dues yet:

- Jennifer
- June
And if you notice the bundles generated by the “Search Rows” module, Jennifer's data is in Bundle 3 and June's in Bundle 4.
So, our filter should qualify the Bundles 3 and 4 to be processed by the next module of the automation.
We can easily verify this by clicking on the filter icon that is located between the two modules:
As soon as you click on it, a filter inspector panel will open up:
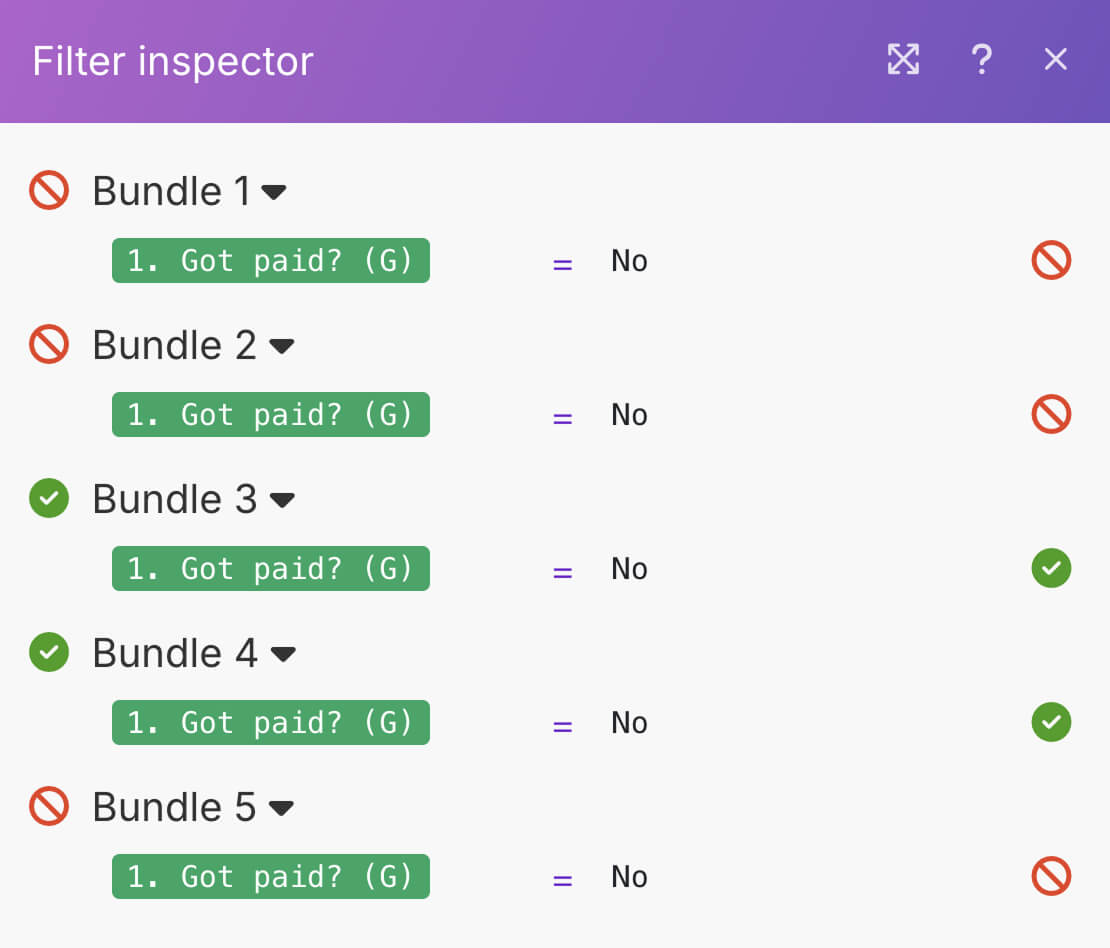
The only purpose of this filter inspector is to convey which bundles are moving to the next module of the automation.
And it confirms that only Bundles 3 and 4 meet our criteria, and it is exactly what we wanted to verify.
This means the filter is working as expected and the “Send an Email” will only process Bundles 3 and 4 while ignoring the others.
This also means that only Jennifer and June will receive payment reminder emails.
Let's check their email account to confirm:
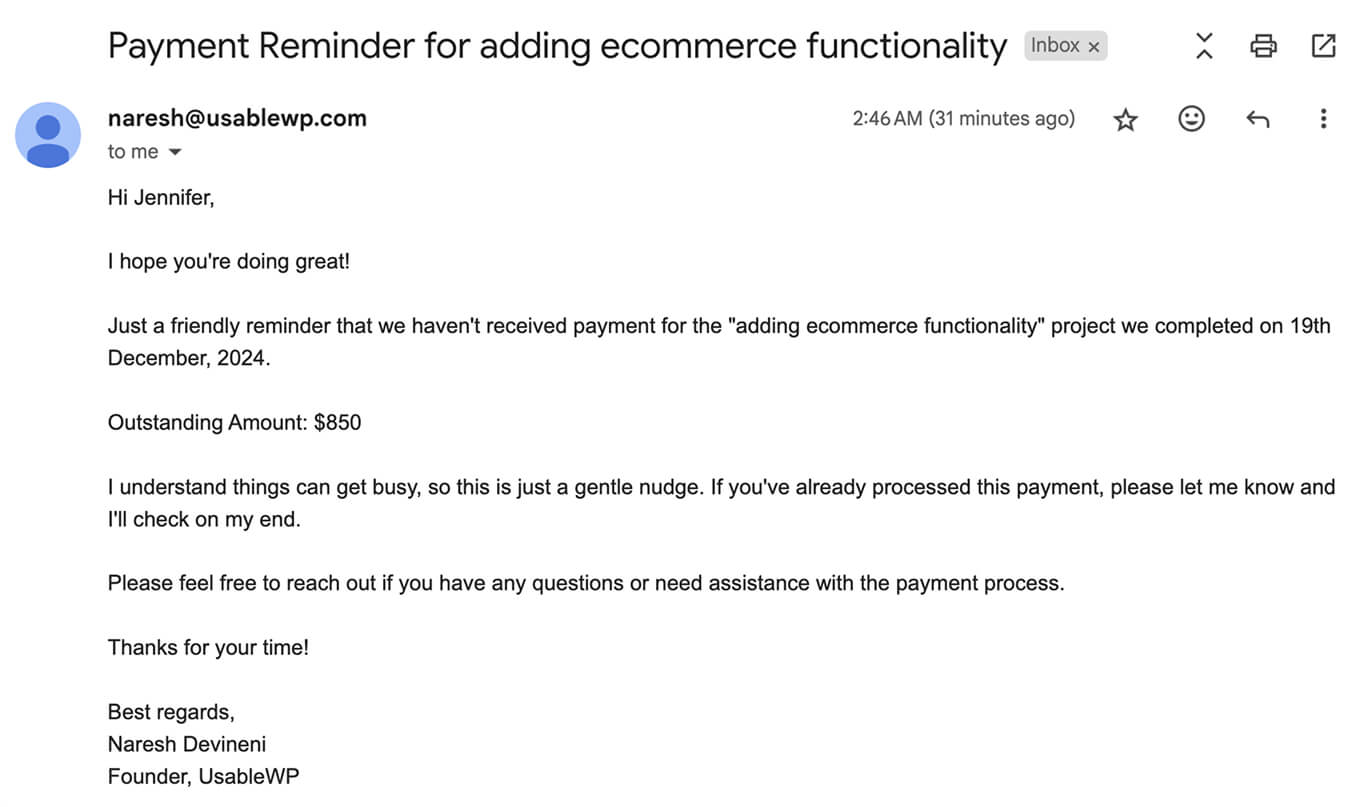
And there we go.
Both clients with outstanding payments have received the payment reminder.
Our automation is now complete and it is working as expected.
In the next lesson, we'll review the entire automation flow to better understand how the filter condition helped us achieve our goal.