How module execution flow works in Make.com

Just to recap:
1) Using the “Search Rows” module, we have connected to the Google Sheet API and requested the data from the “Quote Generation” spreadsheet
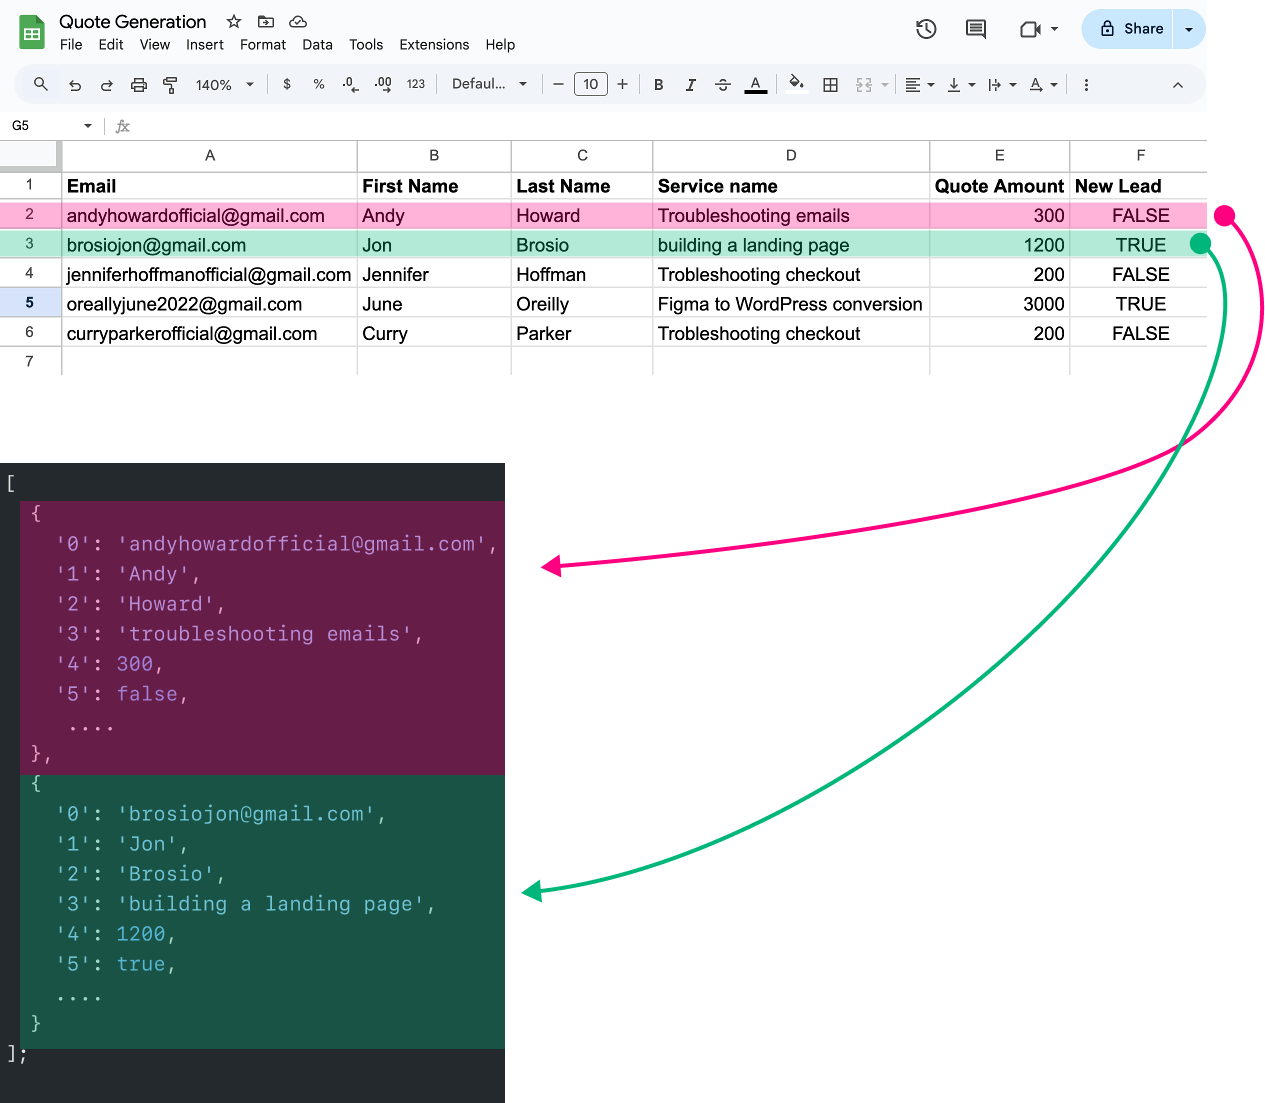
2) Google Sheets API responded and sent us the data back in the JSON format
3) Finally, Make.com converted the JSON data into bundles so that we can use the data in the subsequent modules

This also means that the input data for our automation has been processed and is ready to go.
We now need to transform the bundles into separate emails and send them to respective leads.
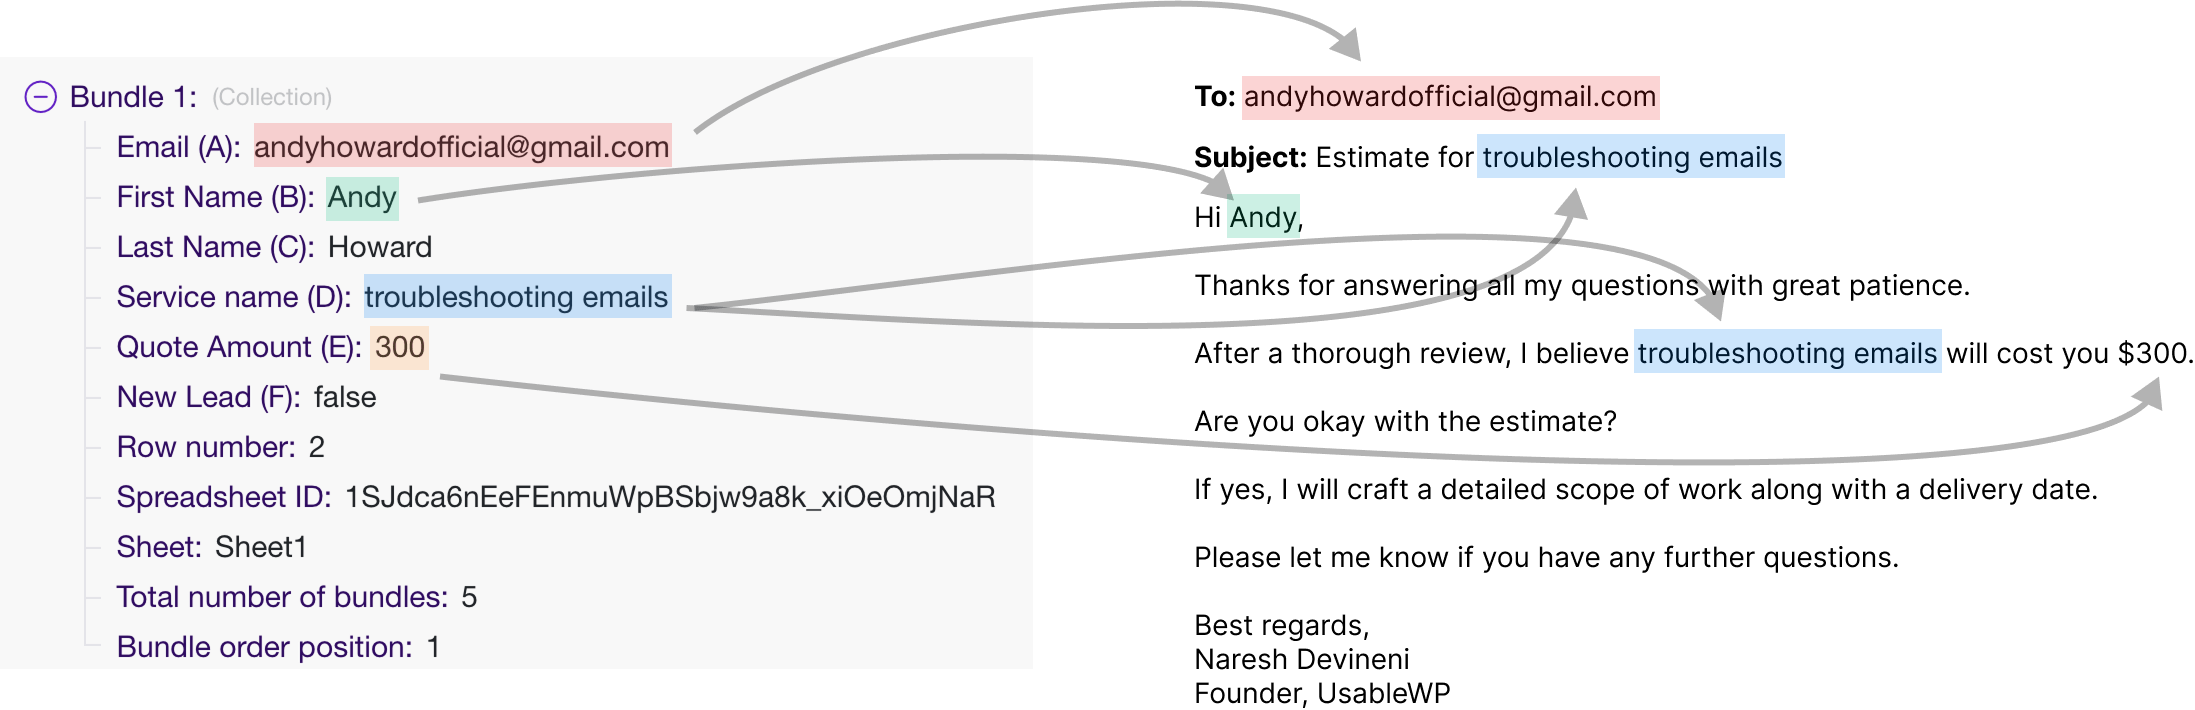
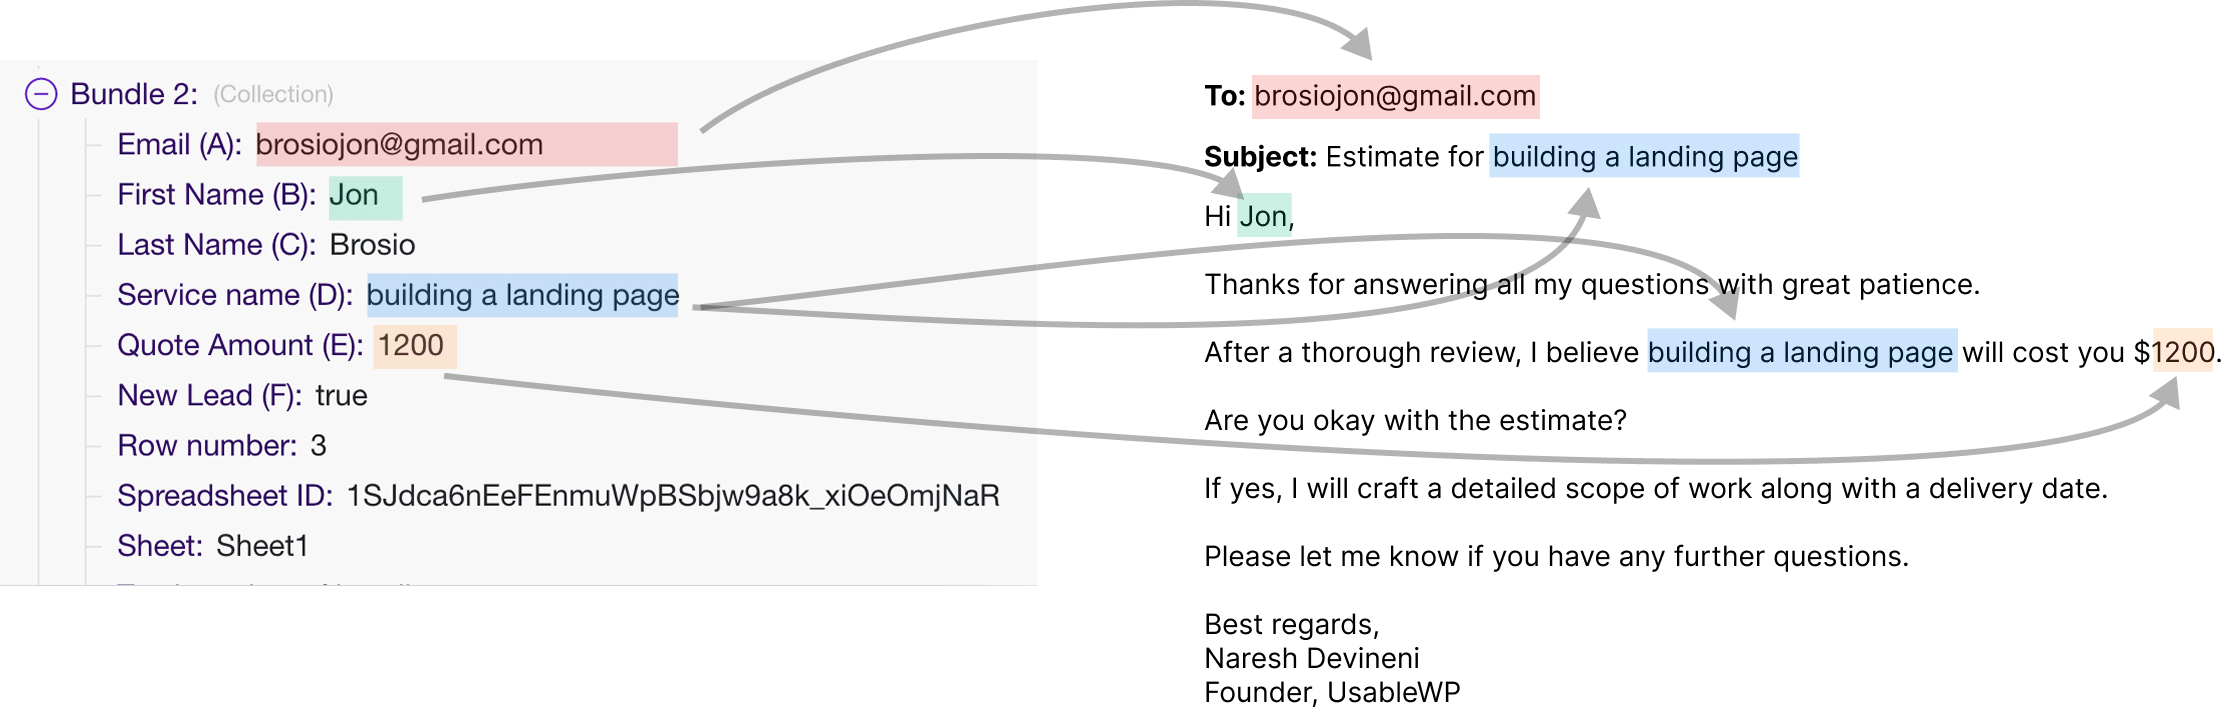
For example, we need to convert data from Bundle 1 into email message 1:
Similarly, we have to convert data from Bundle 2 into email message 2:
We have to do it for all the bundles generated in step 1.
You get the idea, right?
“But how do we actually transform bundles into emails?”
Good question! We have to find and use another module that will handle this transformation for us.
“Okay! But how do we process each bundle separately and create separate emails from them?”
Another great question!
Here is a simplified answer for now.
Understanding the module execution flow in Make.com
Note: The following process works the same way for any automation tool. Not just make.com.
Every task automation involves at least two actions:
- Getting the input data
- Processing the input data and doing something with it
So, every automation we create inside Make.com involves at least two modules:
- The first module for getting the input data and converting it into bundles
- The second module for transforming those bundles one-by-one into output data for achieving our automation goal.
For example, in our “Quote Generation” automation:
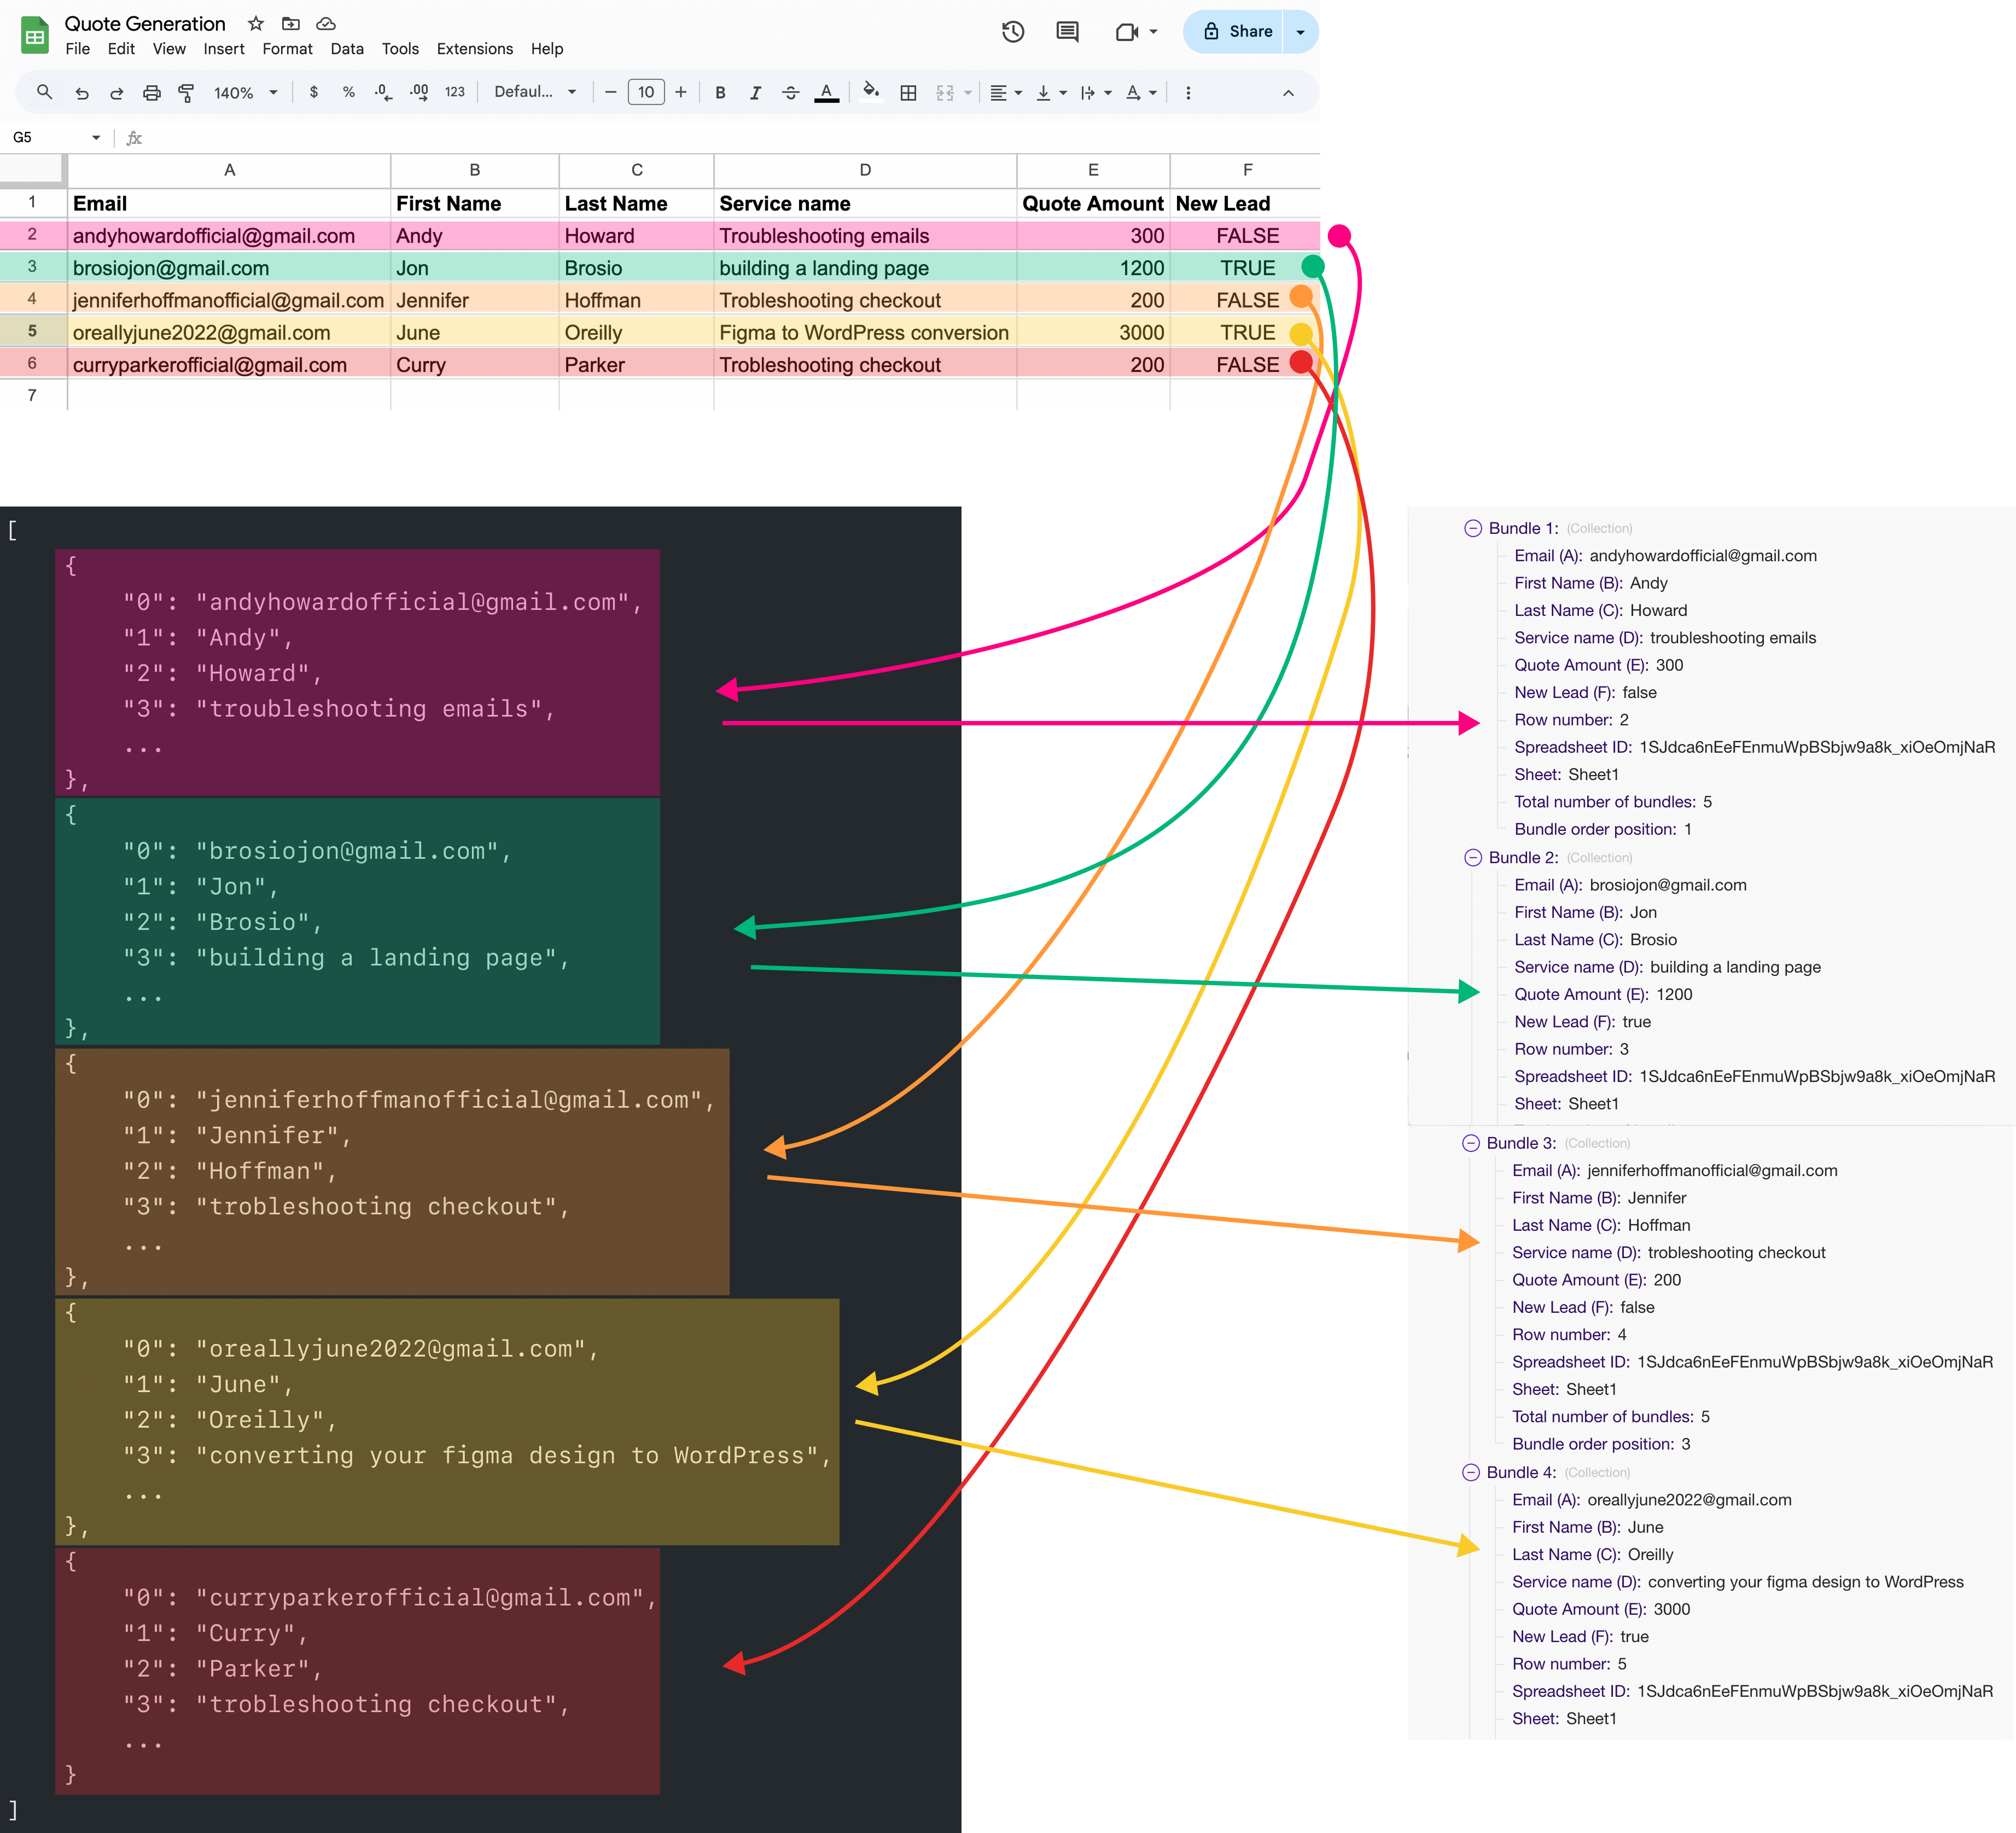
1) We have used the “Search Rows” module (first module) from the Google Sheets App to get the input quote data and converted that data into a certain number of bundles
In other words, each spreadsheet row retrieved by the “Search Rows” module is converted into a separate bundle.

Our spreadsheet row had five rows, so five bundles are created at the end of running the first module.
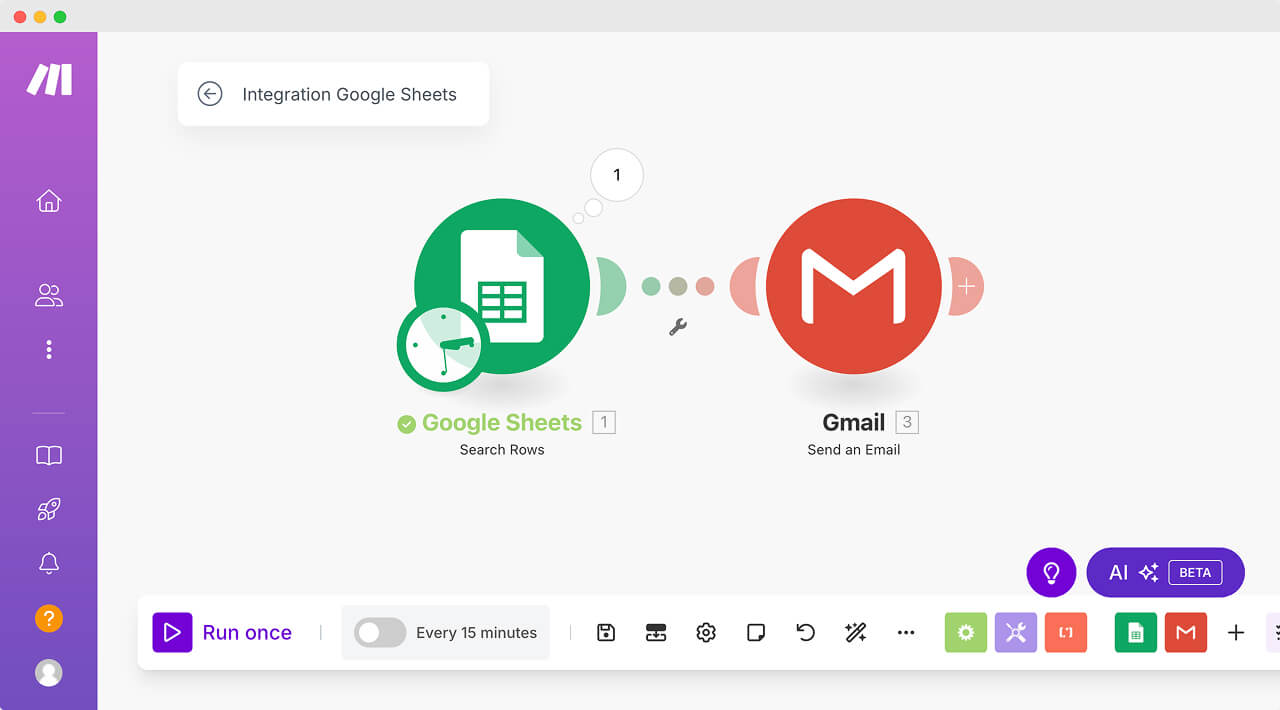
2) Next, we need to add the “Send an Email” module from Gmail or Outlook App to our automation pipeline:
- To process those bundles one-by-one and transform them into unique emails
- Finally, send them to respective leads
But now comes an important question, though.
How does the “Send an Email” module process those bundles one-by-one and transform them into unique emails?
The answer is simple.
After the first module has generated a certain number of bundles, the subsequent module (next module) will get executed once for each bundle generated in the first module.
For example, in our case, the “Search Rows” module (first module of the automation) has generated five bundles:
So, Make.com will now run the “Send an email” module five times, once for each bundle.
This also means, the automation runs five times.
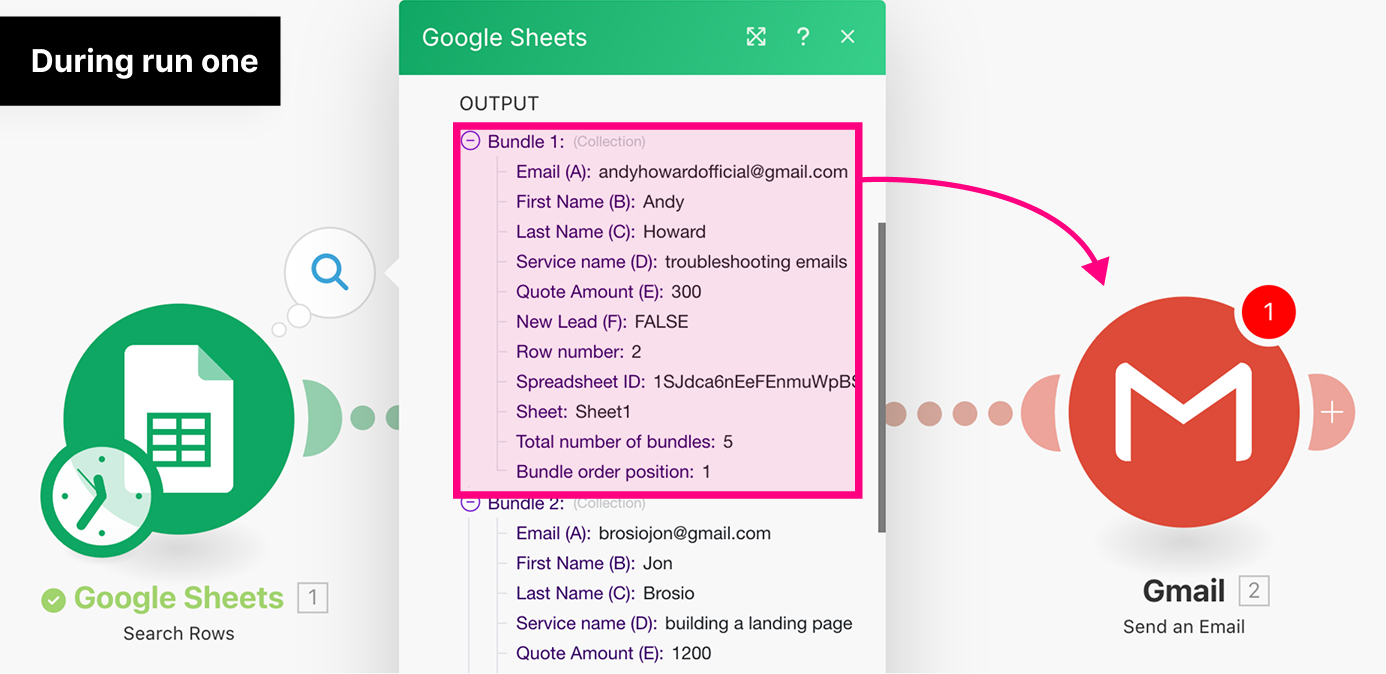
During the first run of the automation:
1) Make.com will automatically provide data of Bundle 1 to the “Send an email” module
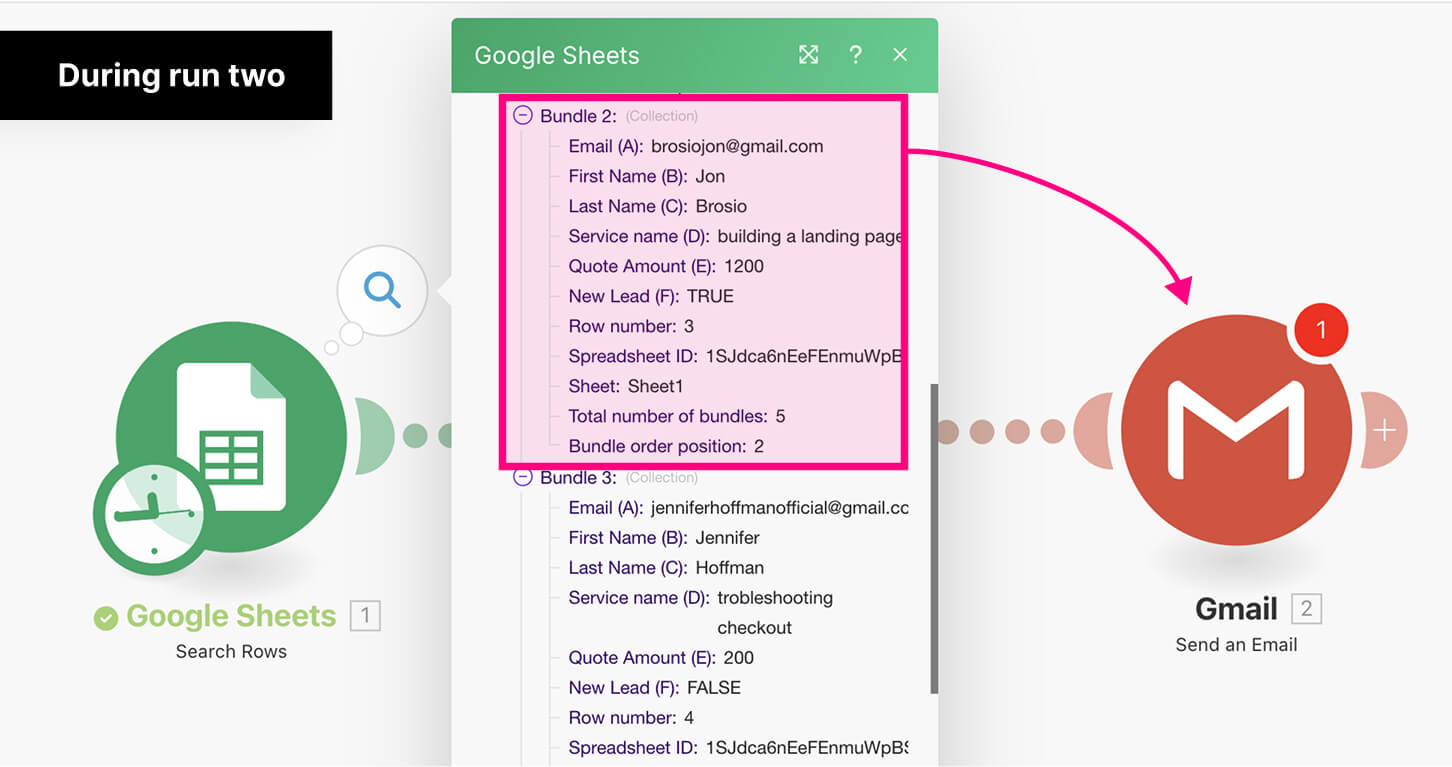
Similarly, during run two, Make.com will automatically provide data of Bundle 2 to the “Send an email” module.
The same process repeats for any number of bundles generated by the first module of the automation.
If the first module generates 40 bundles, then its next module will run 40 times, once for each bundle.
If the first module generates 100 bundles, then its next module will run 100 times, once for each bundle.
You get the idea, right?
Now that you understand it, in the next lesson, we will continue building our automation and understand how we can add and configure the second module to use the bundle data from the first module in a dynamic way.