Different ways of triggering automations

So far, we have been triggering the automations manually by clicking on the “Run once” button.
But depending on the type of automation we are dealing with, manual triggering is not always the answer.
Let me elaborate…
There are three most common ways to trigger task automations
| Trigger Type | When to use it |
|---|---|
| Manual Trigger | When human intervention or approval is needed. |
| Event-Based Trigger | When automation should run in response to specific actions. |
| Scheduled Trigger | When tasks need to run at fixed times. |
1. Manually starting the automation
Simply put, a user manually starts the automation by clicking a button.
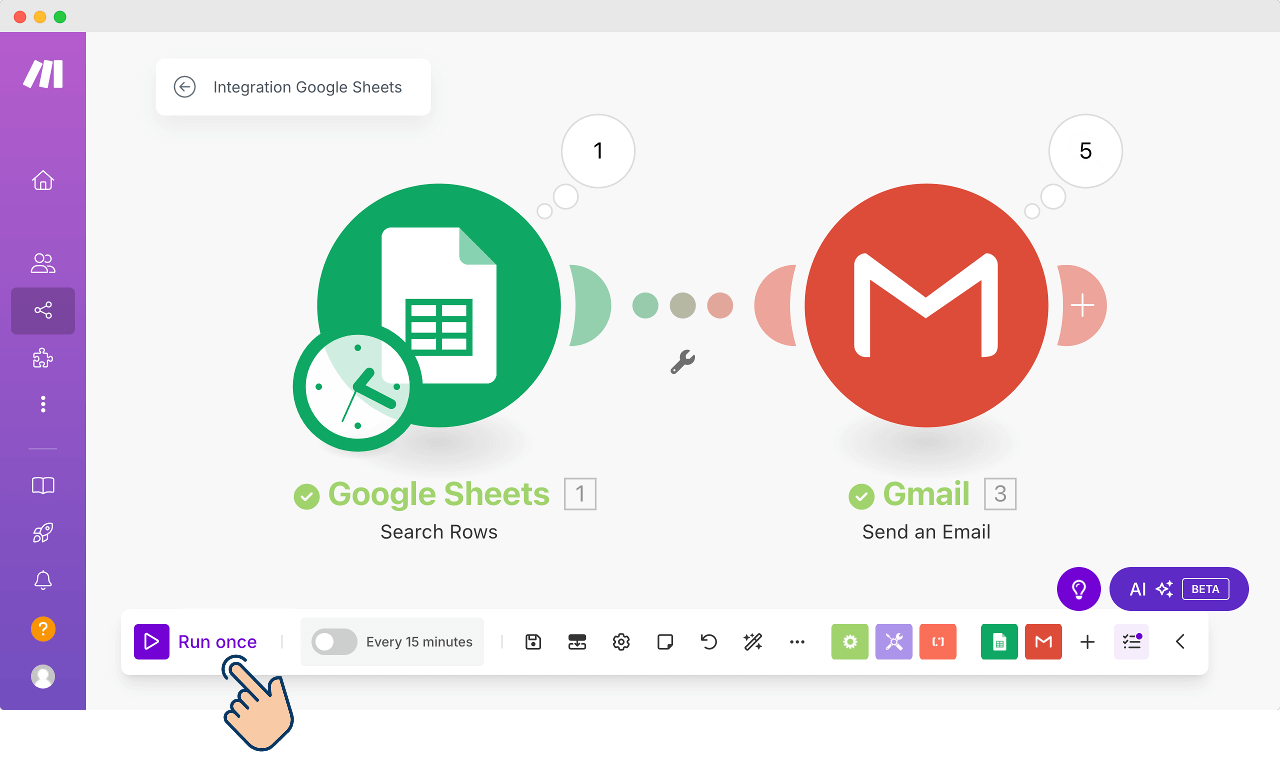
You are already familiar with this.
This approach is helpful:
- When automation needs human approval
- Or, when we don't run the task frequently enough to consider scheduling it automatically.
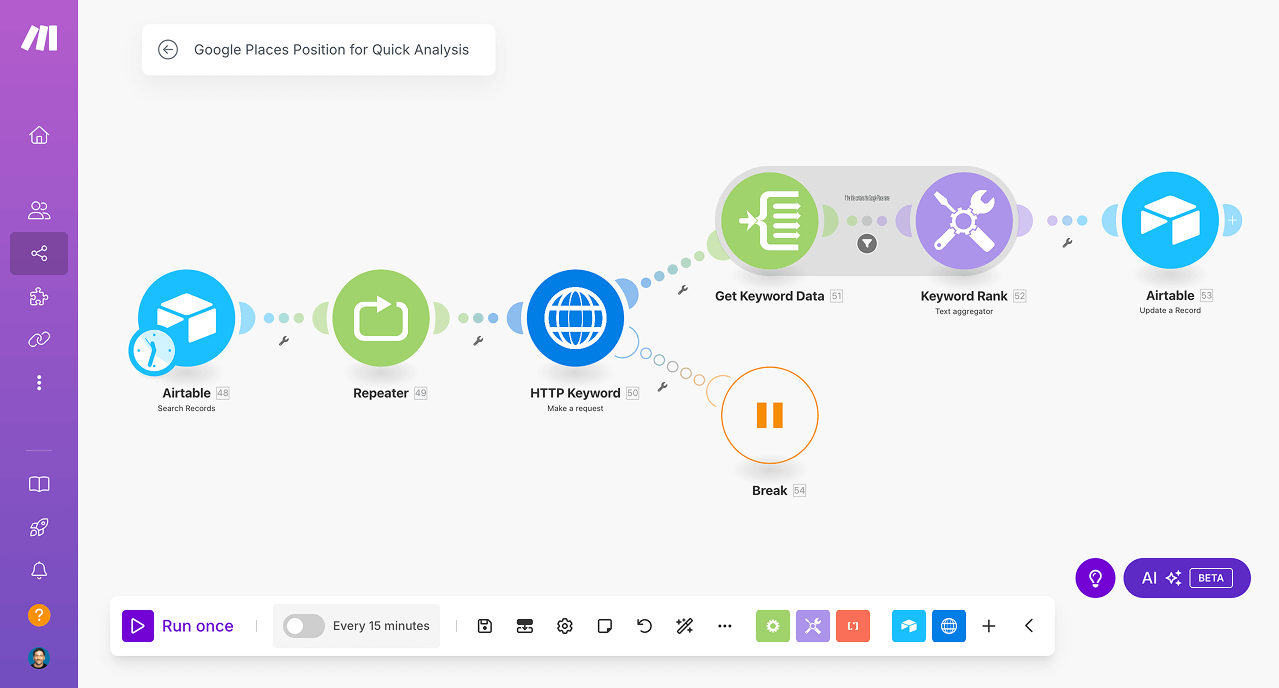
A Real-world example: Checking Google Places Rankings
Alright, that's a mouthful.
But the requirement was simple.
My client runs a digital marketing agency that works exclusively with doctors.
And whenever he talks to a potential client, he wants to check how their business ranks on Google Places for 10 SEO keywords.
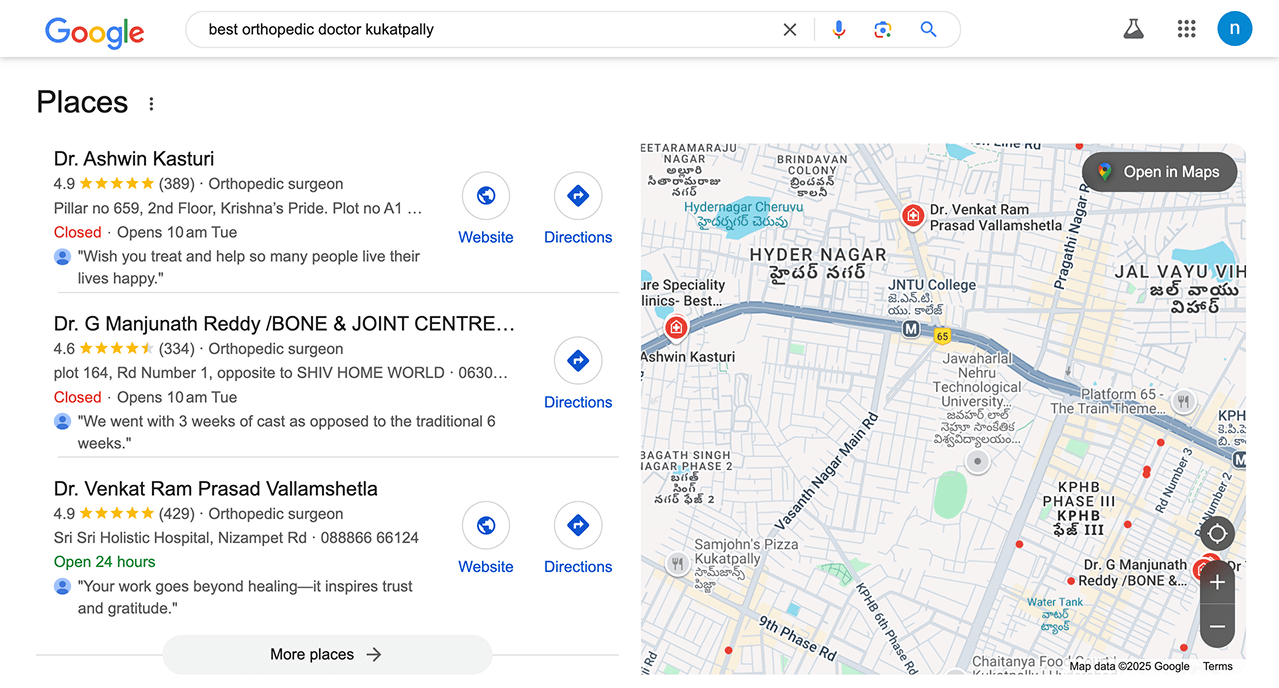
He used to do this manually—one search at a time.
So, we ended up creating a simple automation to save the manual effort.
Now let me ask you a couple of questions.
How often does he need this automation?
“Whenever a new lead comes in. Probably 10 times a month.”
Nice. Correct.
Now, can he predict when the next lead will show up?
“No way to tell that! Who knows when the next lead will show up?”
Correct.
So, the client needs to run this automation only when needed.
Simply put, the client needs to run the automation by manually triggering it.
It doesn't make sense to run this automation at a scheduled date or time.
2. Triggering the automation automatically when an event occurs
Instead of clicking a button, this method executes automation when a predefined event occurs, such as:
- Receiving an email
- A new customer signing up
- Or a payment being made.
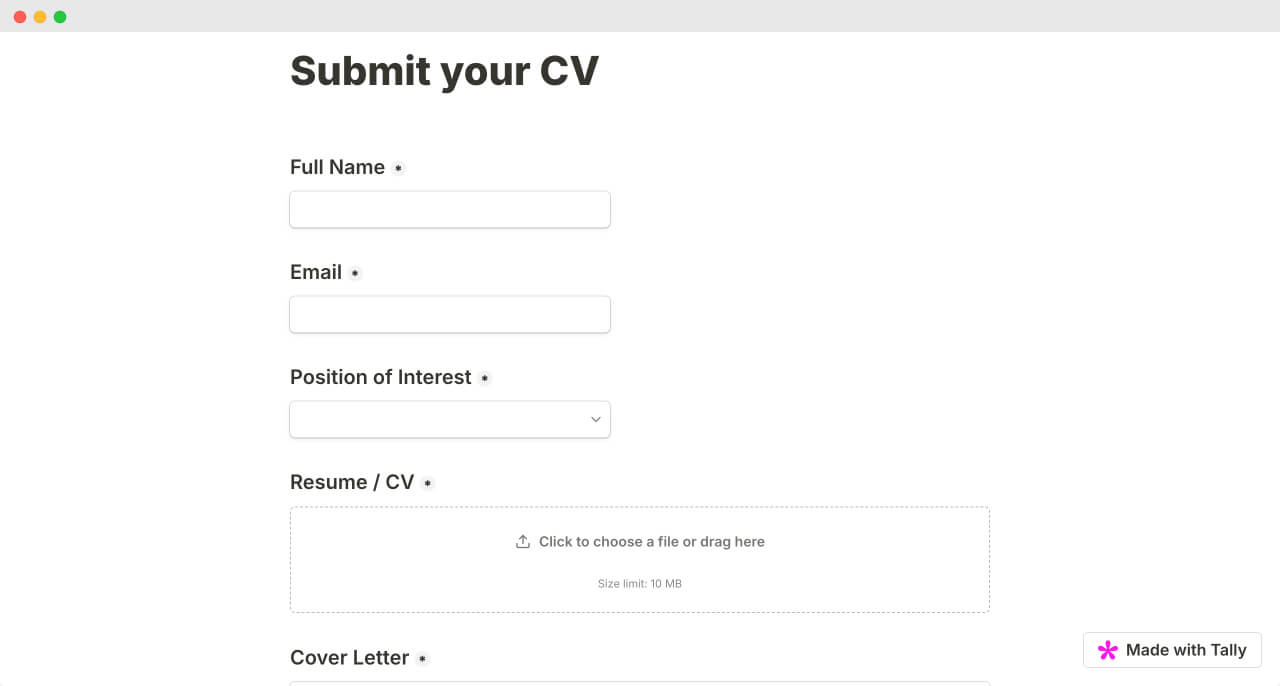
For example, I built an automation that screens job applicants' resumes.
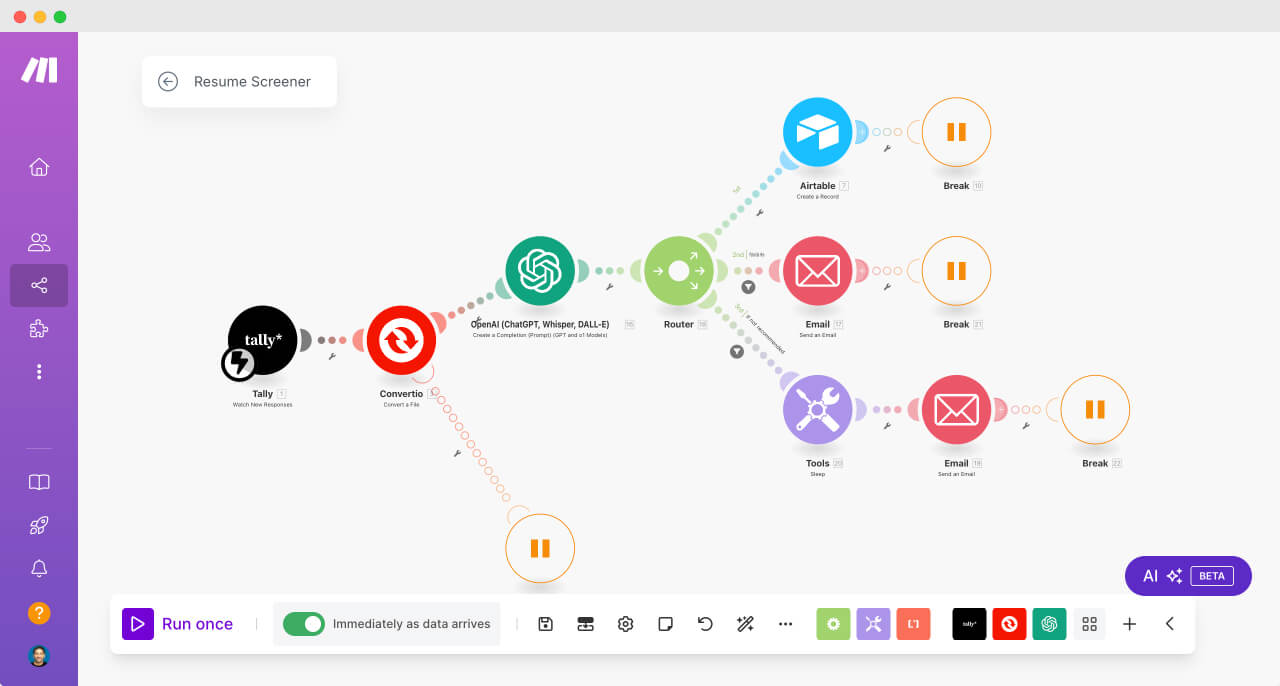
But it only needs to run when someone submits a CV.
So, instead of running all the time, the automation waits for the event (a CV submission) and runs only when needed.
A few more real-world examples
- Social Media Monitoring: If someone mentions a brand on X (formerly known as Twitter), an automation collects the mention and notifies the marketing team.
- E-commerce Order Processing: When a customer places an order on an online store, automation sends an order confirmation email, updates inventory, and notifies the warehouse.
- Customer Support: When a customer submits a ticket, automation assigns it to an agent and sends an acknowledgment email.
We don't need to press buttons, these automations just happen when the time comes!
But how can an automation run on its own when something specific happens?
Like a chain reaction?
This is possible with something called as a Webhook.
A quick introduction to Webhooks and how they are compared with traditional API calls
You already know that traditional APIs allow different software applications to communicate and exchange data.
They act like a messenger service between different applications, allowing them to request and retrieve specific information from each other.
For example, when we built the Quote Generation automation, we used Google Sheets API to pull data from a spreadsheet.
This tells us that traditional APIs work through a request-response model.
In other words, an application sends a request for specific data, and the server responds with that information.
This is similar to making a phone call to ask a friend for a piece of information. You directly request what you need, and they provide it.
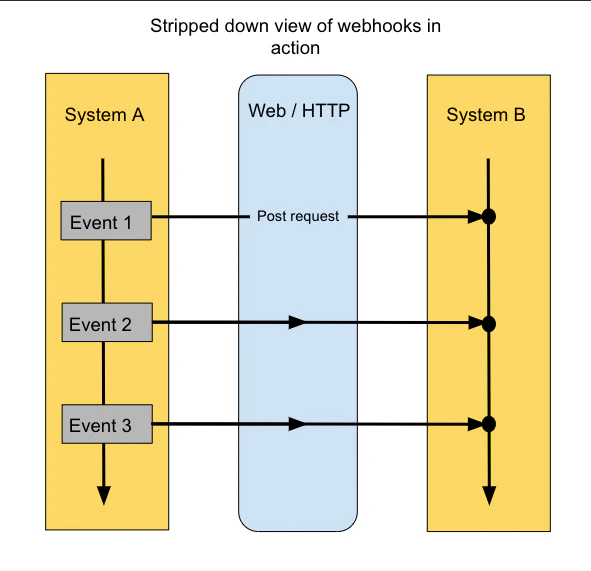
But on the other hard, webhooks are like instant notifications between apps.
While traditional APIs require an application to actively request data, webhooks flip this model by automatically sending data whenever something happens.
In other words, webhooks send data automatically when a specific event occurs.
To summarize:
- Traditional APIs: An app has to keep asking, “Is there new data?” (like constantly refreshing your email). We call this a polling model.
- Webhooks: The app gets notified instantly when something happens (like receiving a text message). We call this a push model.
For example, imagine tracking a shipping package:
- With a traditional API, you'd repeatedly check the shipping status by making requests.
- With a webhook, the shipping company automatically sends you an update the moment the package's status changes.
Another example: Imagine tracking job application submissions:
- With a traditional API, you'd repeatedly check a spreadsheet for a new submission by making requests to Google Sheets API
- With a webhook, a form submission tool like Tally automatically sends you an update the moment someone submits their CV.
You get the idea, right?
This approach makes webhooks extremely useful for real-time applications like chat systems, payment processors, or monitoring services where immediate notification is important.
That's all you need to know for now about webhooks. We will soon work with webhooks when building the resume screener automation.
Anyway, back to the task at hand.
Let's quickly discuss the one last common way of triggering automation.
3. Scheduling the Automation to Automatically Run at a Particular Time or Day
Sometimes, you don’t need an event to trigger automation.
You just need it to run on a set schedule.
This can be:
- Hourly
- Daily
- Weekly
- Monthly
- Or even on a custom schedule.
This method is perfect for routine tasks that need to happen automatically without manual effort.
For example, One of my clients needs performance insights for all his clients before the 5th of every month.
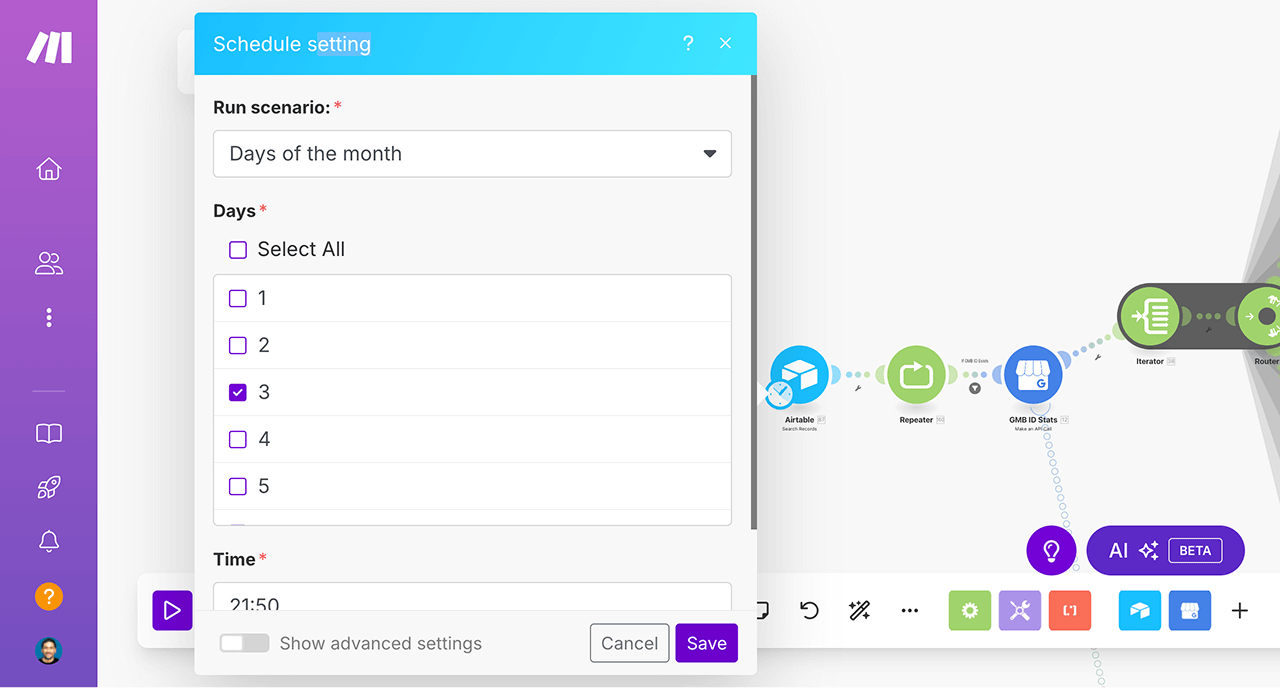
So, instead of manually running the automation, I scheduled it to run automatically on the 3rd of each month.
My client needs this data before the 5th day of each month.
So, I scheduled to run this automation automatically on the 3rd day of each month.
Sounds nice, right?
Here are some more real-world examples
- Daily Report Generation: A company automatically generates and emails a sales performance report every morning at 8 AM.
- Weekly Backup: A WordPress website schedules automatic backups every Sunday at midnight.
- Automated Social Media Posts: A marketing team schedules social media posts to be published at a specific time each day.
- Database Clean-up: A system runs a script every night to delete outdated records and optimize performance.
You get the idea, right?
“Yep! Set it and forget it :D”
Haha, yeah!
The conclusion: Choosing the right trigger for your automation
The best trigger type depends on the nature of your task automation.
Once again, here is a quick guide for choosing the right one:
| Trigger Type | When to use it |
|---|---|
| Manual Trigger | When human intervention or approval is needed. |
| Event-Based Trigger | When automation should run in response to specific actions. |
| Scheduled Trigger | When tasks need to run at fixed times. |
You have now got a solid understanding of the different trigger types.
Great!
But before we start using them, you also need to understand different modules in Make.com that help you activate these automation triggers.
And we will do that in the next lesson.