Adding a webhook trigger to our automation

Webhooks Recap
Unlike the automations we have built so far, the resume screener automation only needs to run when someone submits a CV.
In other words, instead of running all the time or manually running at the click of a button, the automation should wait for the event (a CV submission) and runs only when needed.
But how can an automation run on its own when something specific happens?
This is only possible if we utilize Webhooks.

You already know that traditional APIs allow different software applications to communicate and exchange data.
They work through a request-response model.
For example, when we built the Quote Generation automation, we used Google Sheets API to request data from a spreadsheet and got the response we needed.
This is similar to making a phone call to ask a friend for a piece of information. You directly request what you need, and they provide it.
But on the other hard, webhooks are like instant notifications between apps.
While traditional APIs require an application to actively request data, webhooks flip this model by automatically sending data whenever something happens.
In other words, webhooks send data automatically when a specific event occurs.
Isn't this exactly what we want for our resume screener automation?
In other words, instead of running all the time or manually running at the click of a button, with the help of a webhook, the automation will wait for the event (a CV submission) and runs only when needed.
Come on, let's see this in action.
Create a new scenario inside Make.com
And add the “Watch New Responses” module of the Tally App as the trigger module to wait to hear a resume form submission from the Tally service.
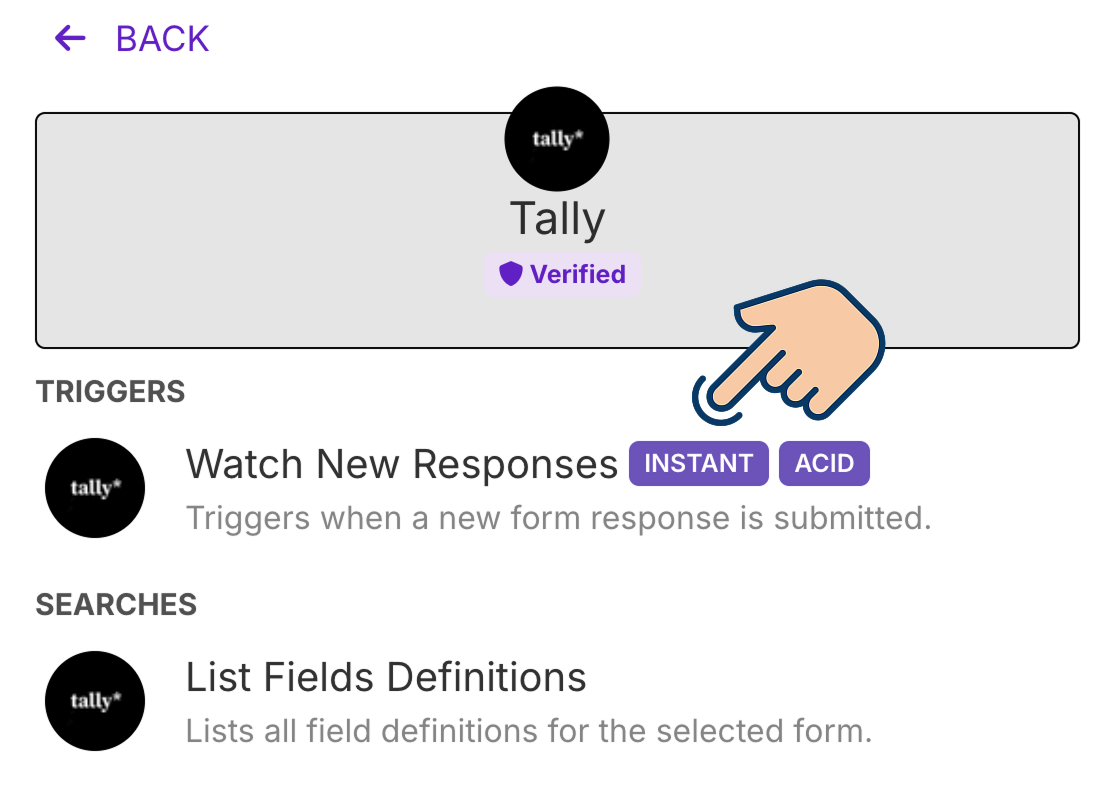
If you notice, the “Watch New Responses” module is labelled as Instant. That means, it is a webhook-based module.
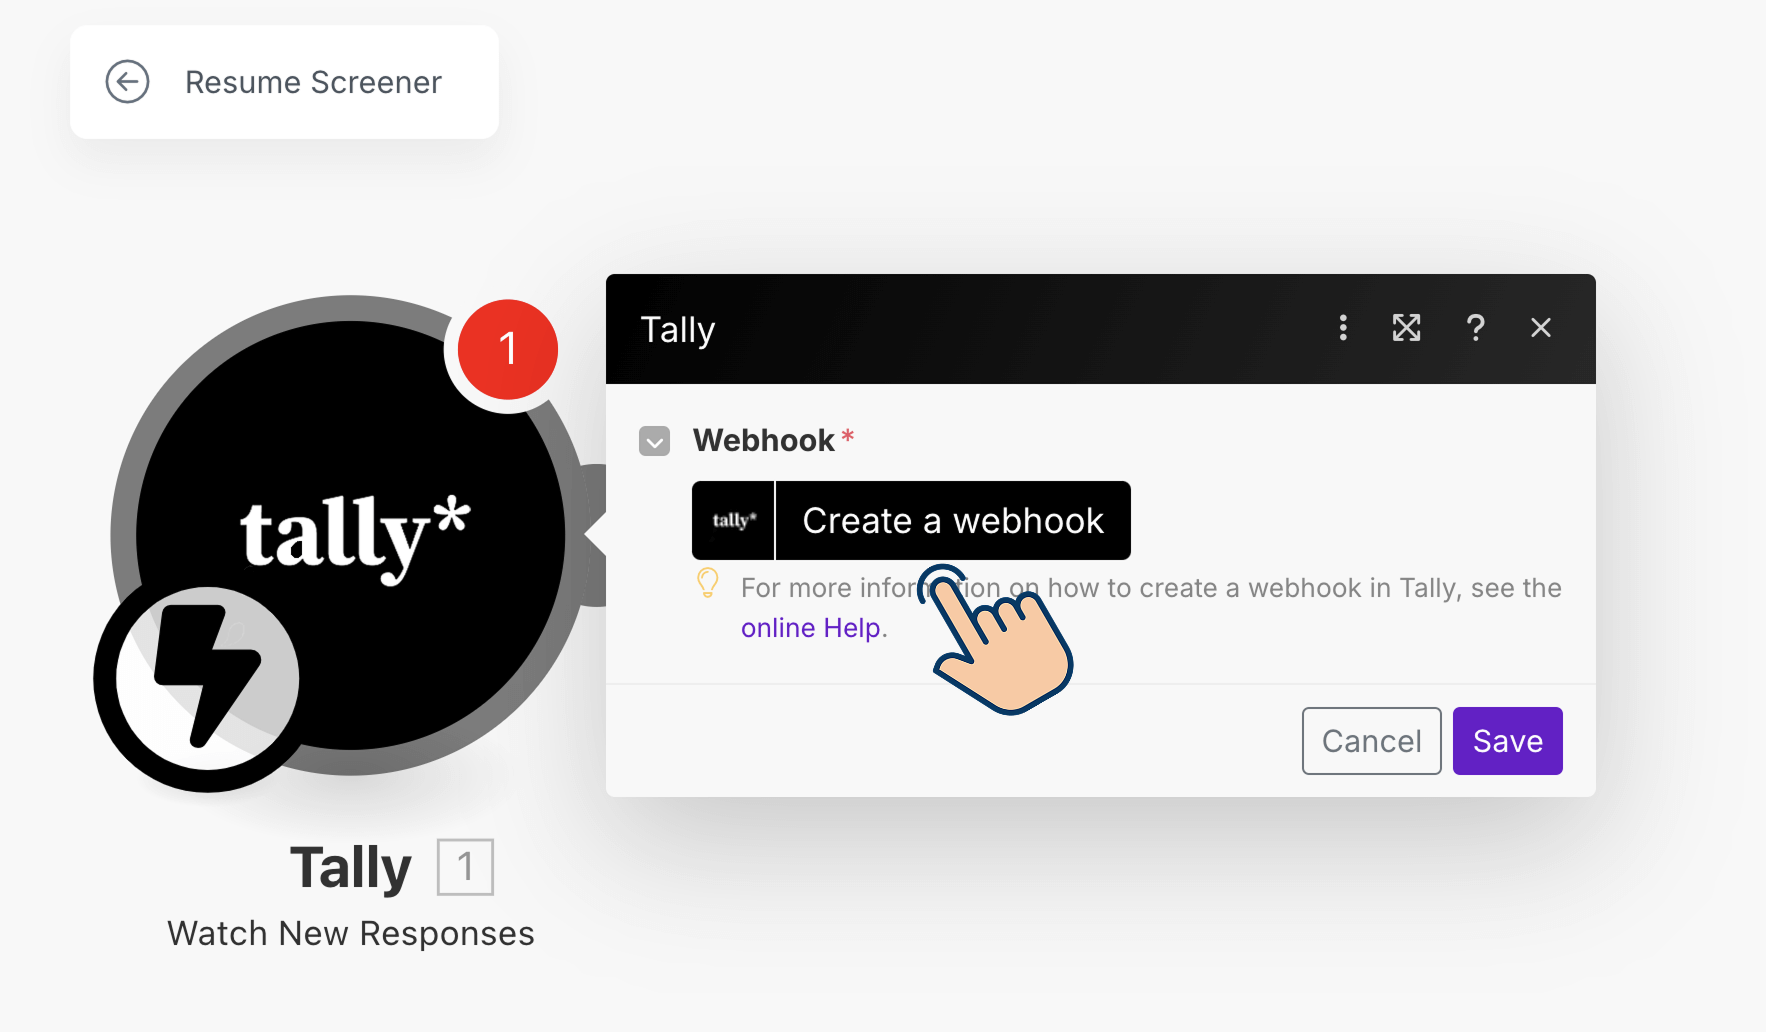
Next, click on the "Create a webhook" button.
This will bring up another popup that will help you create a connection between Make.com and your Tally account:
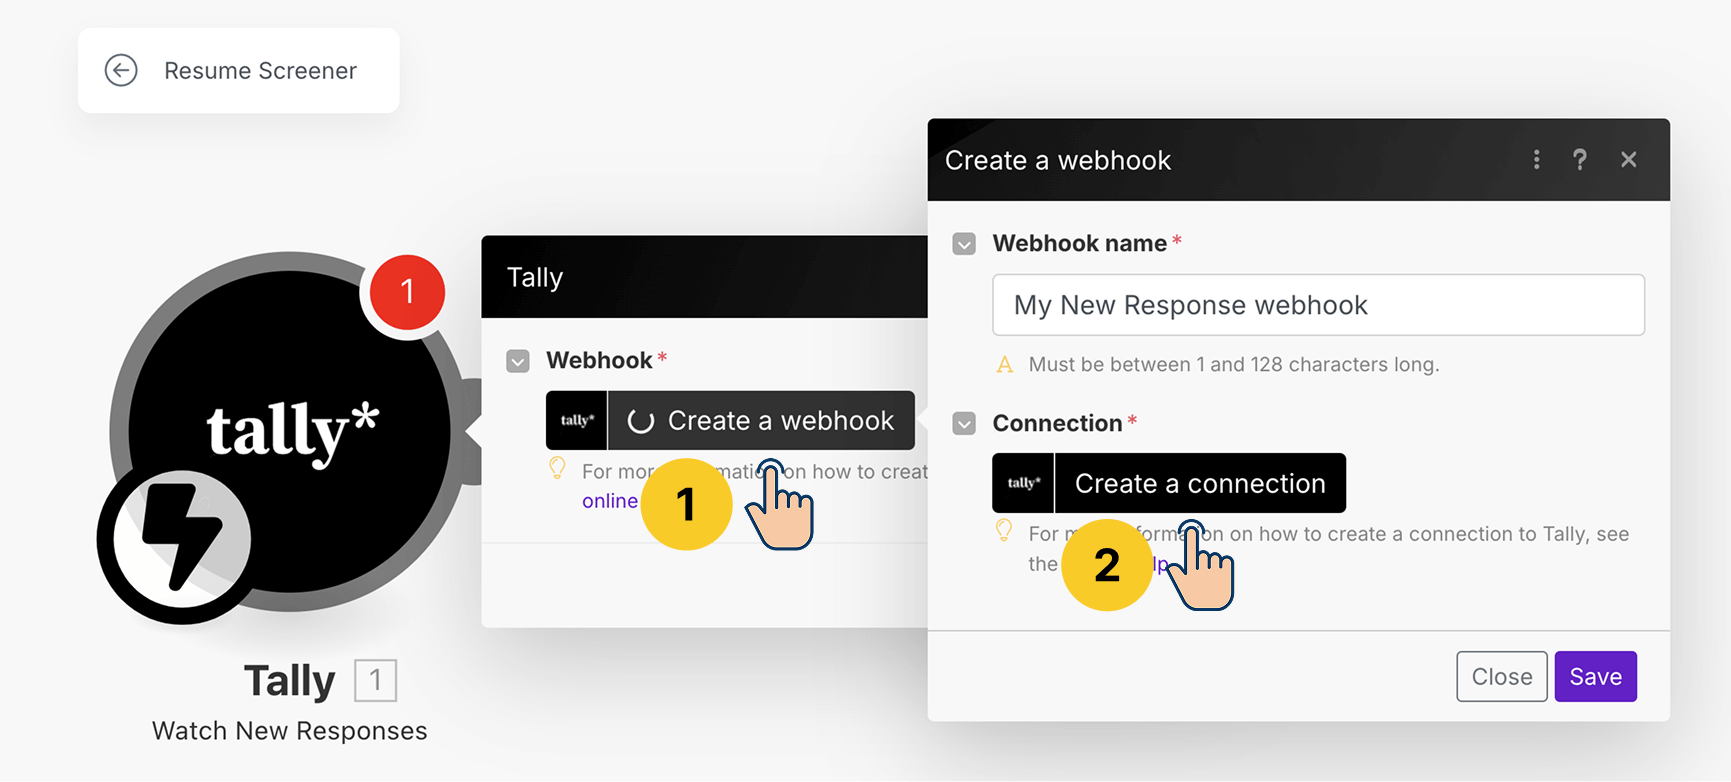
Click on the "Create a connection" button.
We are creating this connection so that Make.com can manage our Tally forms on our behalf and can listen to form submission events.
So, when the Tally's OAuth popup comes up, click on the "Accept" button.

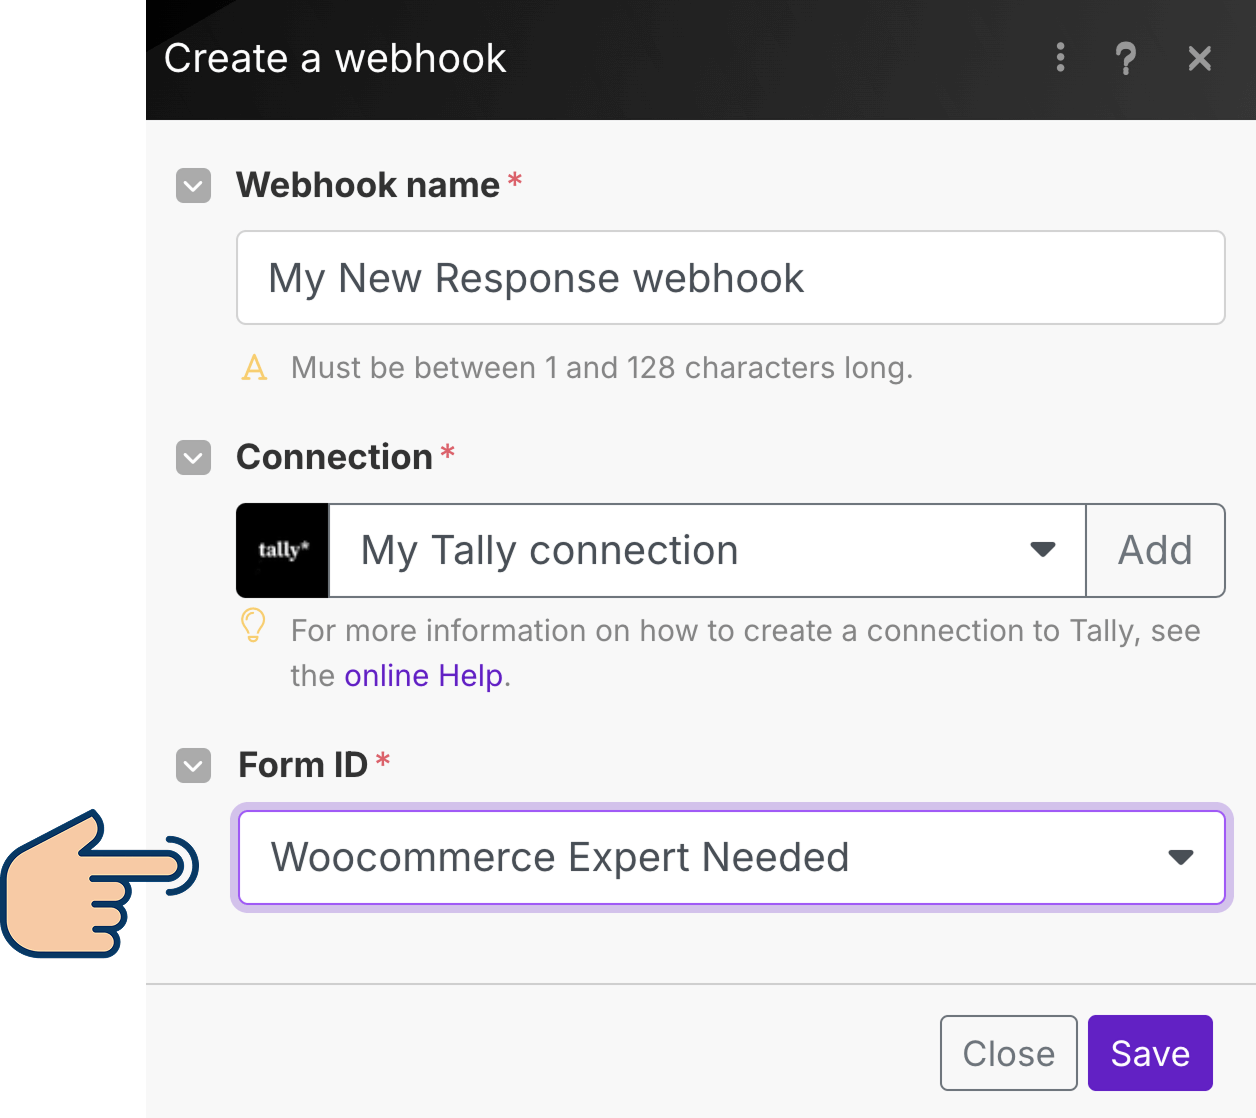
Next, for the Form ID option, select the form we have created on Tally:
After that, click on the save button to finish the process of creating the connection.
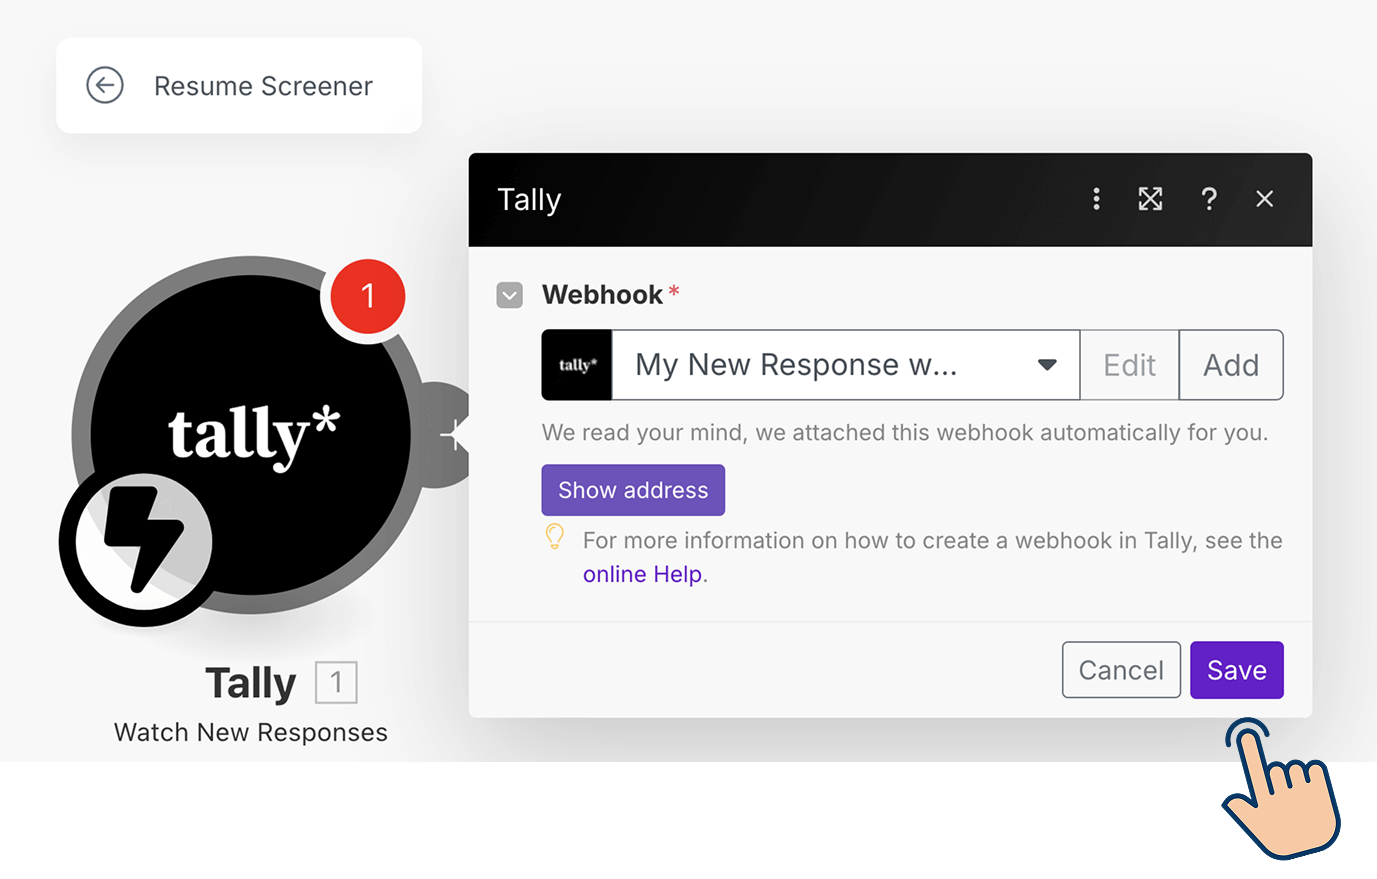
And save the webhook, too.
We have now created a webhook and established an OAuth connection with Tally to use its API.
Next, save the scenario.
Finally, activate the automation so that:
- Tally's webhook can listen to the form submission event
- And immediately run as the form data arrives
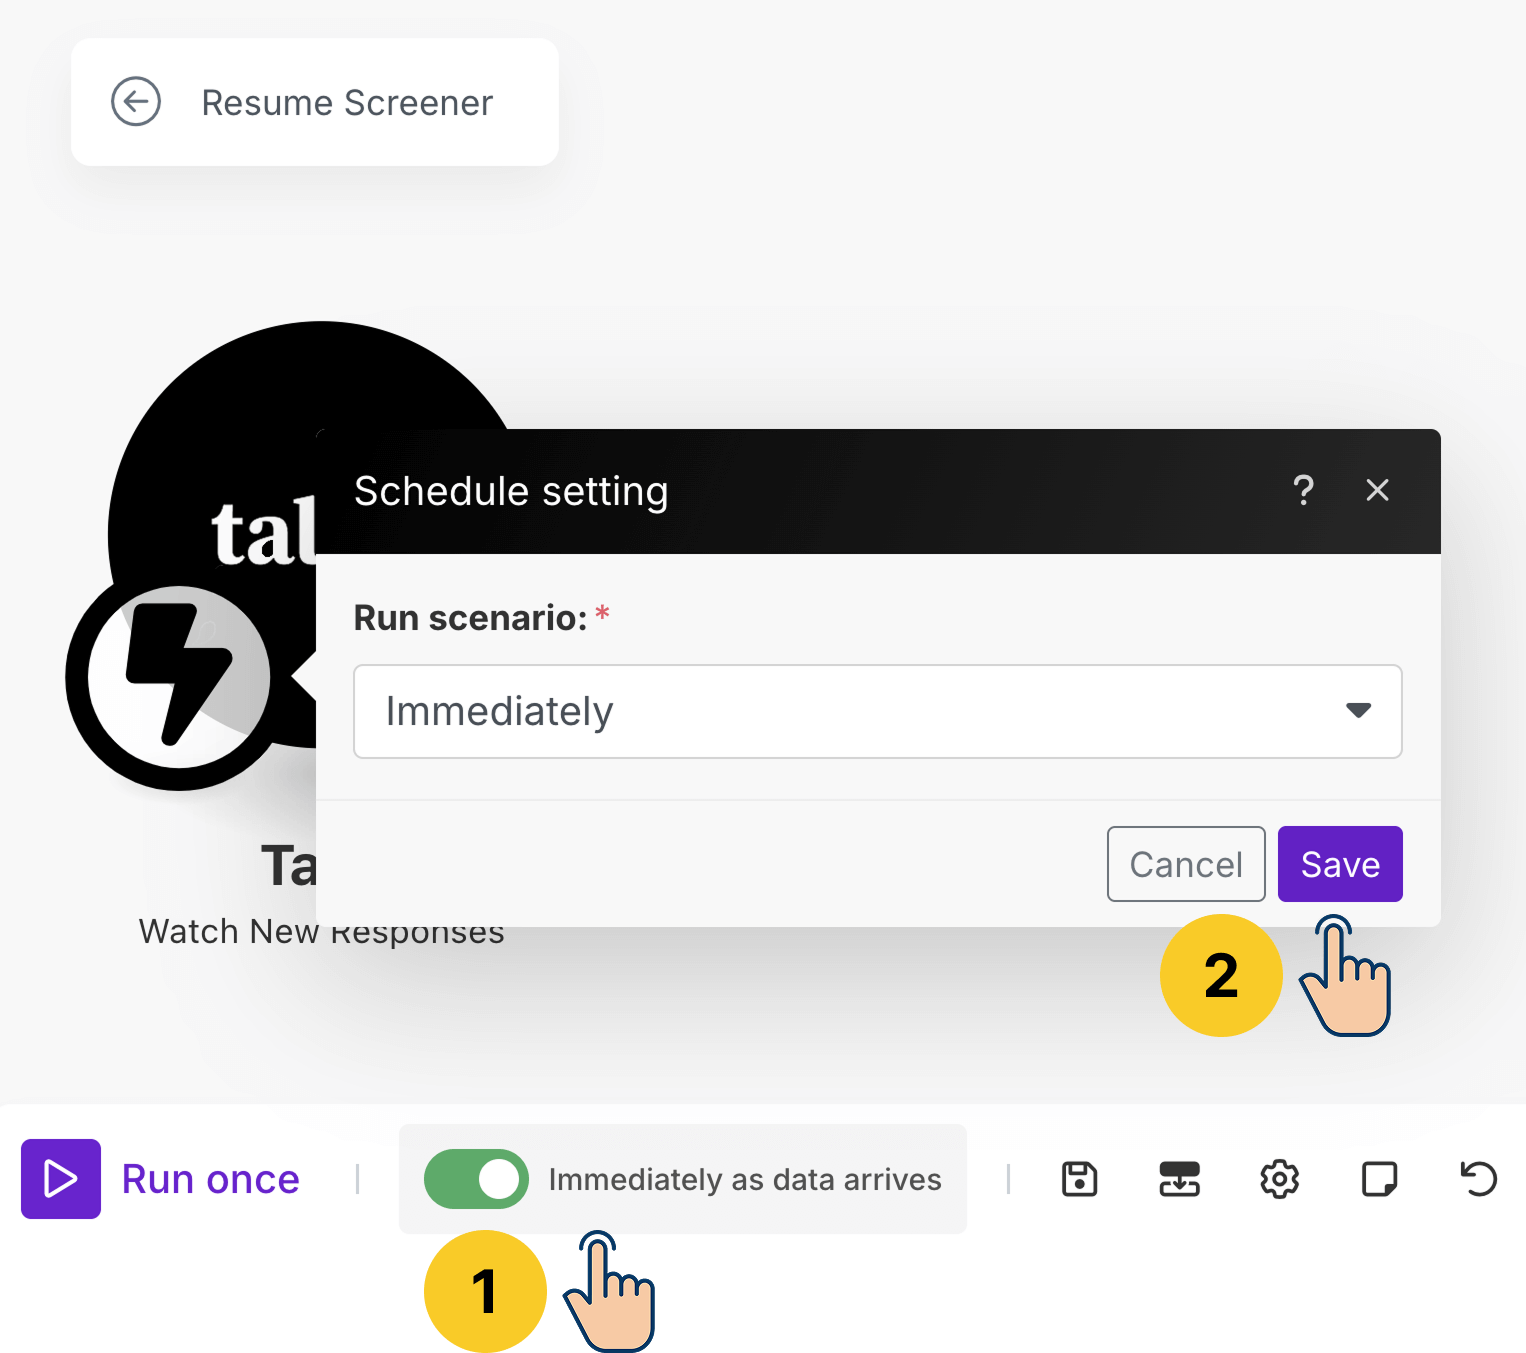
This is make.com way of saying: “Hey! Your automation will wait for a submission at 'Woocommerce Expert Needed' form. And as soon as that happens, the automation gets triggered immediately without your intervention.”
Anyway, it is time to test out our webhook.
And we will do that in the next lesson.